Energy Breakthrough
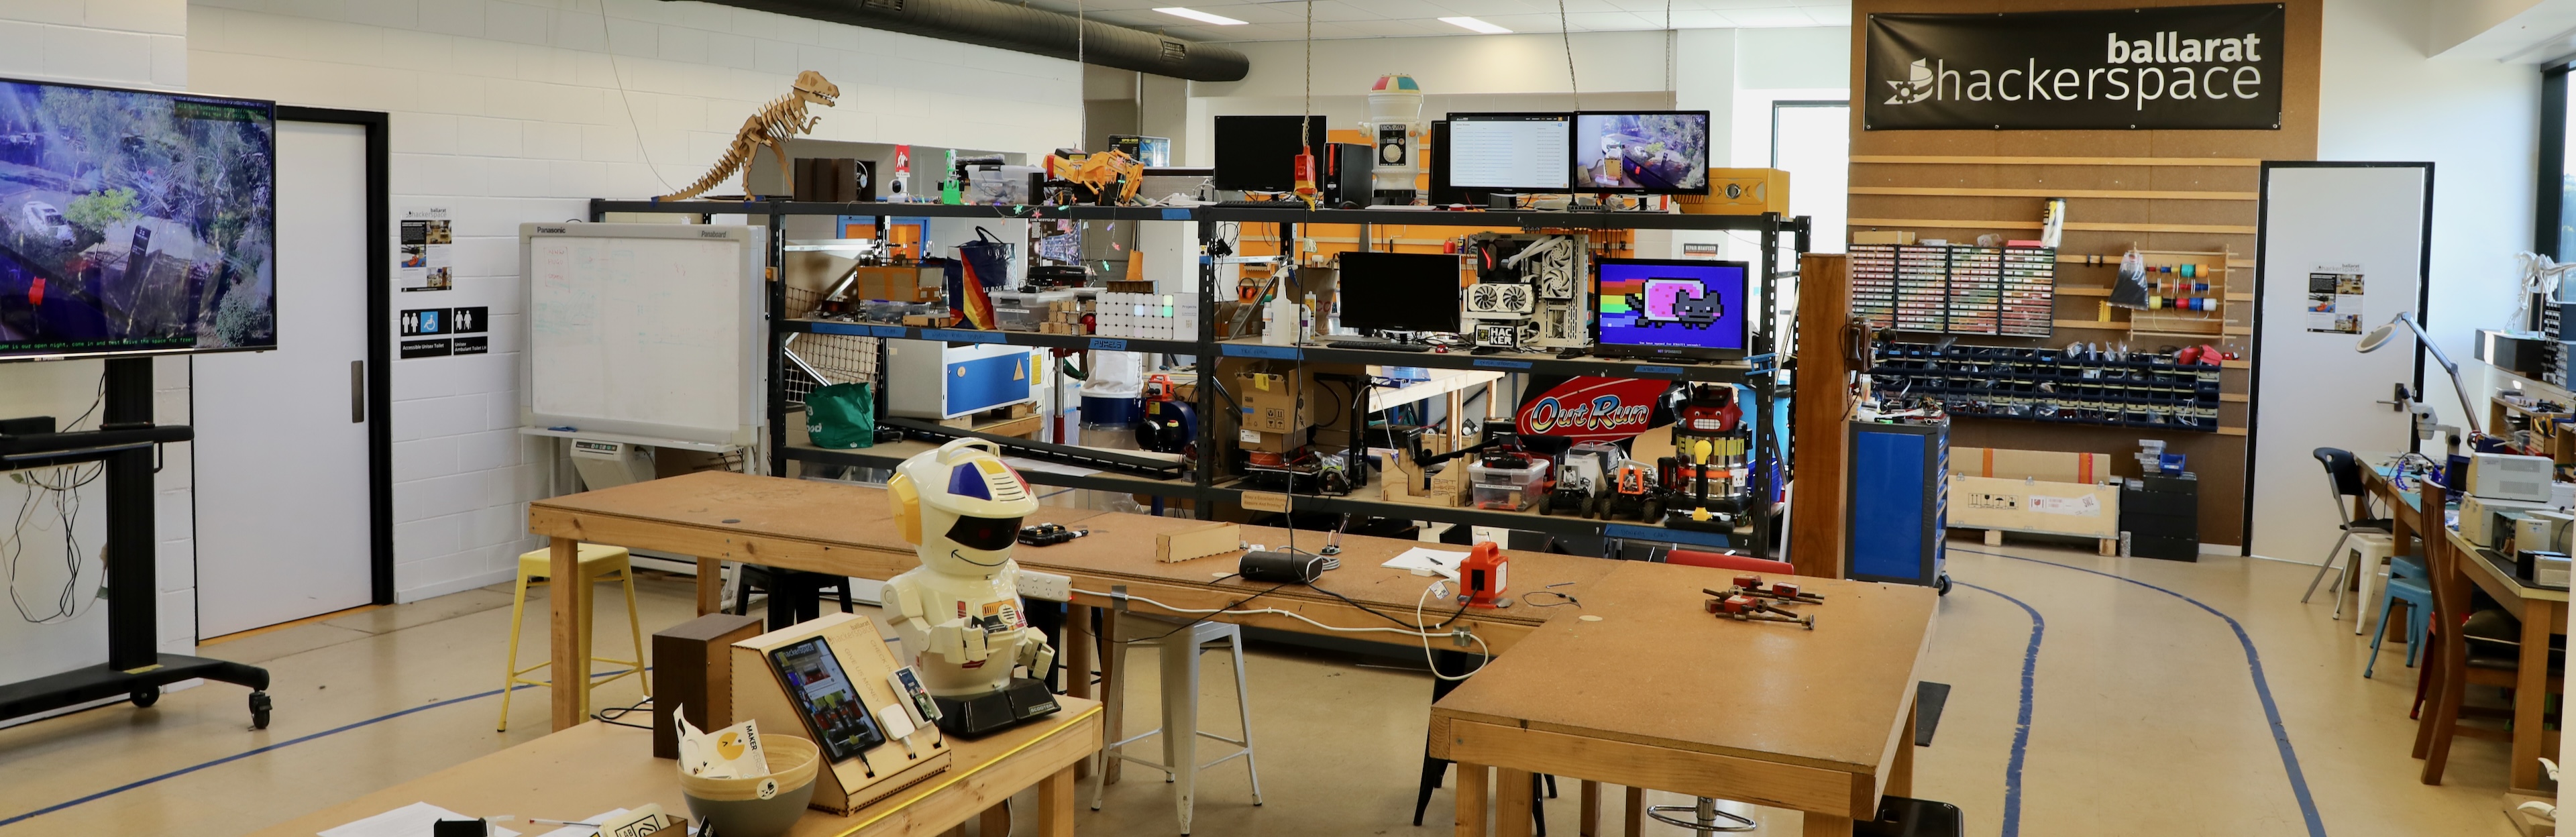
Everything we created for the Energy Breakthrough series has been done by volunteers in their own time, and out of their own pocket. All components (hardware and software) that have been designed/created are open-source and available for any other teams/individuals to use however they wish. If you're in Energy Breakthrough and are interested in any of this stuff, please feel free to contact the Hackerspace via email (committee@ballarathackerspace.org.au) or drop in during any of the /calendar to have a chat.
Files and technical information on all of the below is available via our Github repository. This repo does lag behind real life as most of these projects are figured out as we go, and we update documents/files/etc later when we're ready to share the changes.
Our ultimate goal is to have all of our modifications documented and shared in that repository for other teams to learn from or use.
Working with Pleasant Street Primary School
Members of the hackerspace initially volunteered to support a local primary school competing in the Energy Breakthrough human-powered vehicle challenge after the school experienced ongoing problems with the standard off-the-shelf kit, which ranged from an overheating cabin and poor repair access to a fragmented lighting setup made from individual bicycle components that were poorly suited to the operating environment (wiring vibrating to bits) and required multiple separate batteries to be charged every session.
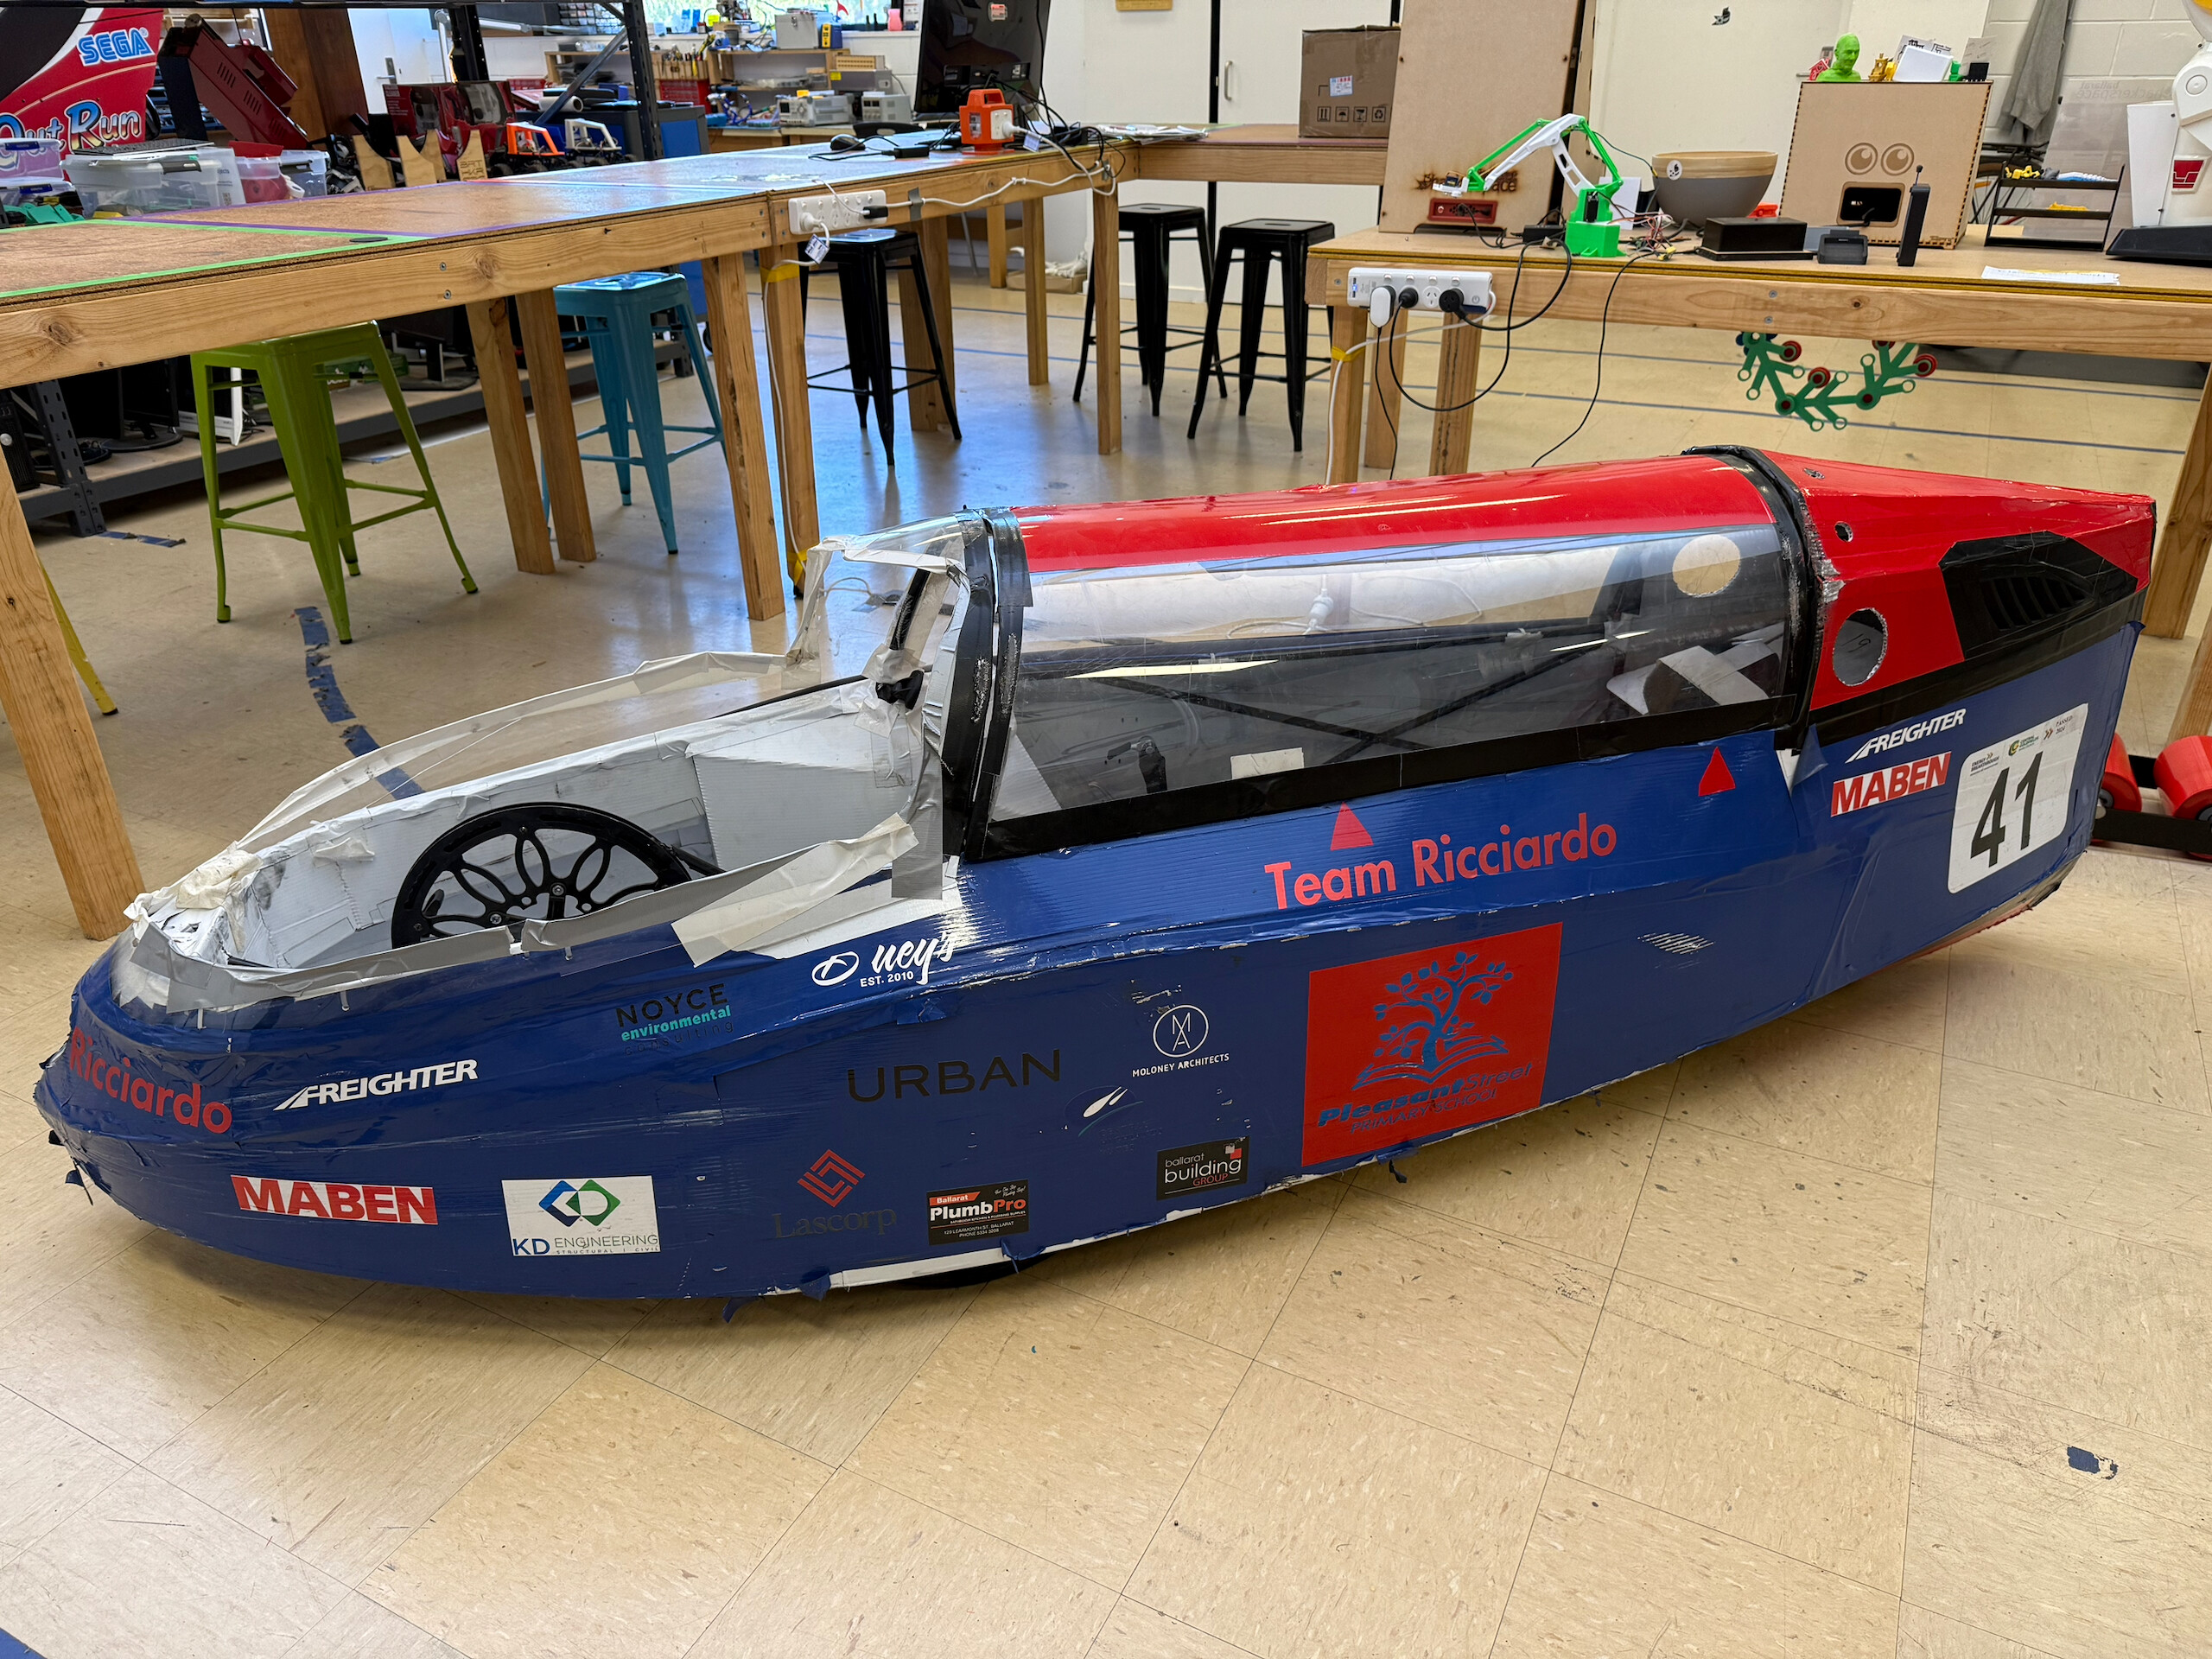
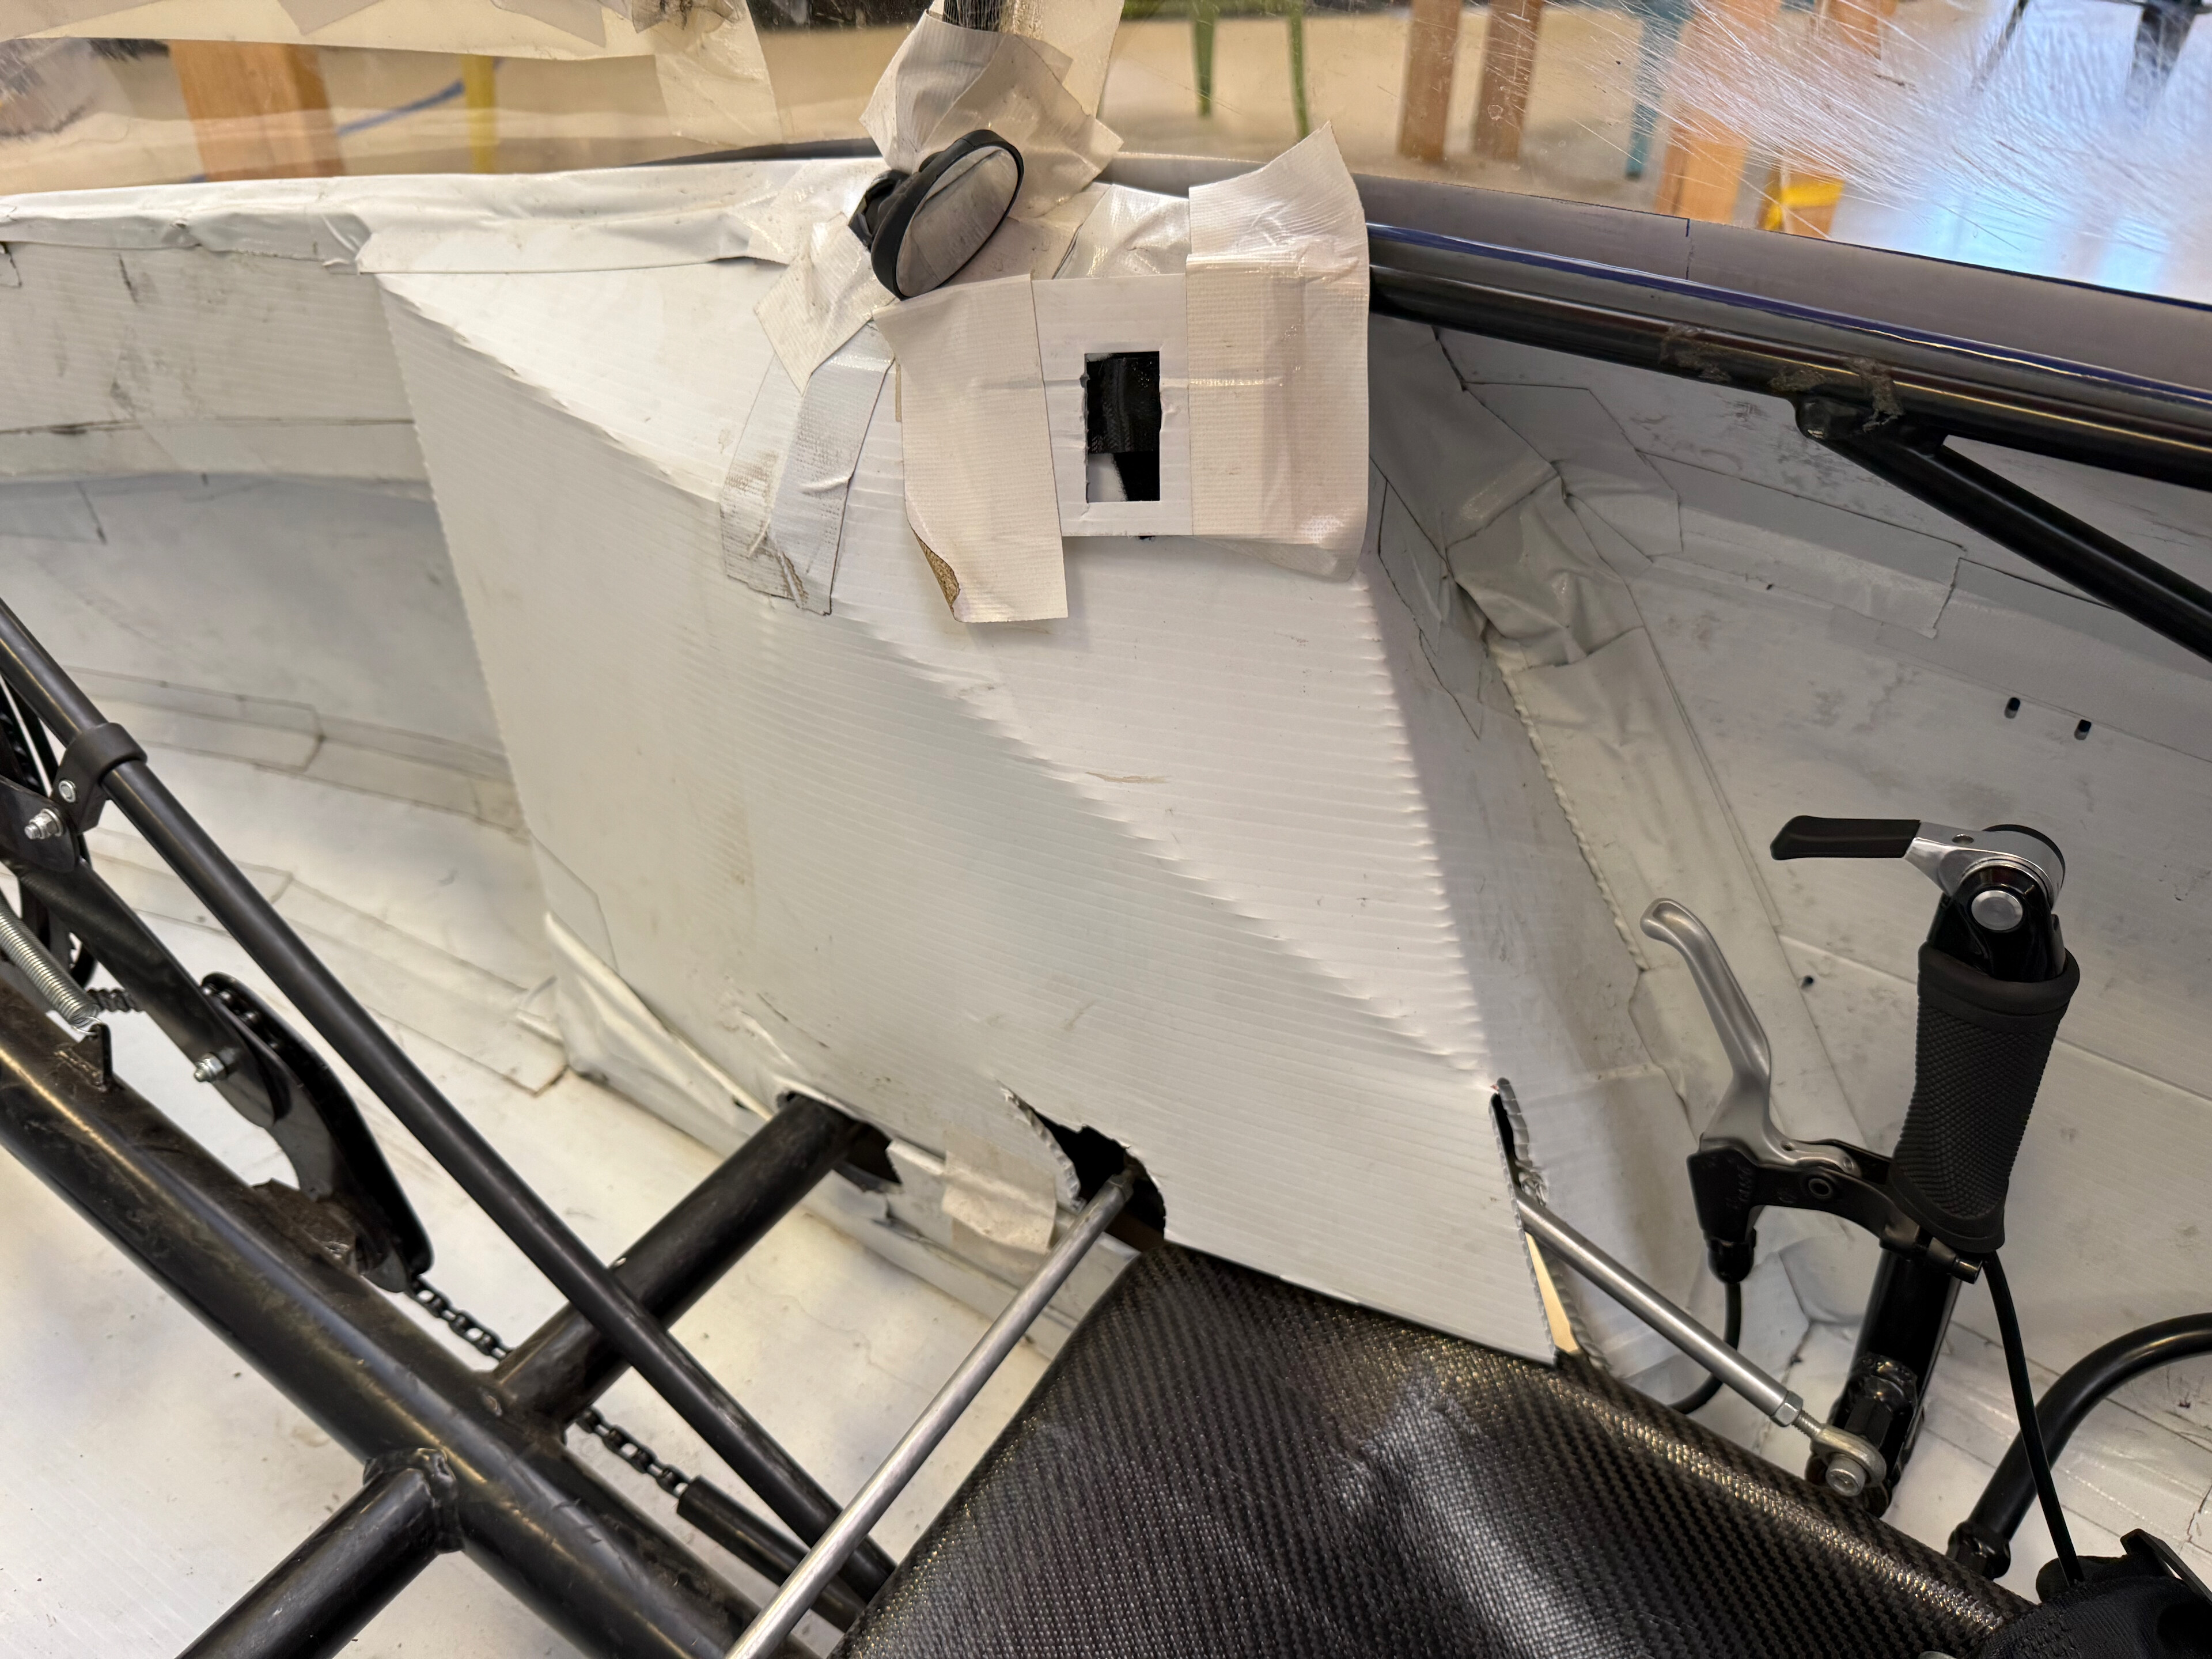
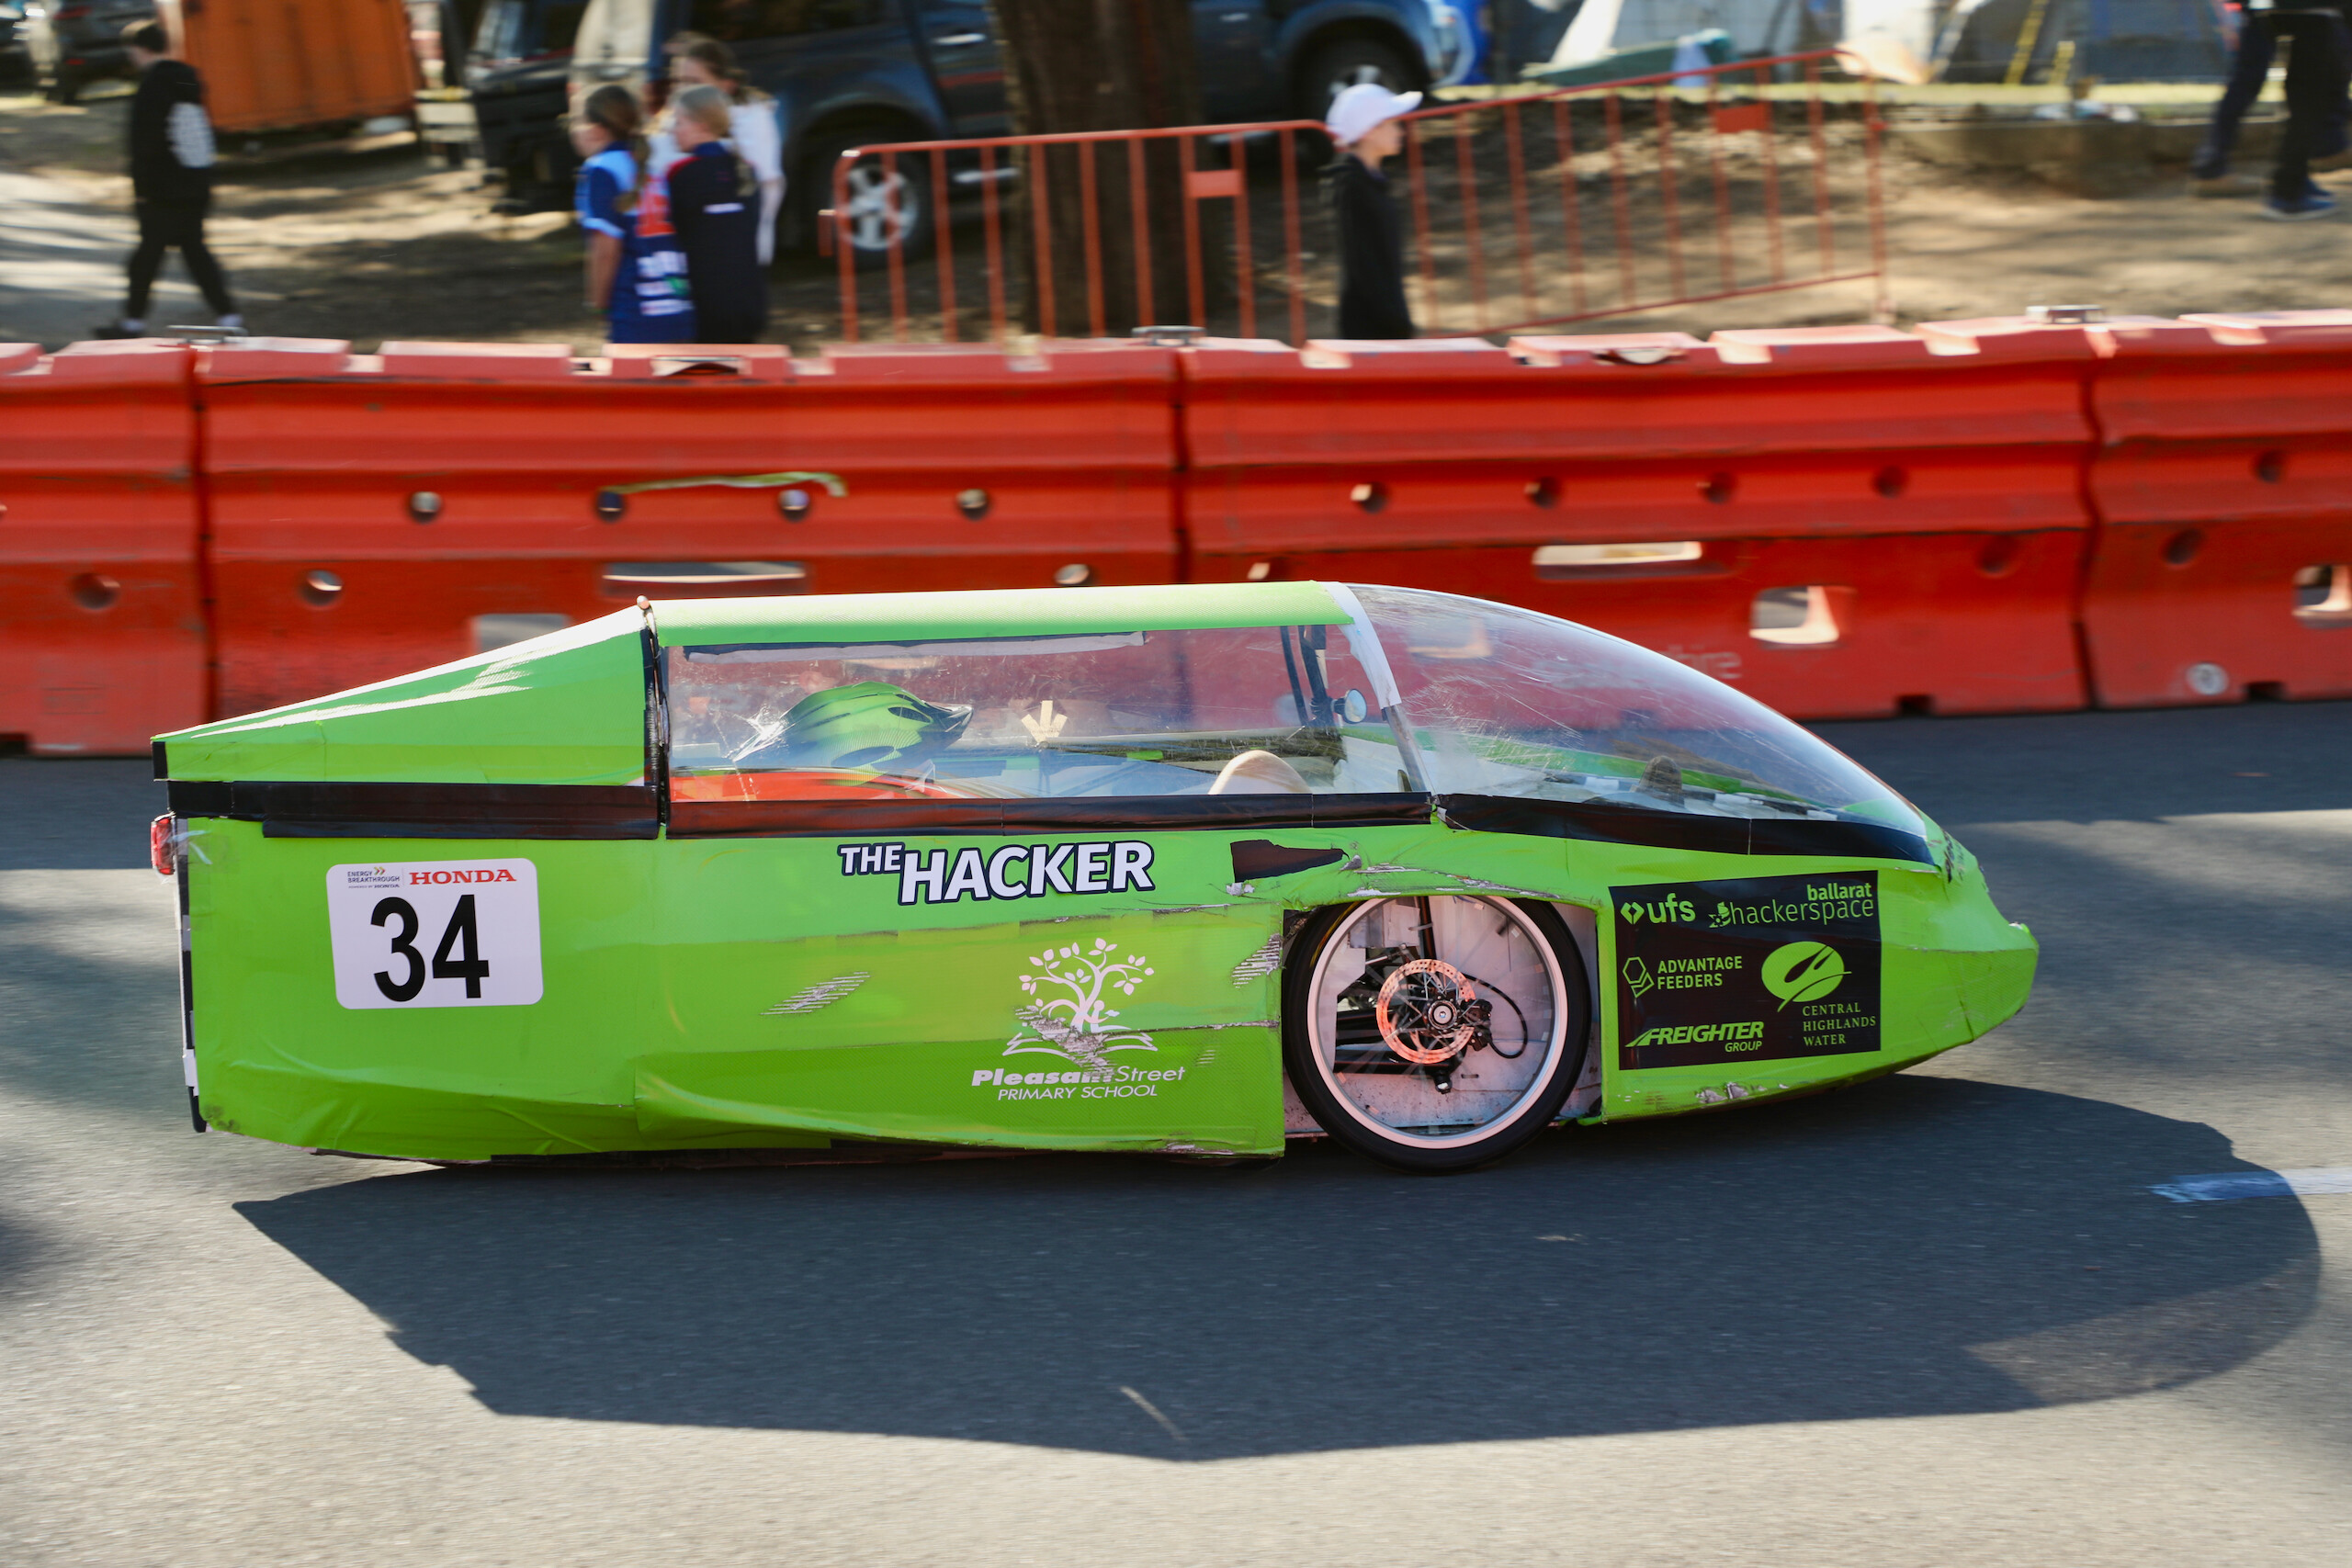
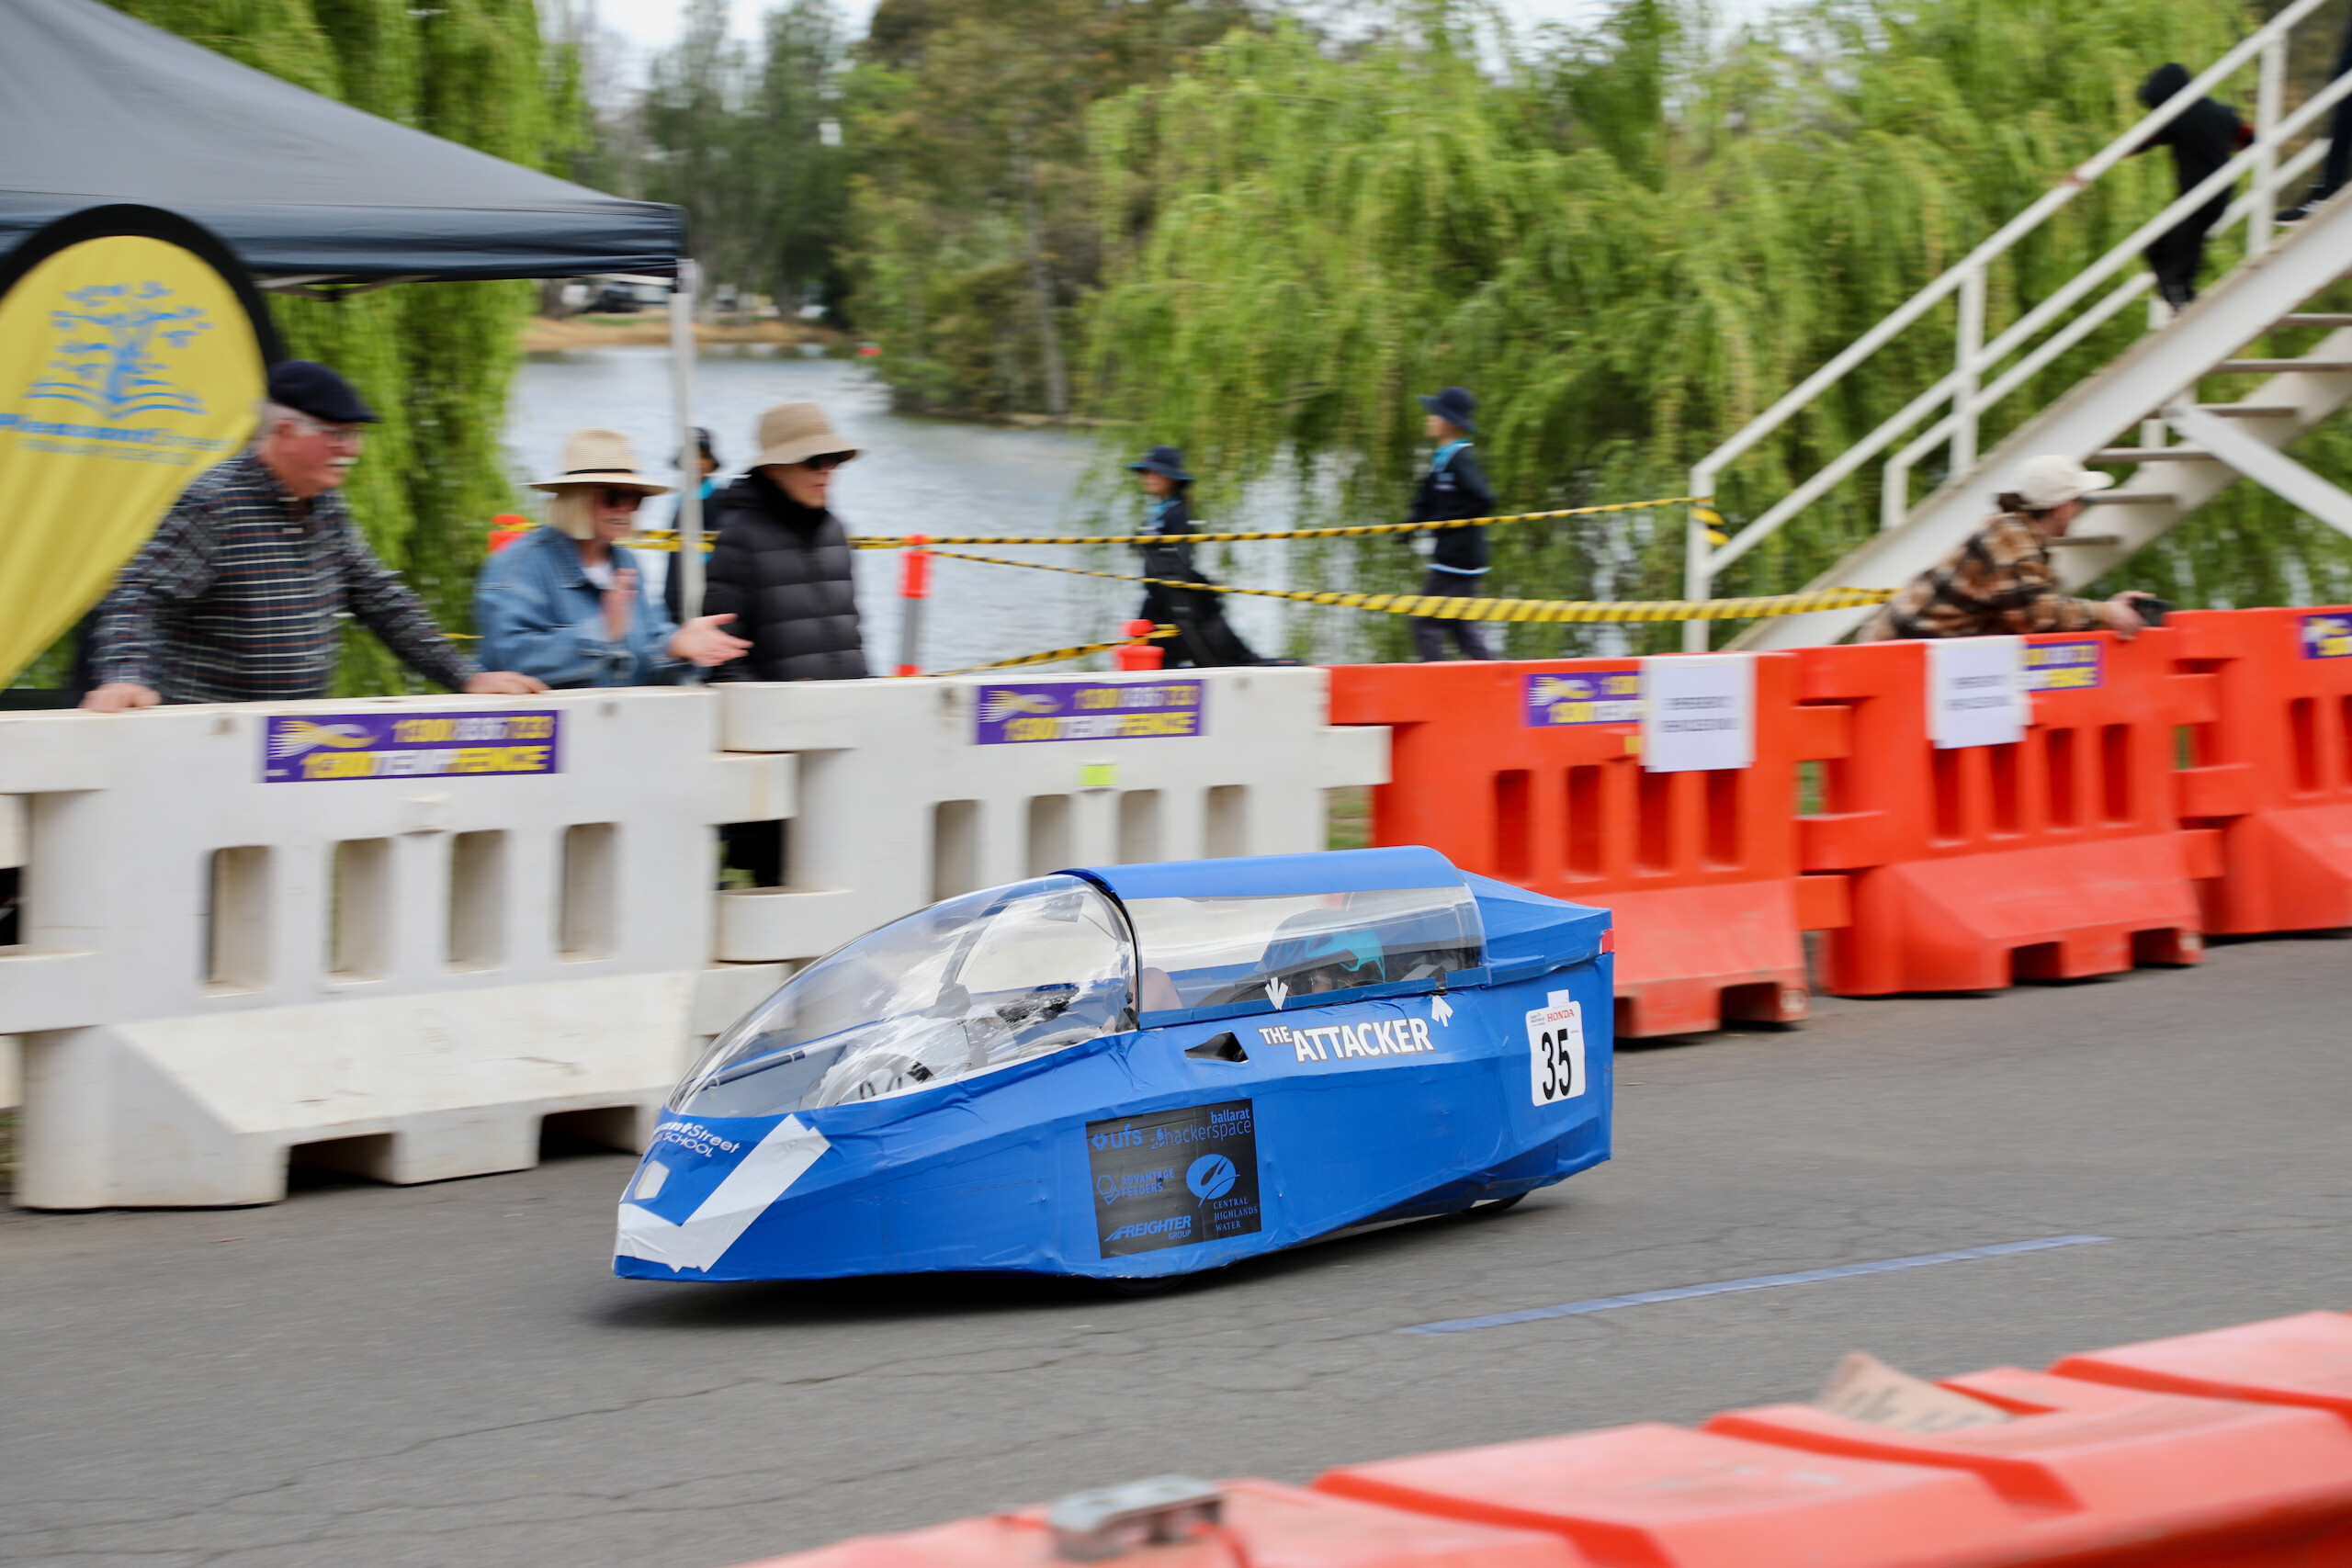
By the time the vehicles came to us, they were in rough condition after years of racing and repeated bandaid repairs: the children reported that the cabin was extremely hot and sweaty, their hands and legs constantly interfered with the inside of the bodywork and steering components, the body had become intrusively large to cover steering linkages and other components, and even a simple issue like a flat rear tyre could take the vehicle completely out of commission because everything was sealed inside with little to no access short of cutting sections of the body away. Not obvious in the photos, but the entire body is sealed all over with tape, so you can't "open it up" to do repairs/maintenance other than climbing awkardly inside through the little side hatch.
2025 - Prototyping Ideas
2024 (for the 2025 race) was our first year helping out. The team has 2 vehicles that are using the same base kit, so we designed and prototyped a series of upgrades to improve safety, reliability, and usability. These included:
- Removable rear access hatch to simplify maintenance
- Side NACA ducts to improve rider cooling
- Development of a fully integrated electronics system
The new electronics architecture powers the entire vehicle from a single cheap power-tool battery and consolidates front and rear LED lighting, a sensor suite monitoring vehicle state, and a digital rider dashboard displaying cadence and RPM. This provided riders with practical performance feedback while also introducing a gamified training element, which received very positive feedback from students. The system is built around custom-designed PCBs that act as the central control unit and log all telemetry to MicroSD for post-session analysis.
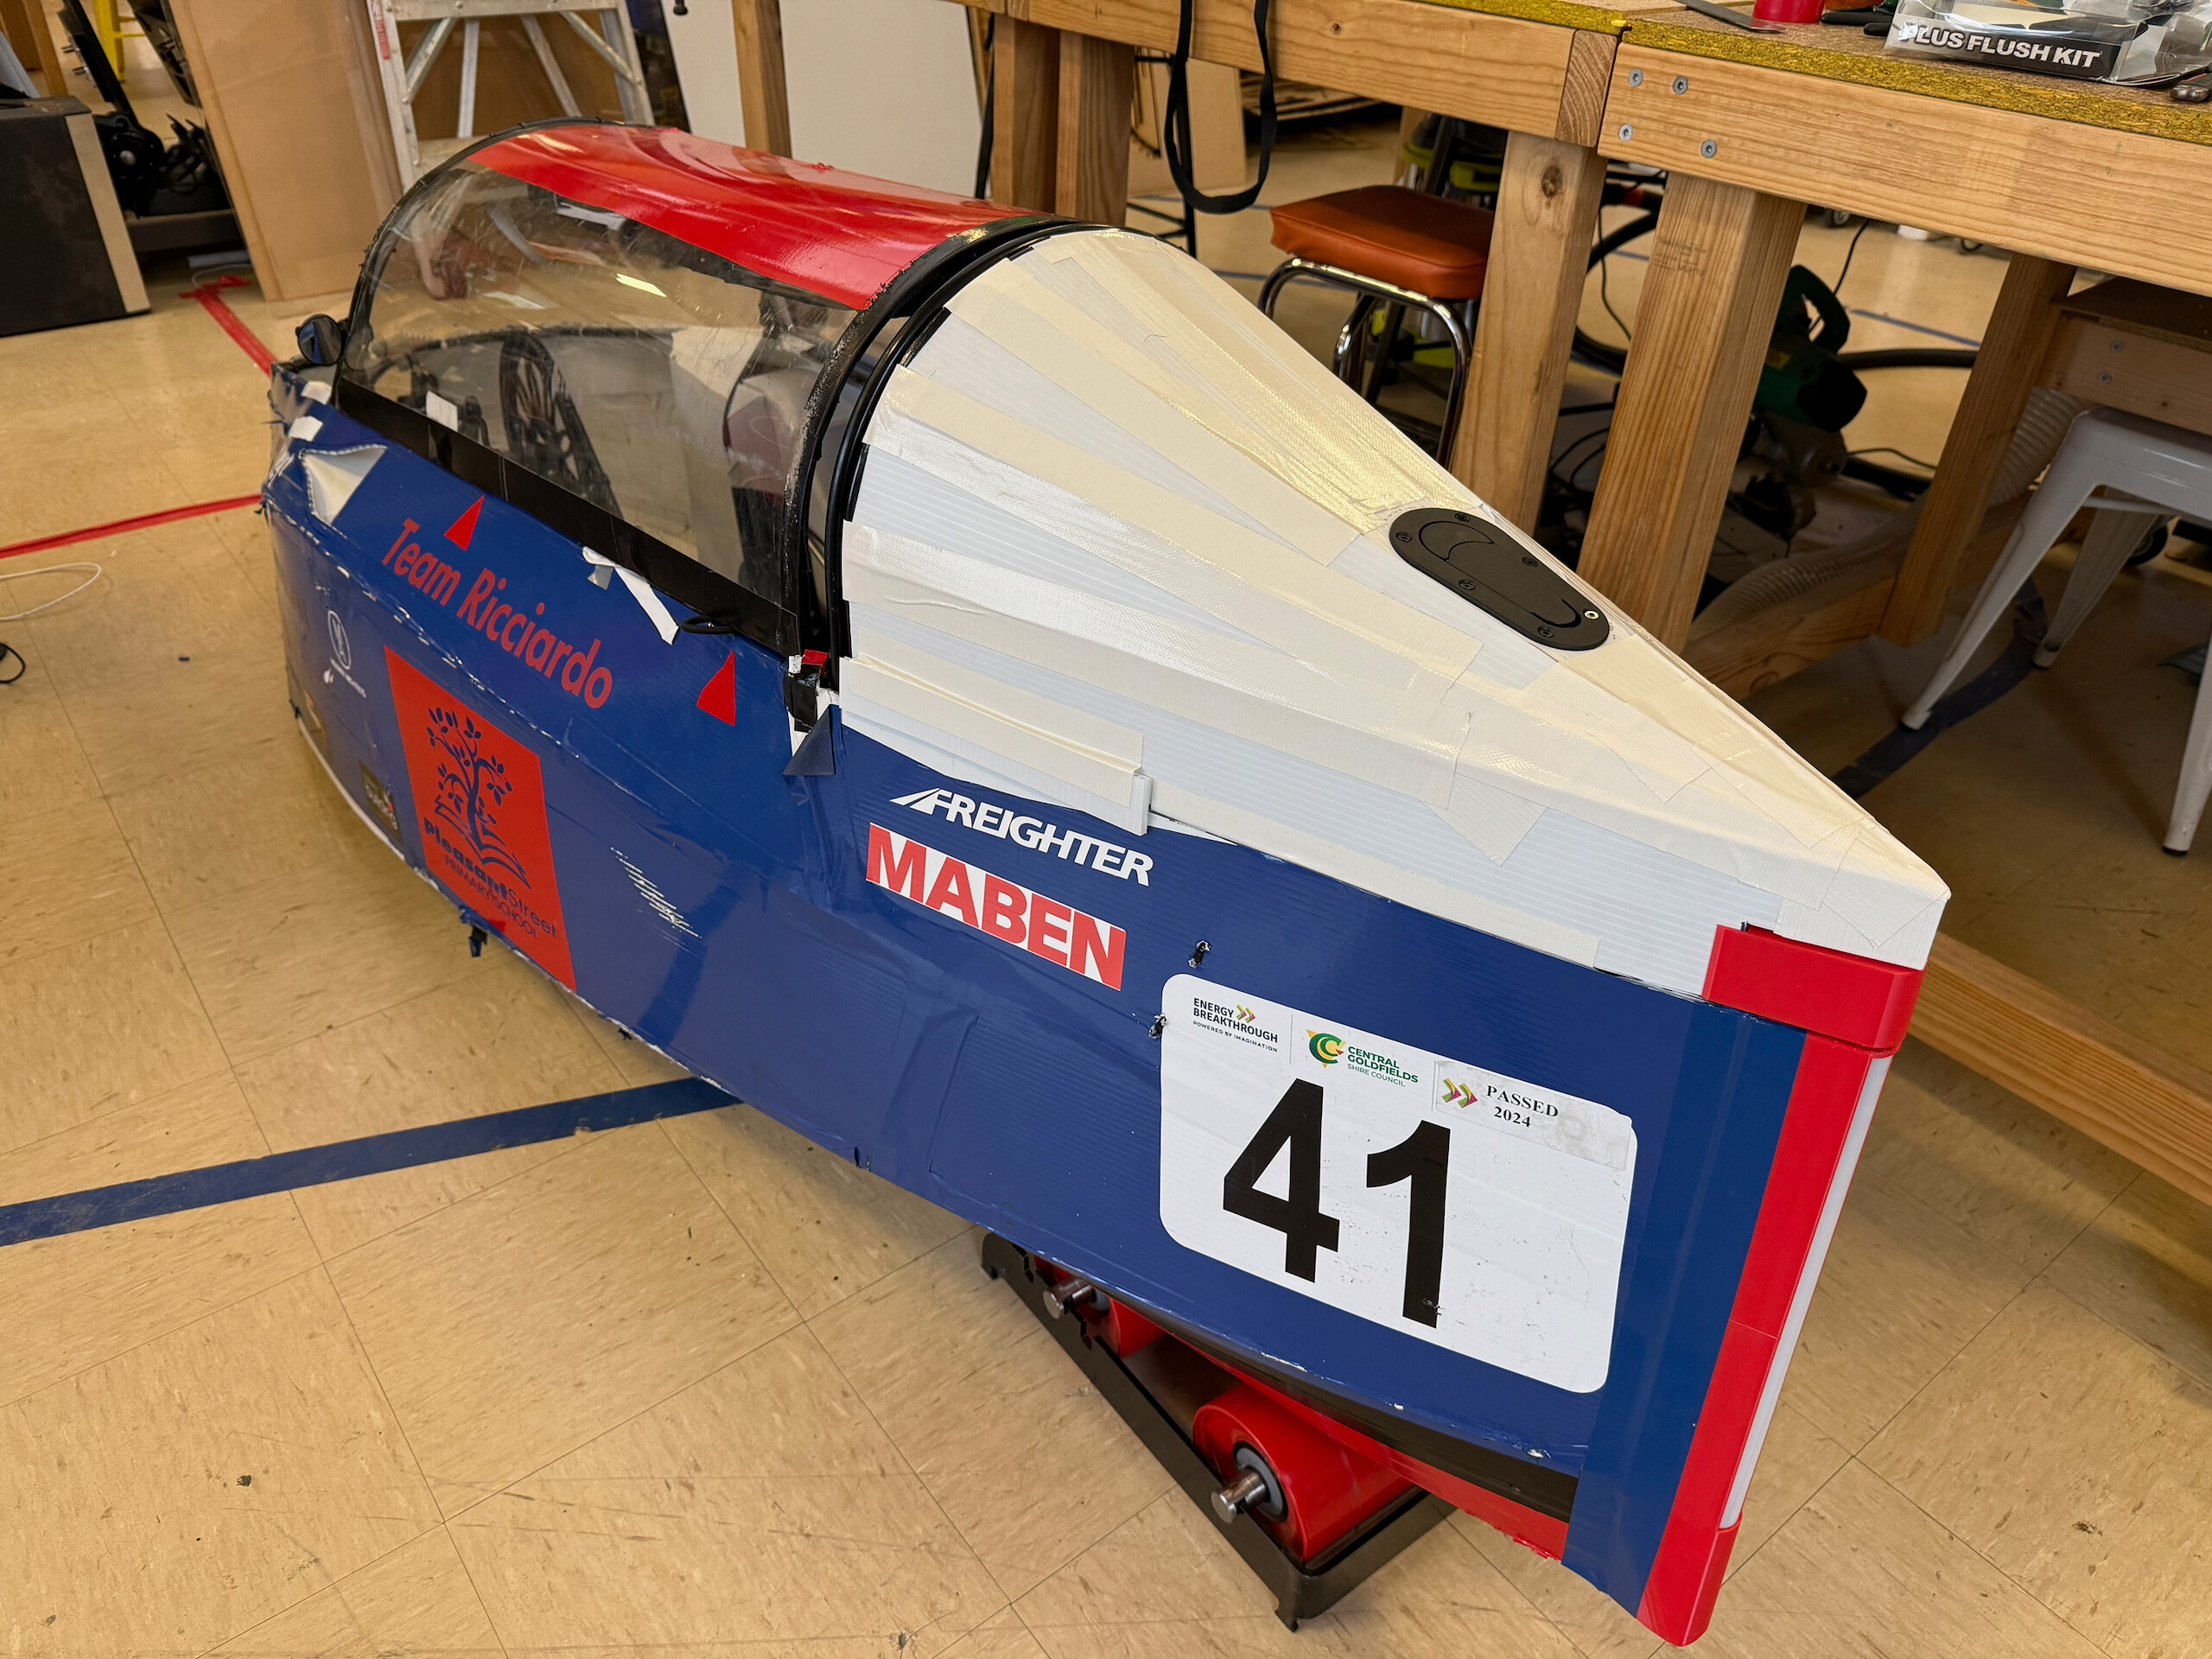
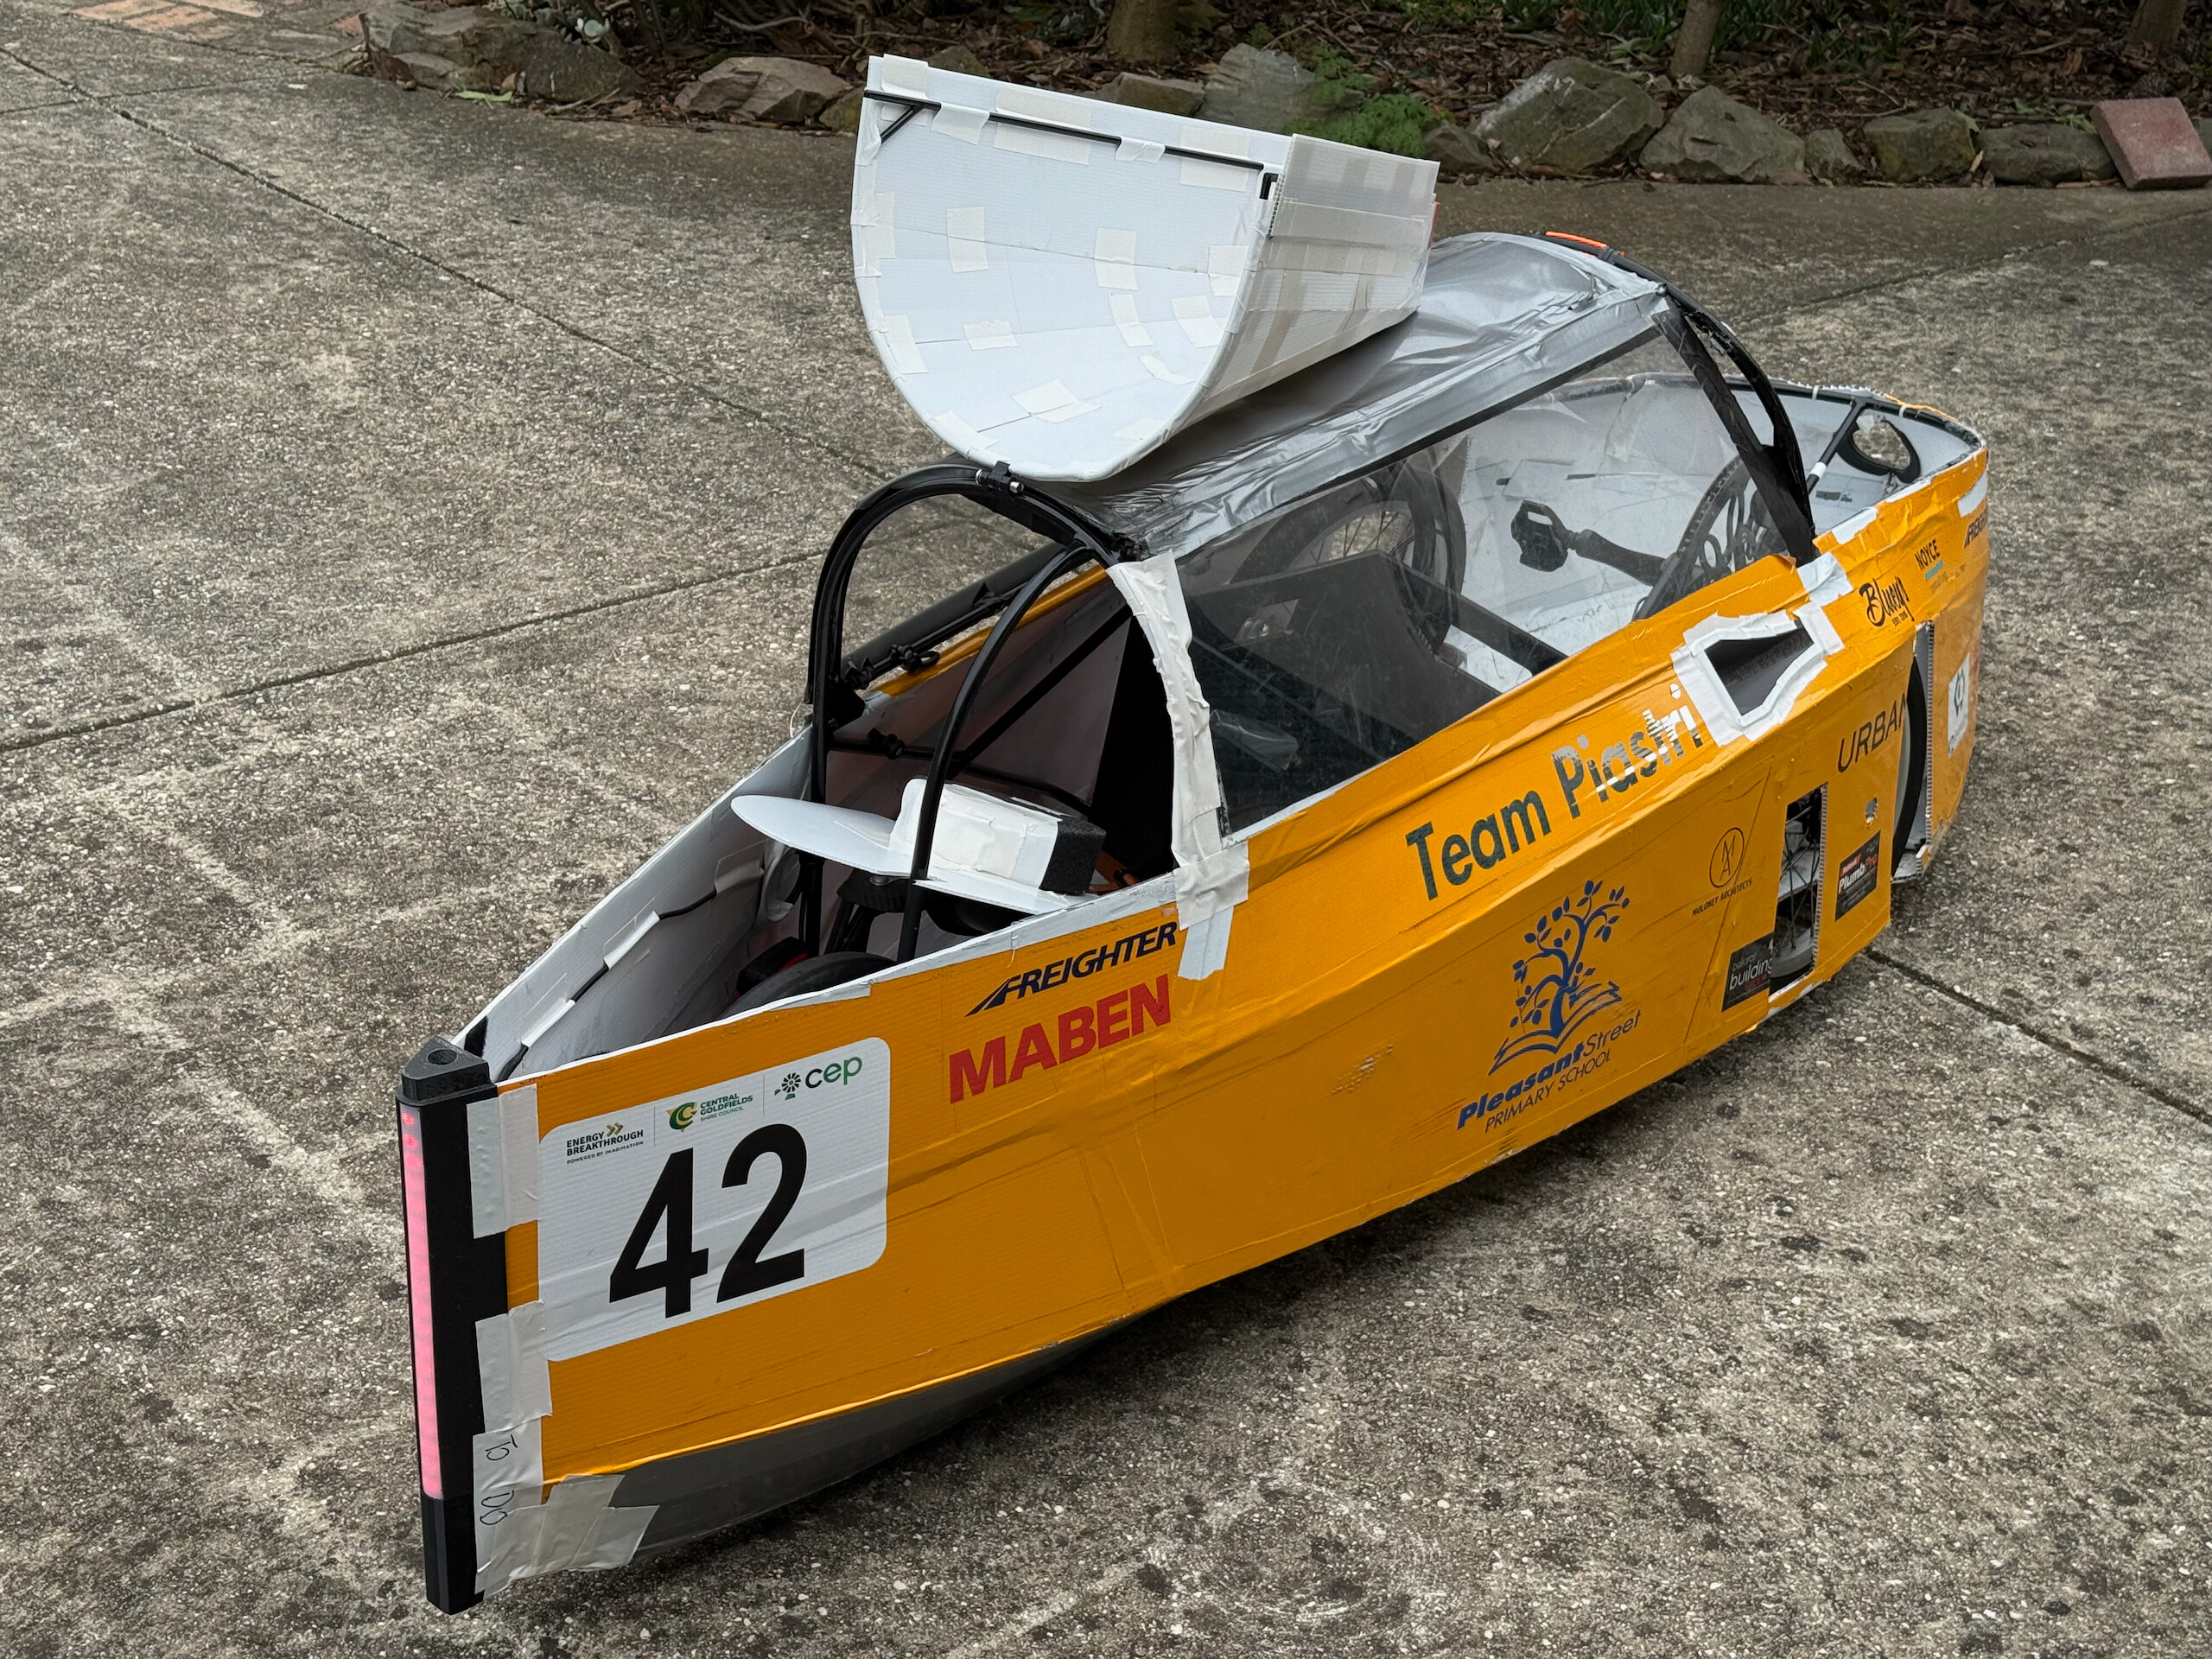
We tried 2 iterations of the removable tail cover. The first of which (left photo below) used a race-car bonnet quick-release latch that connected to a custom fabricated aluminium frame underneath, and flipping the latch let you lift the entire tail cover off. The second one (right photo) used a hinge on the roll-bar with a quick-release hinge pin, so that the hatch could hinge upwards like a car boot for temporary access, or pull the pin to fully remove the cover for longer repairs. Both worked, and both had their pros and cons.
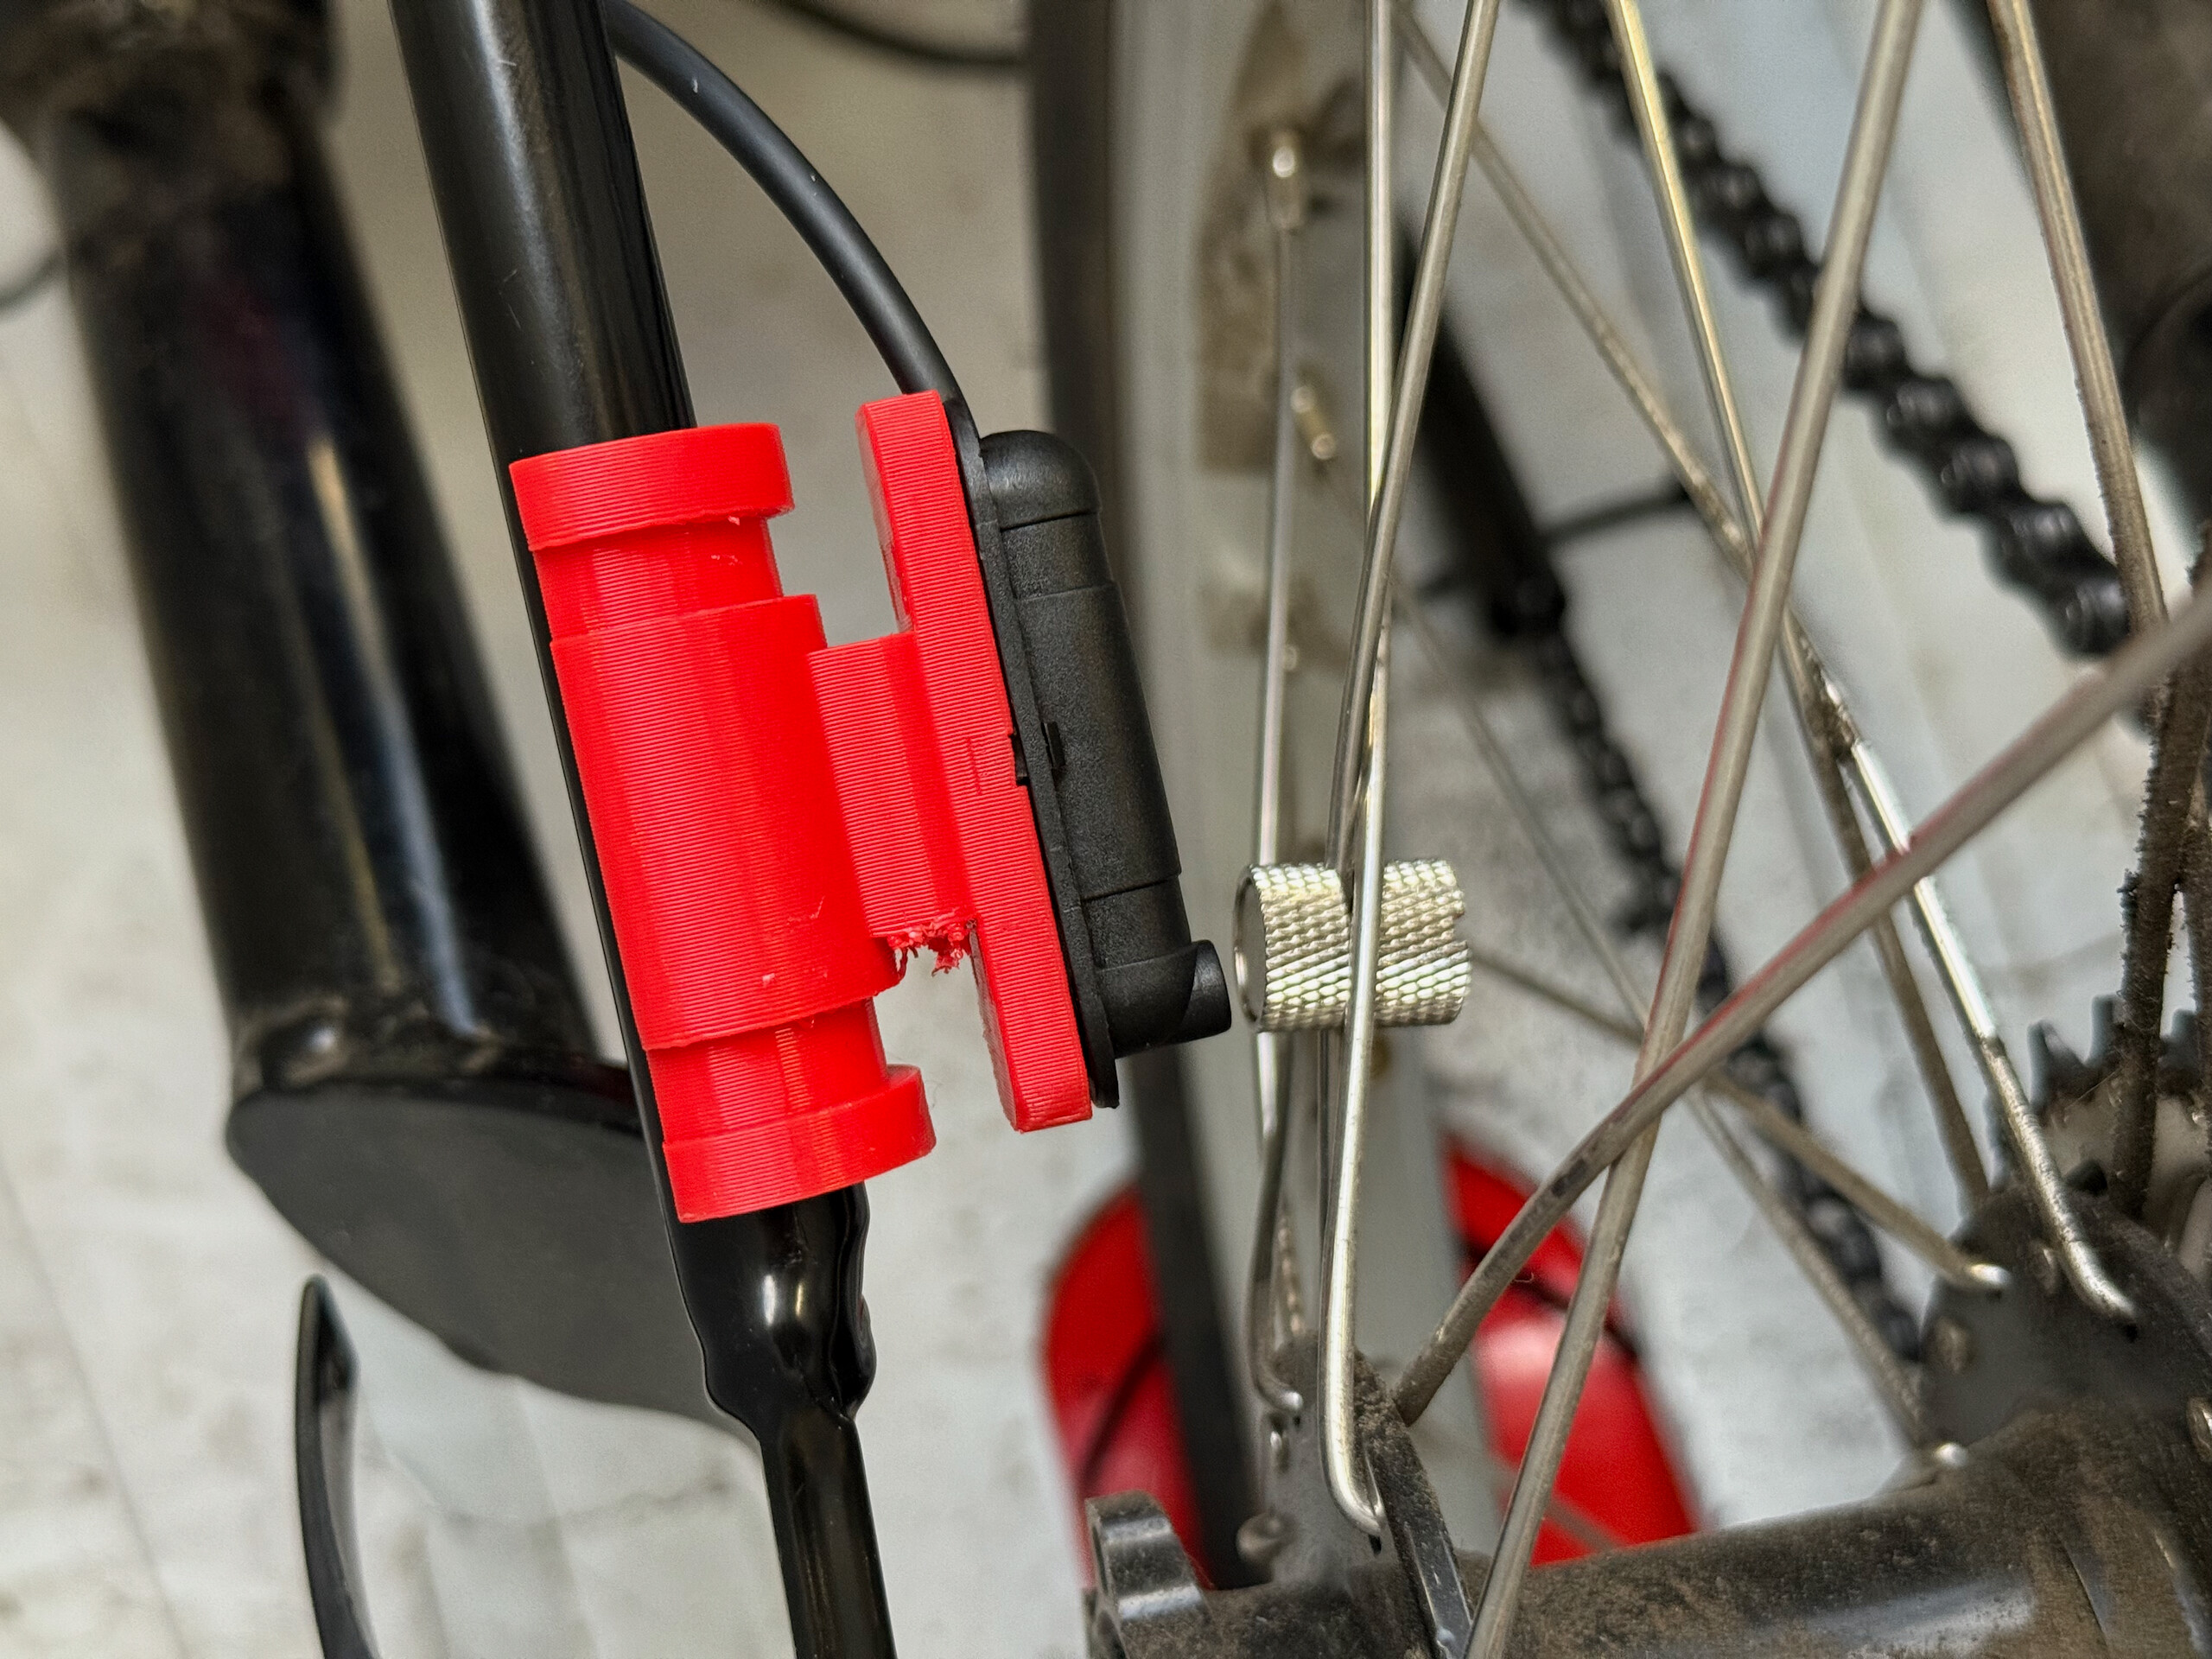
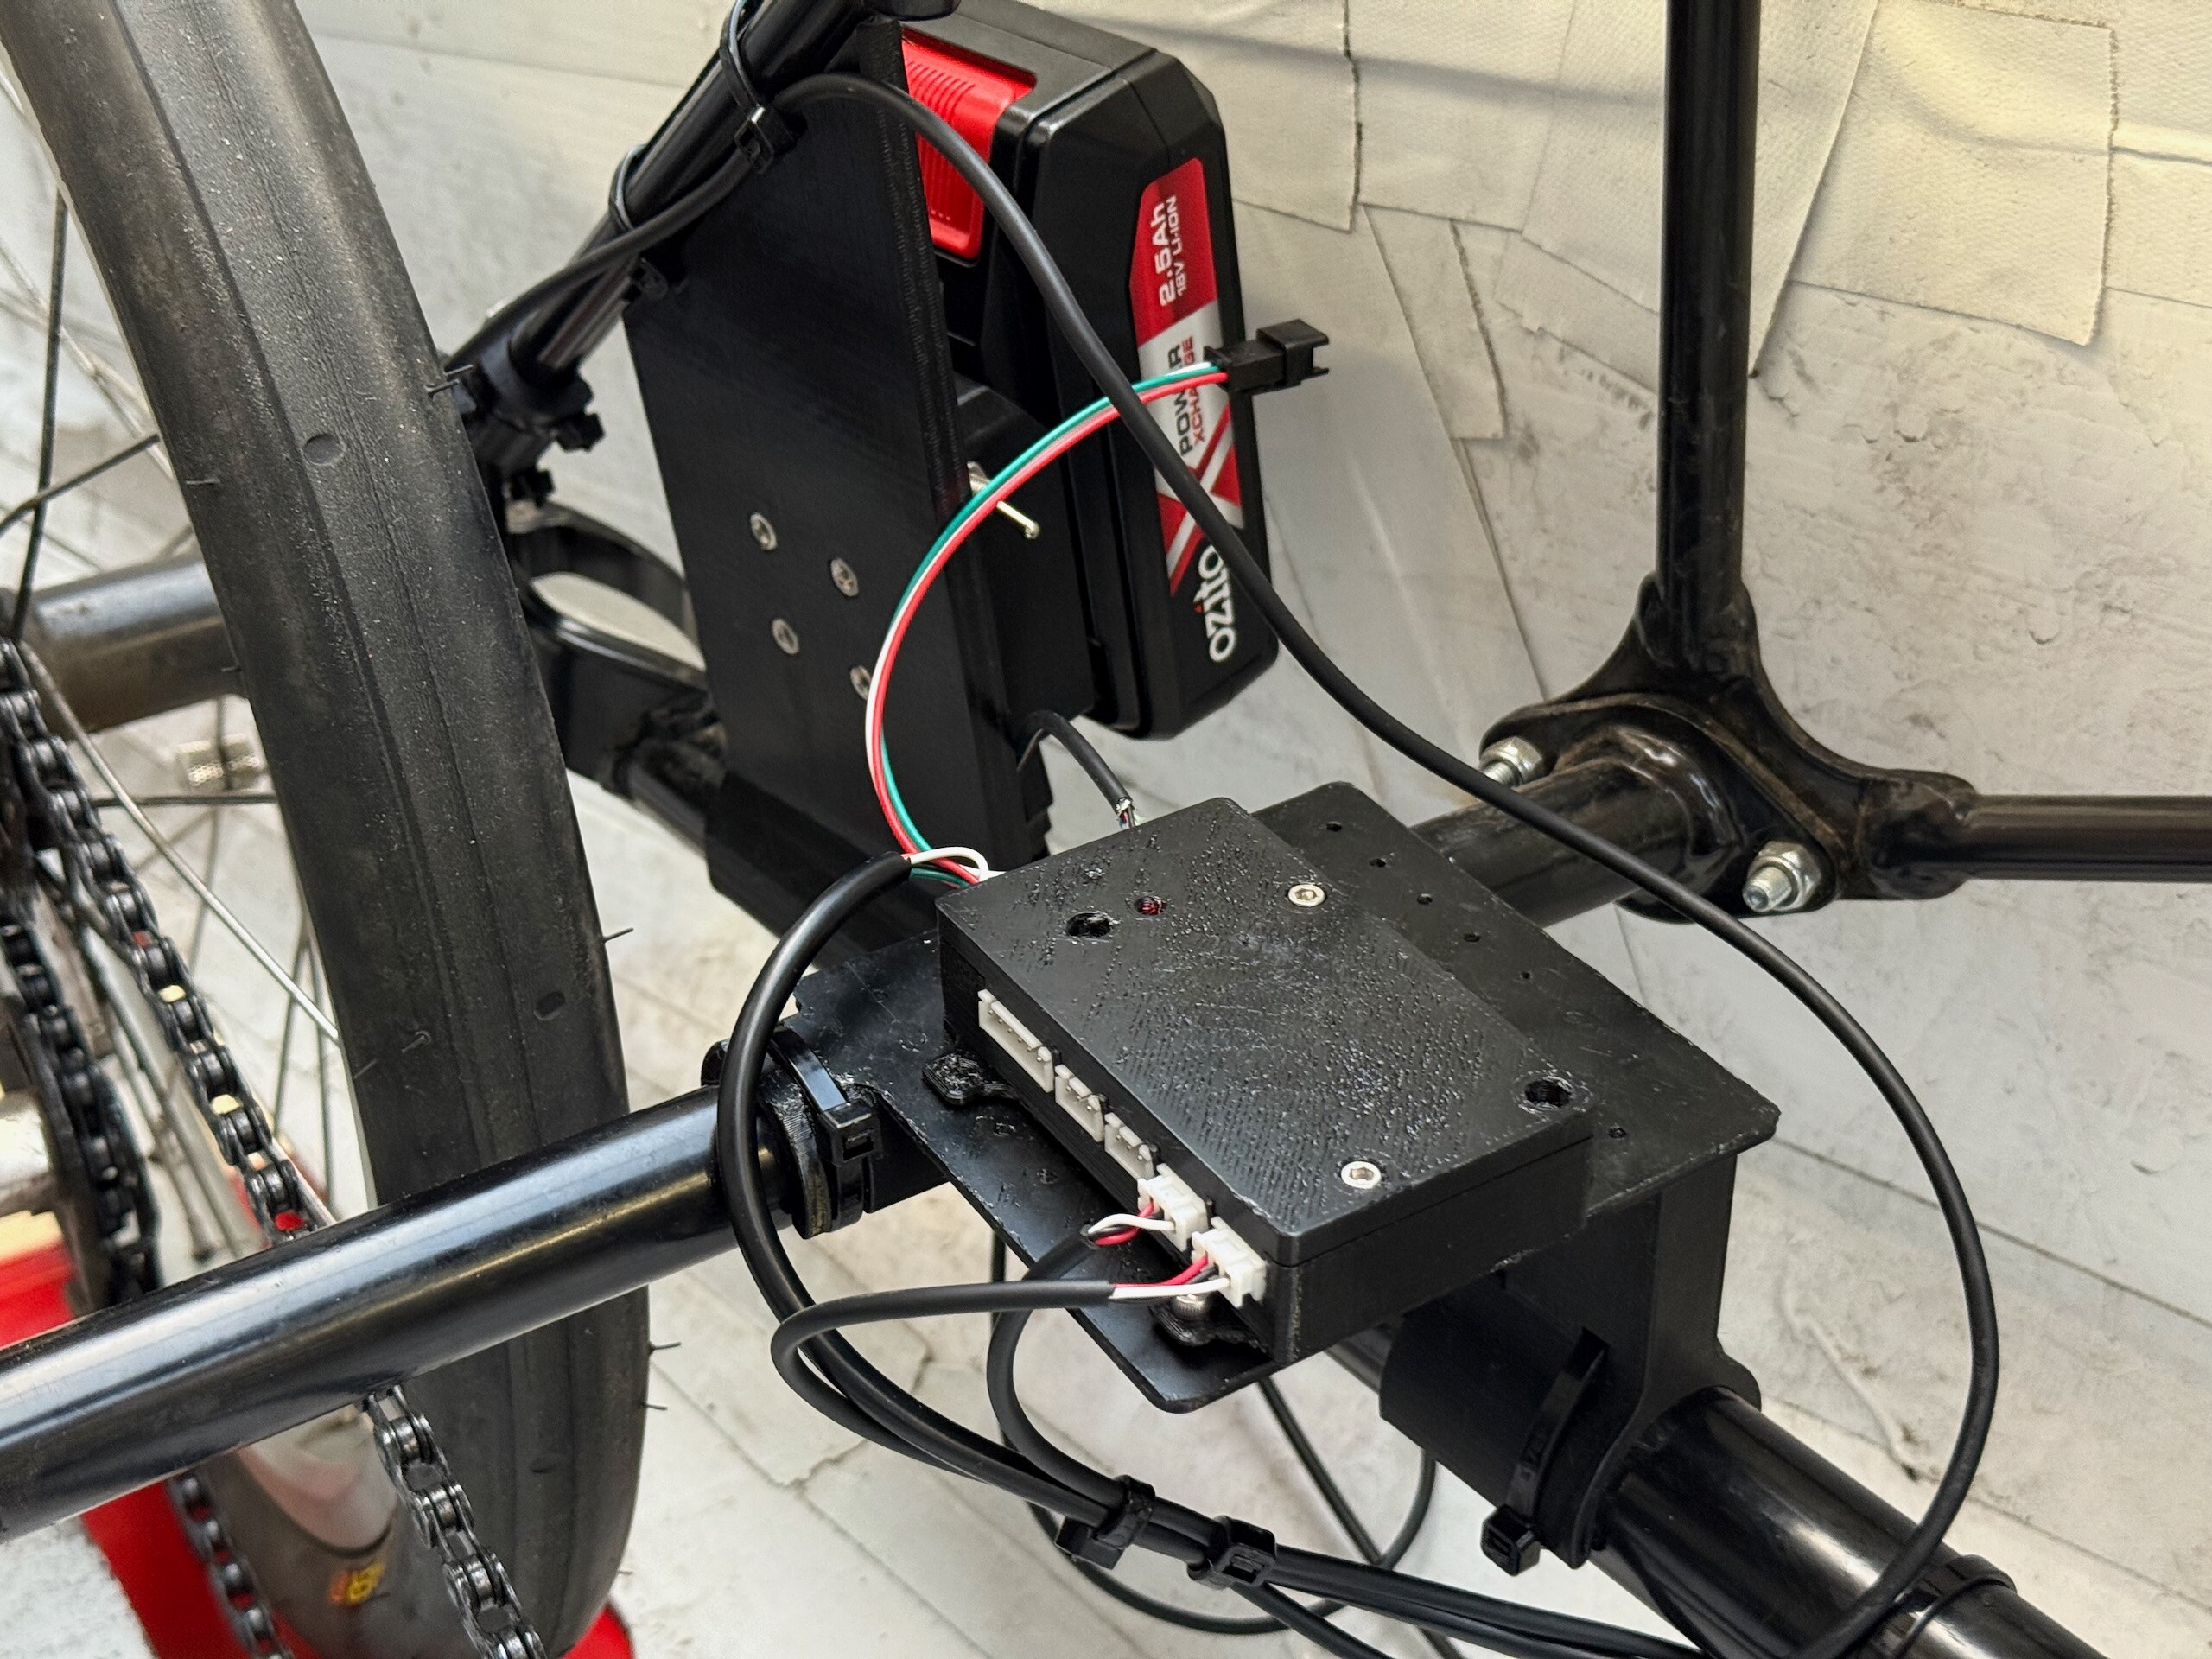
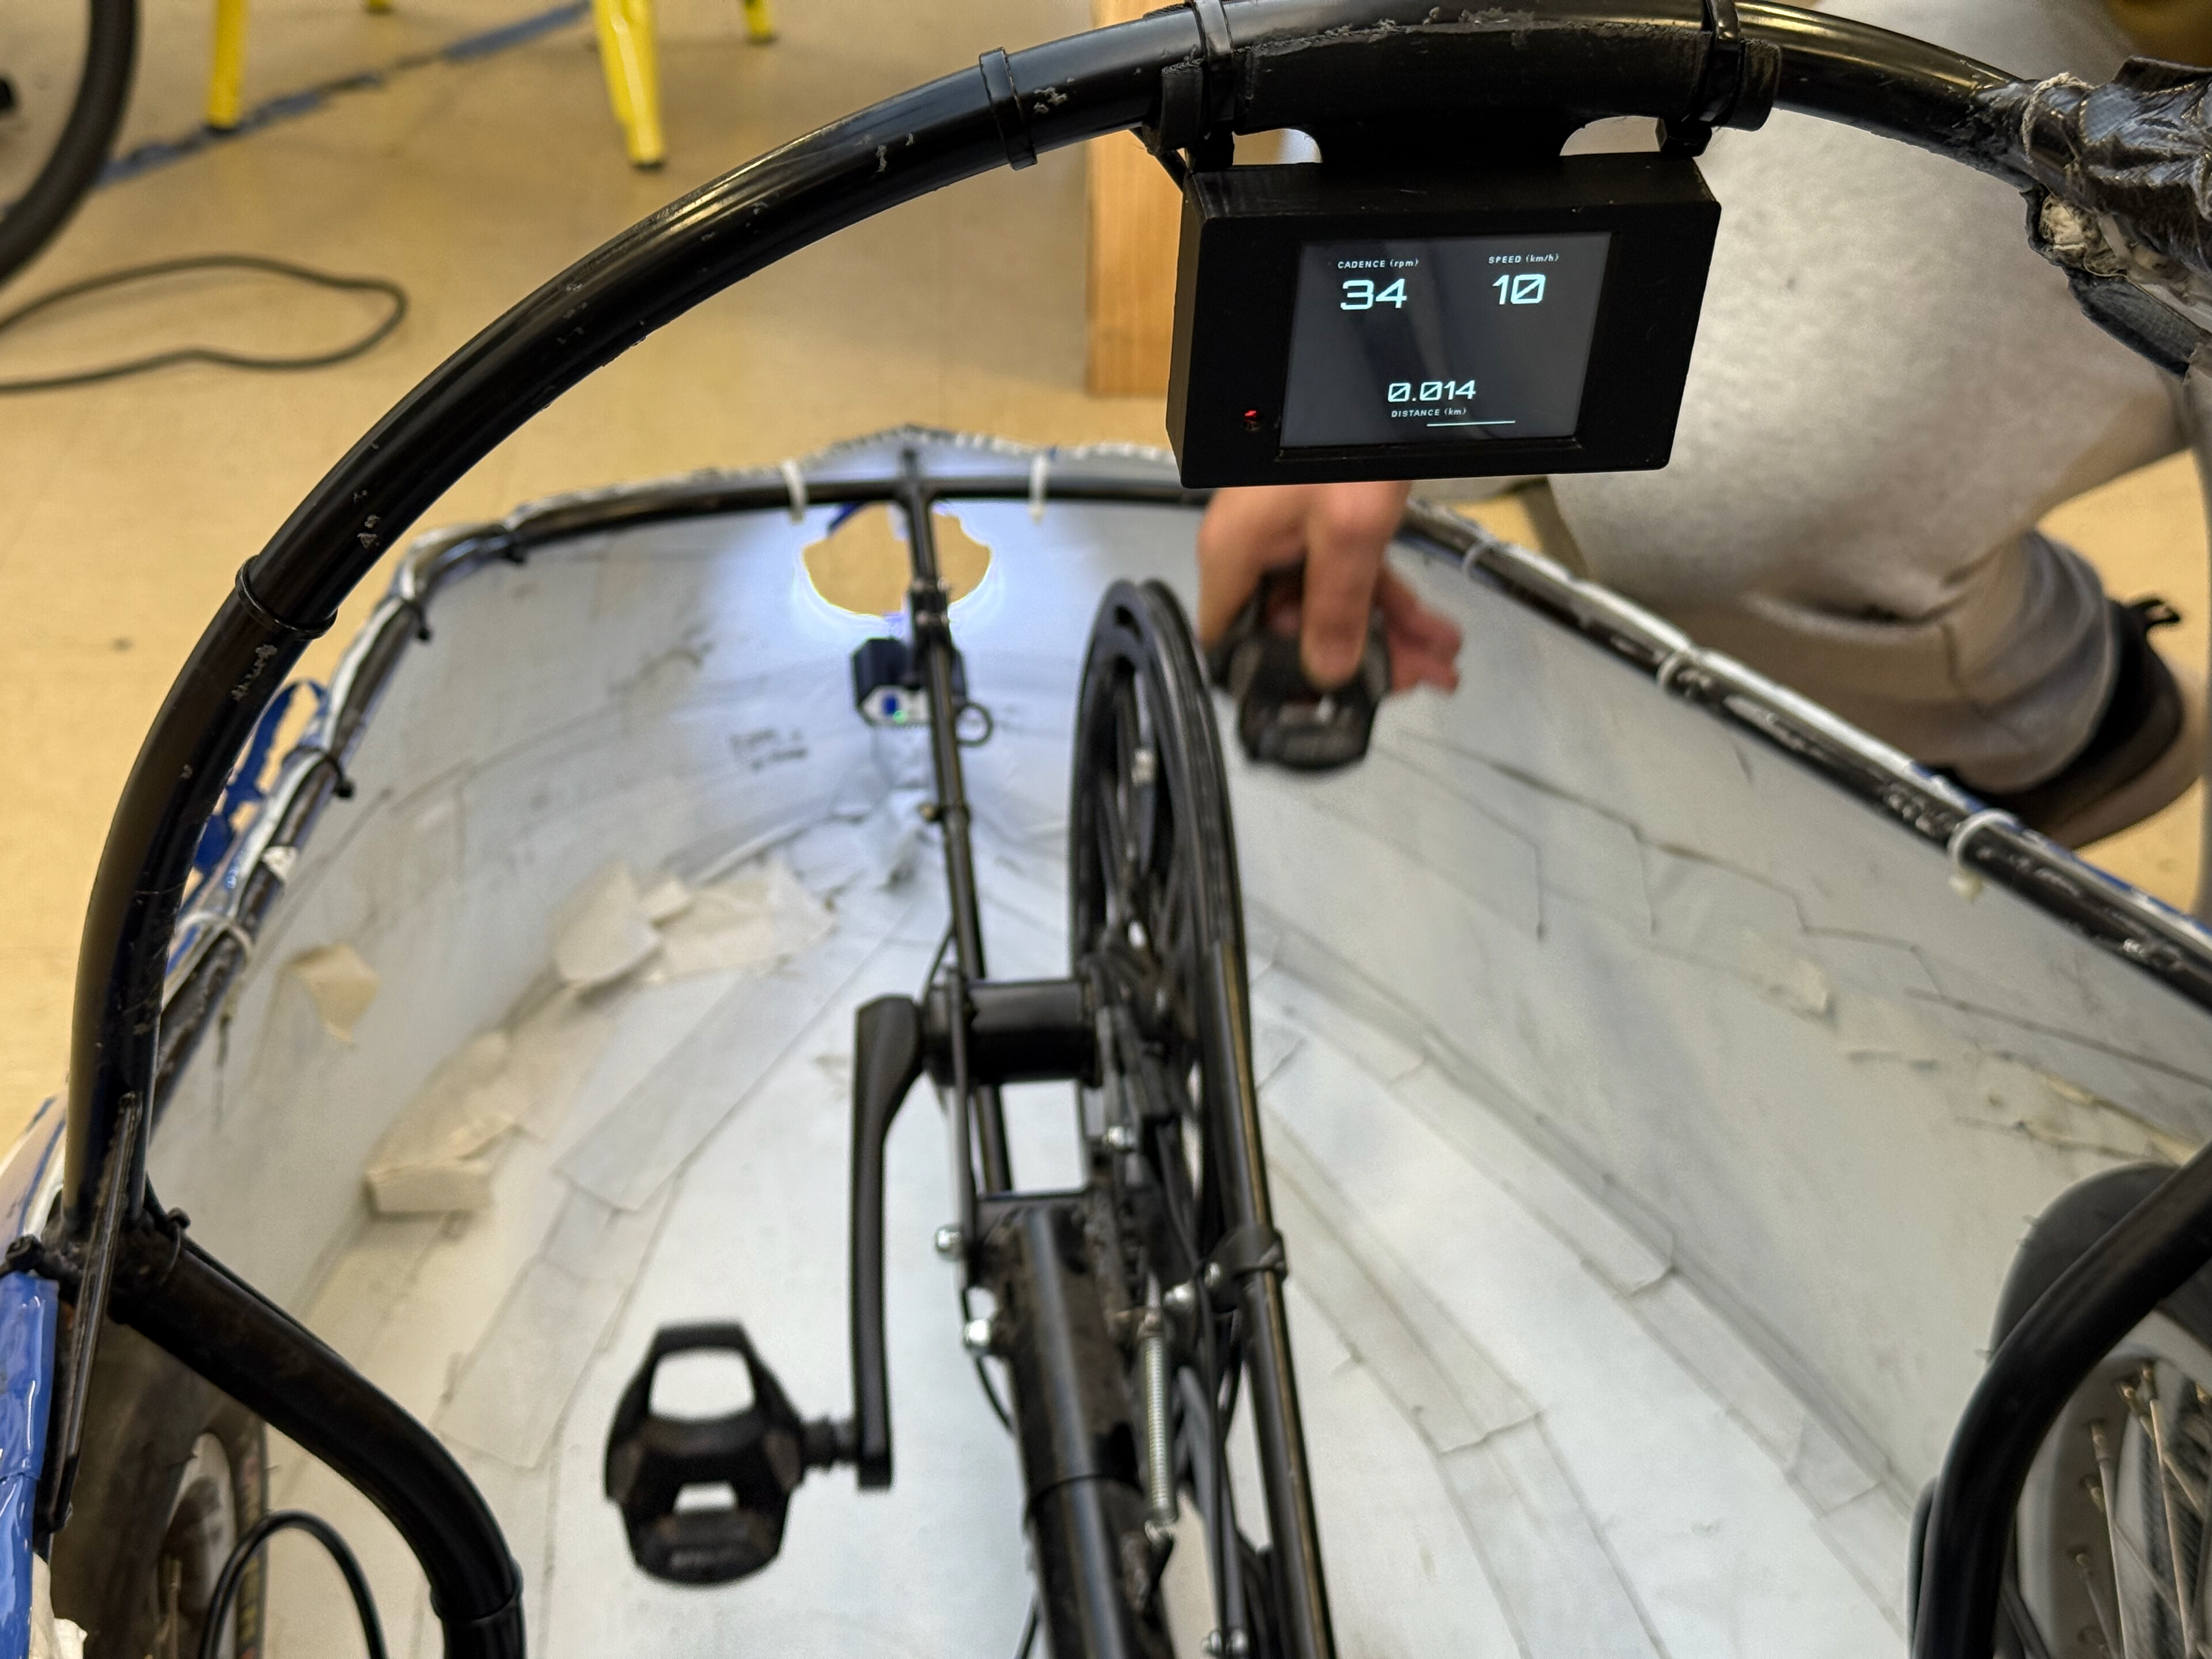
Electronics consisted of 3D printed brackets holding magnetic sensors to detect wheel speed and pedal speed, and a potentiometer connected to the steering linkage to pick up steering angle. The battery is a cheap off-the-shelf tool battery on a 3D printed bracket behind the seat, and the ECU is mounted next to it. These brackets ended up being a problem due to vibration so got completely re-thought later. We added a small LED display on the front roll-bar letting the rider see their speed, cadence, and other sensor outputs. They absolutely loved this and the gamification of being able to compare your stats really took off.
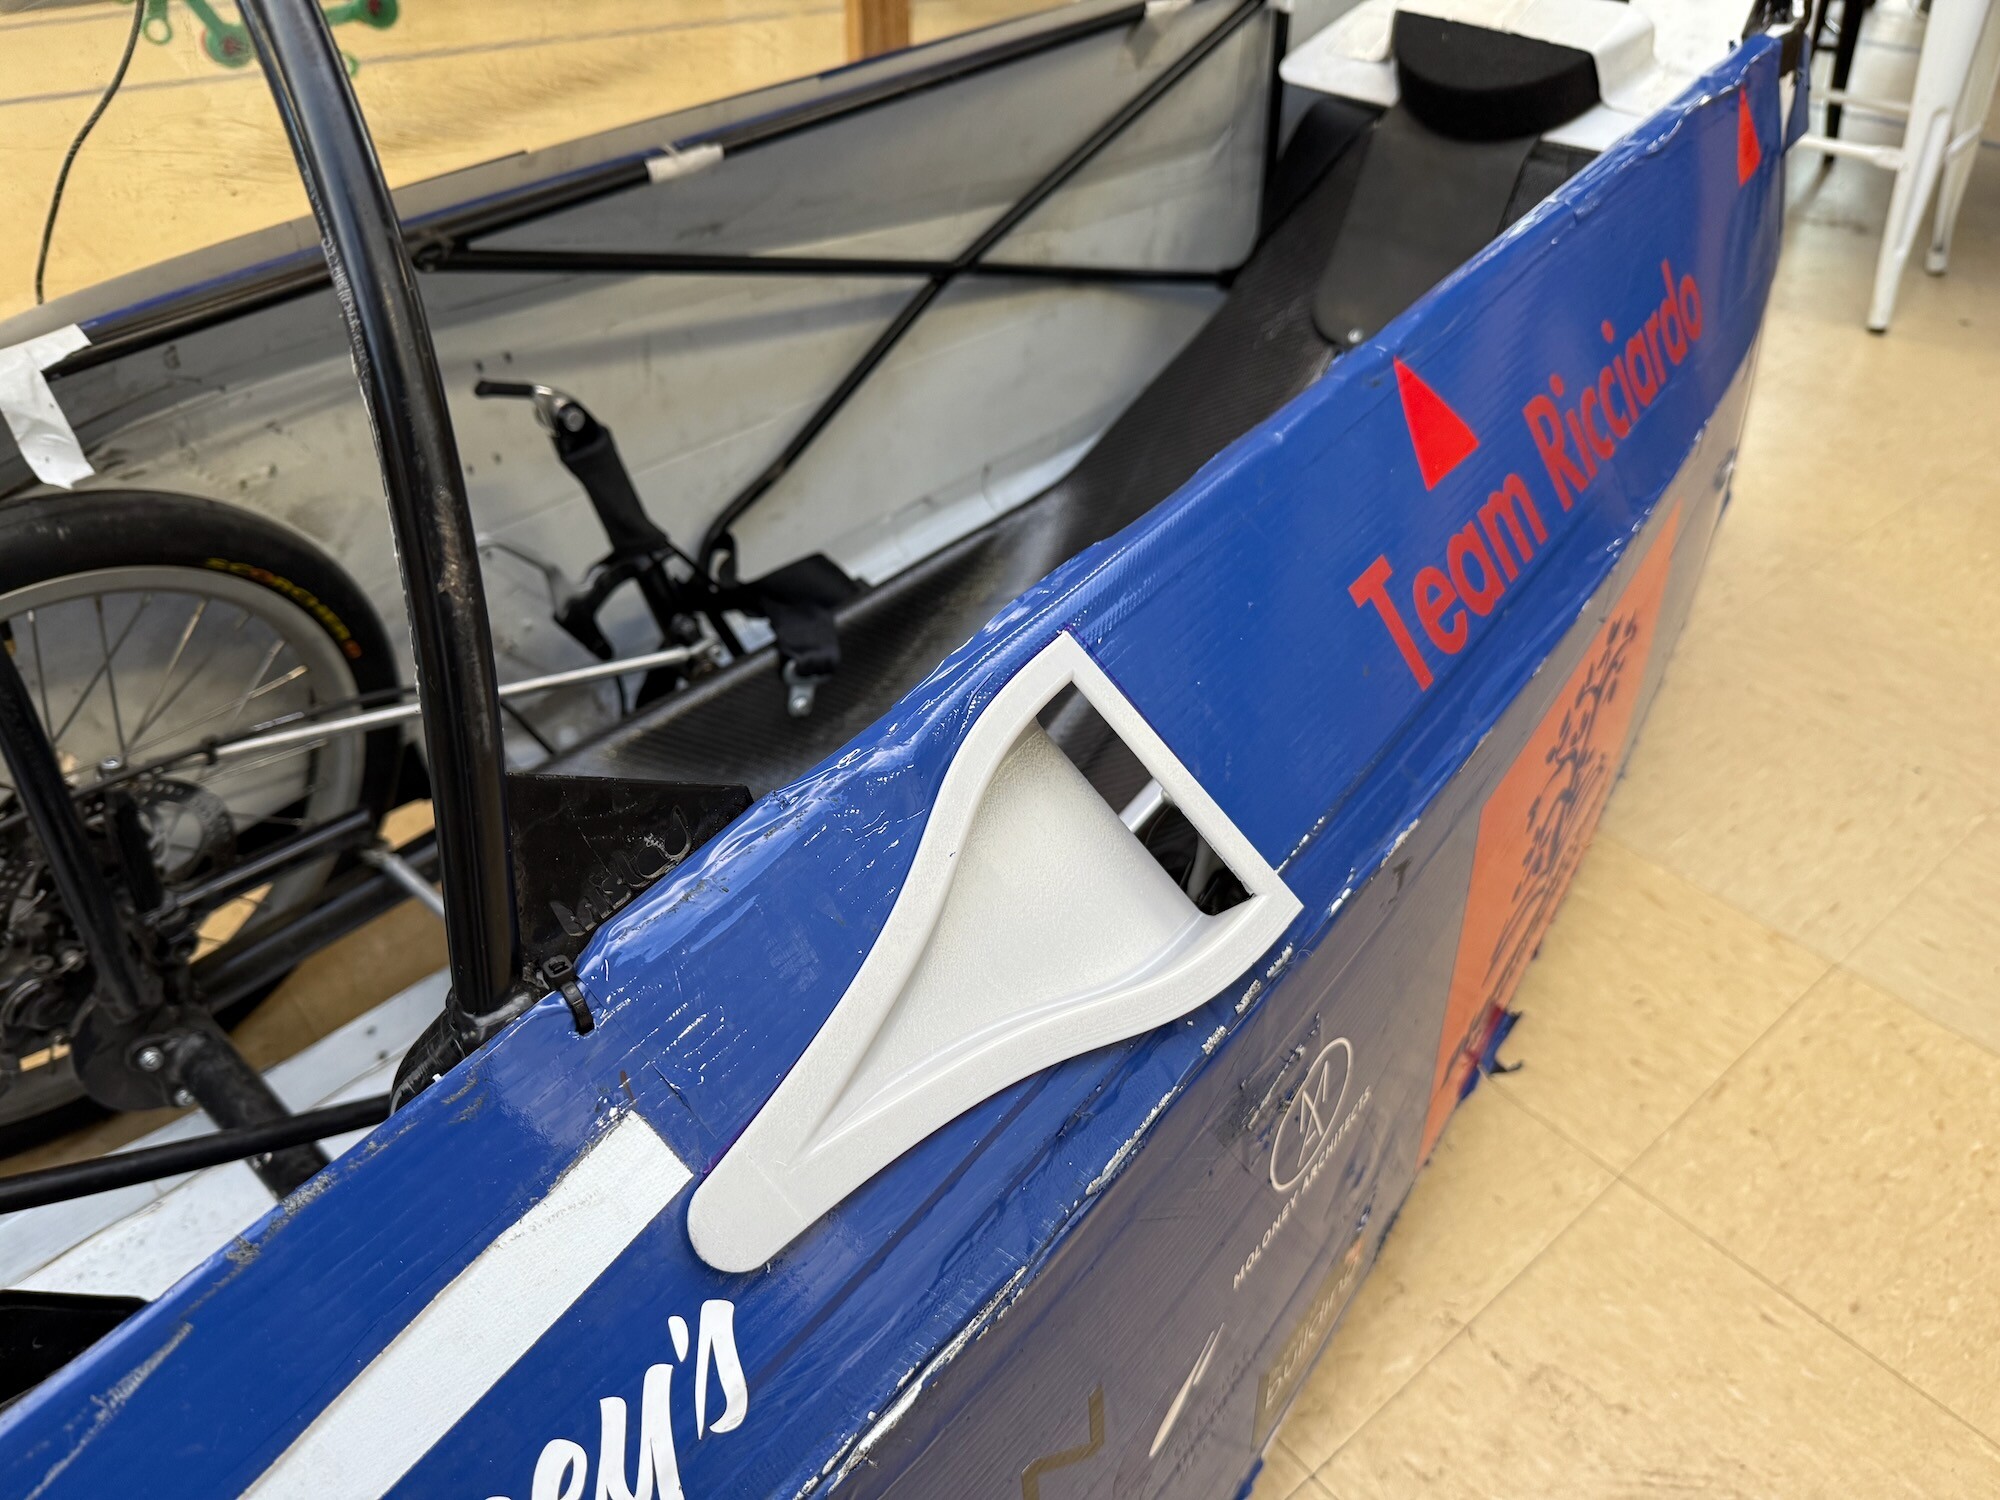
3D printed NACA ducts designed to suck air in and direct it at the rider's hands/arms/torso, helping cool them off. NACA ducts work great for this as they work passively, and yet the faster you go (and the harder you're pedalling) the more air they suck in.
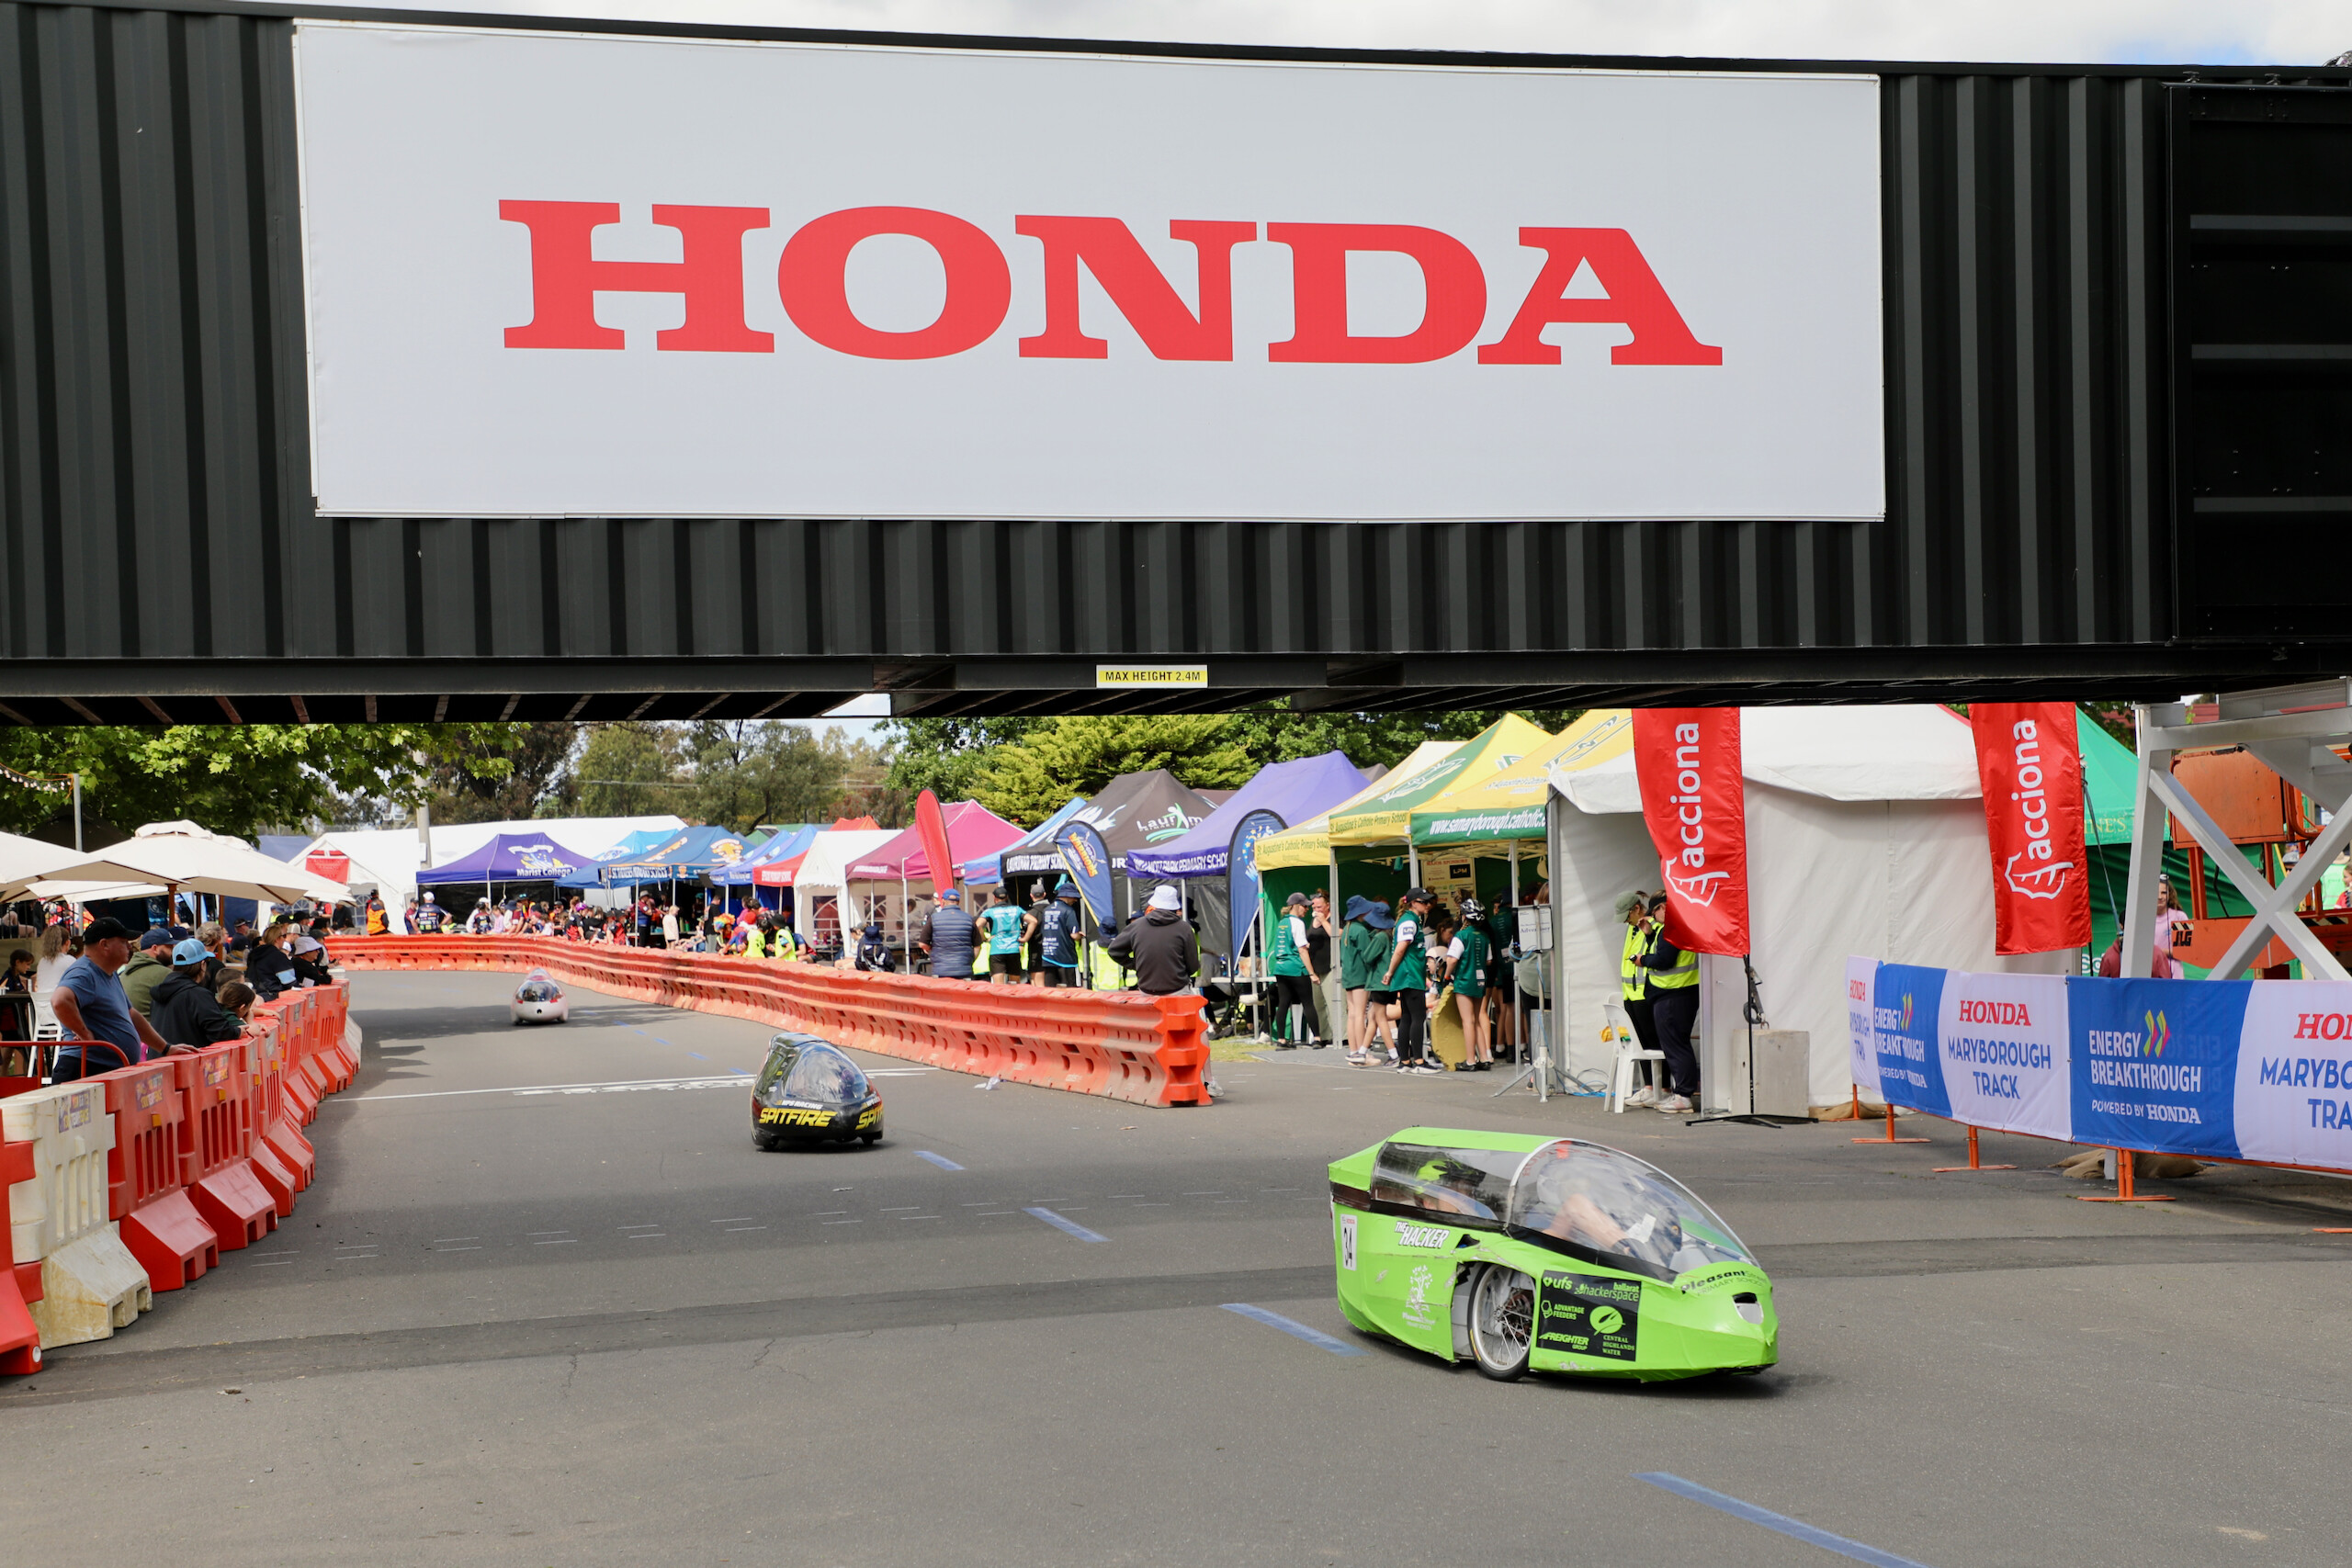
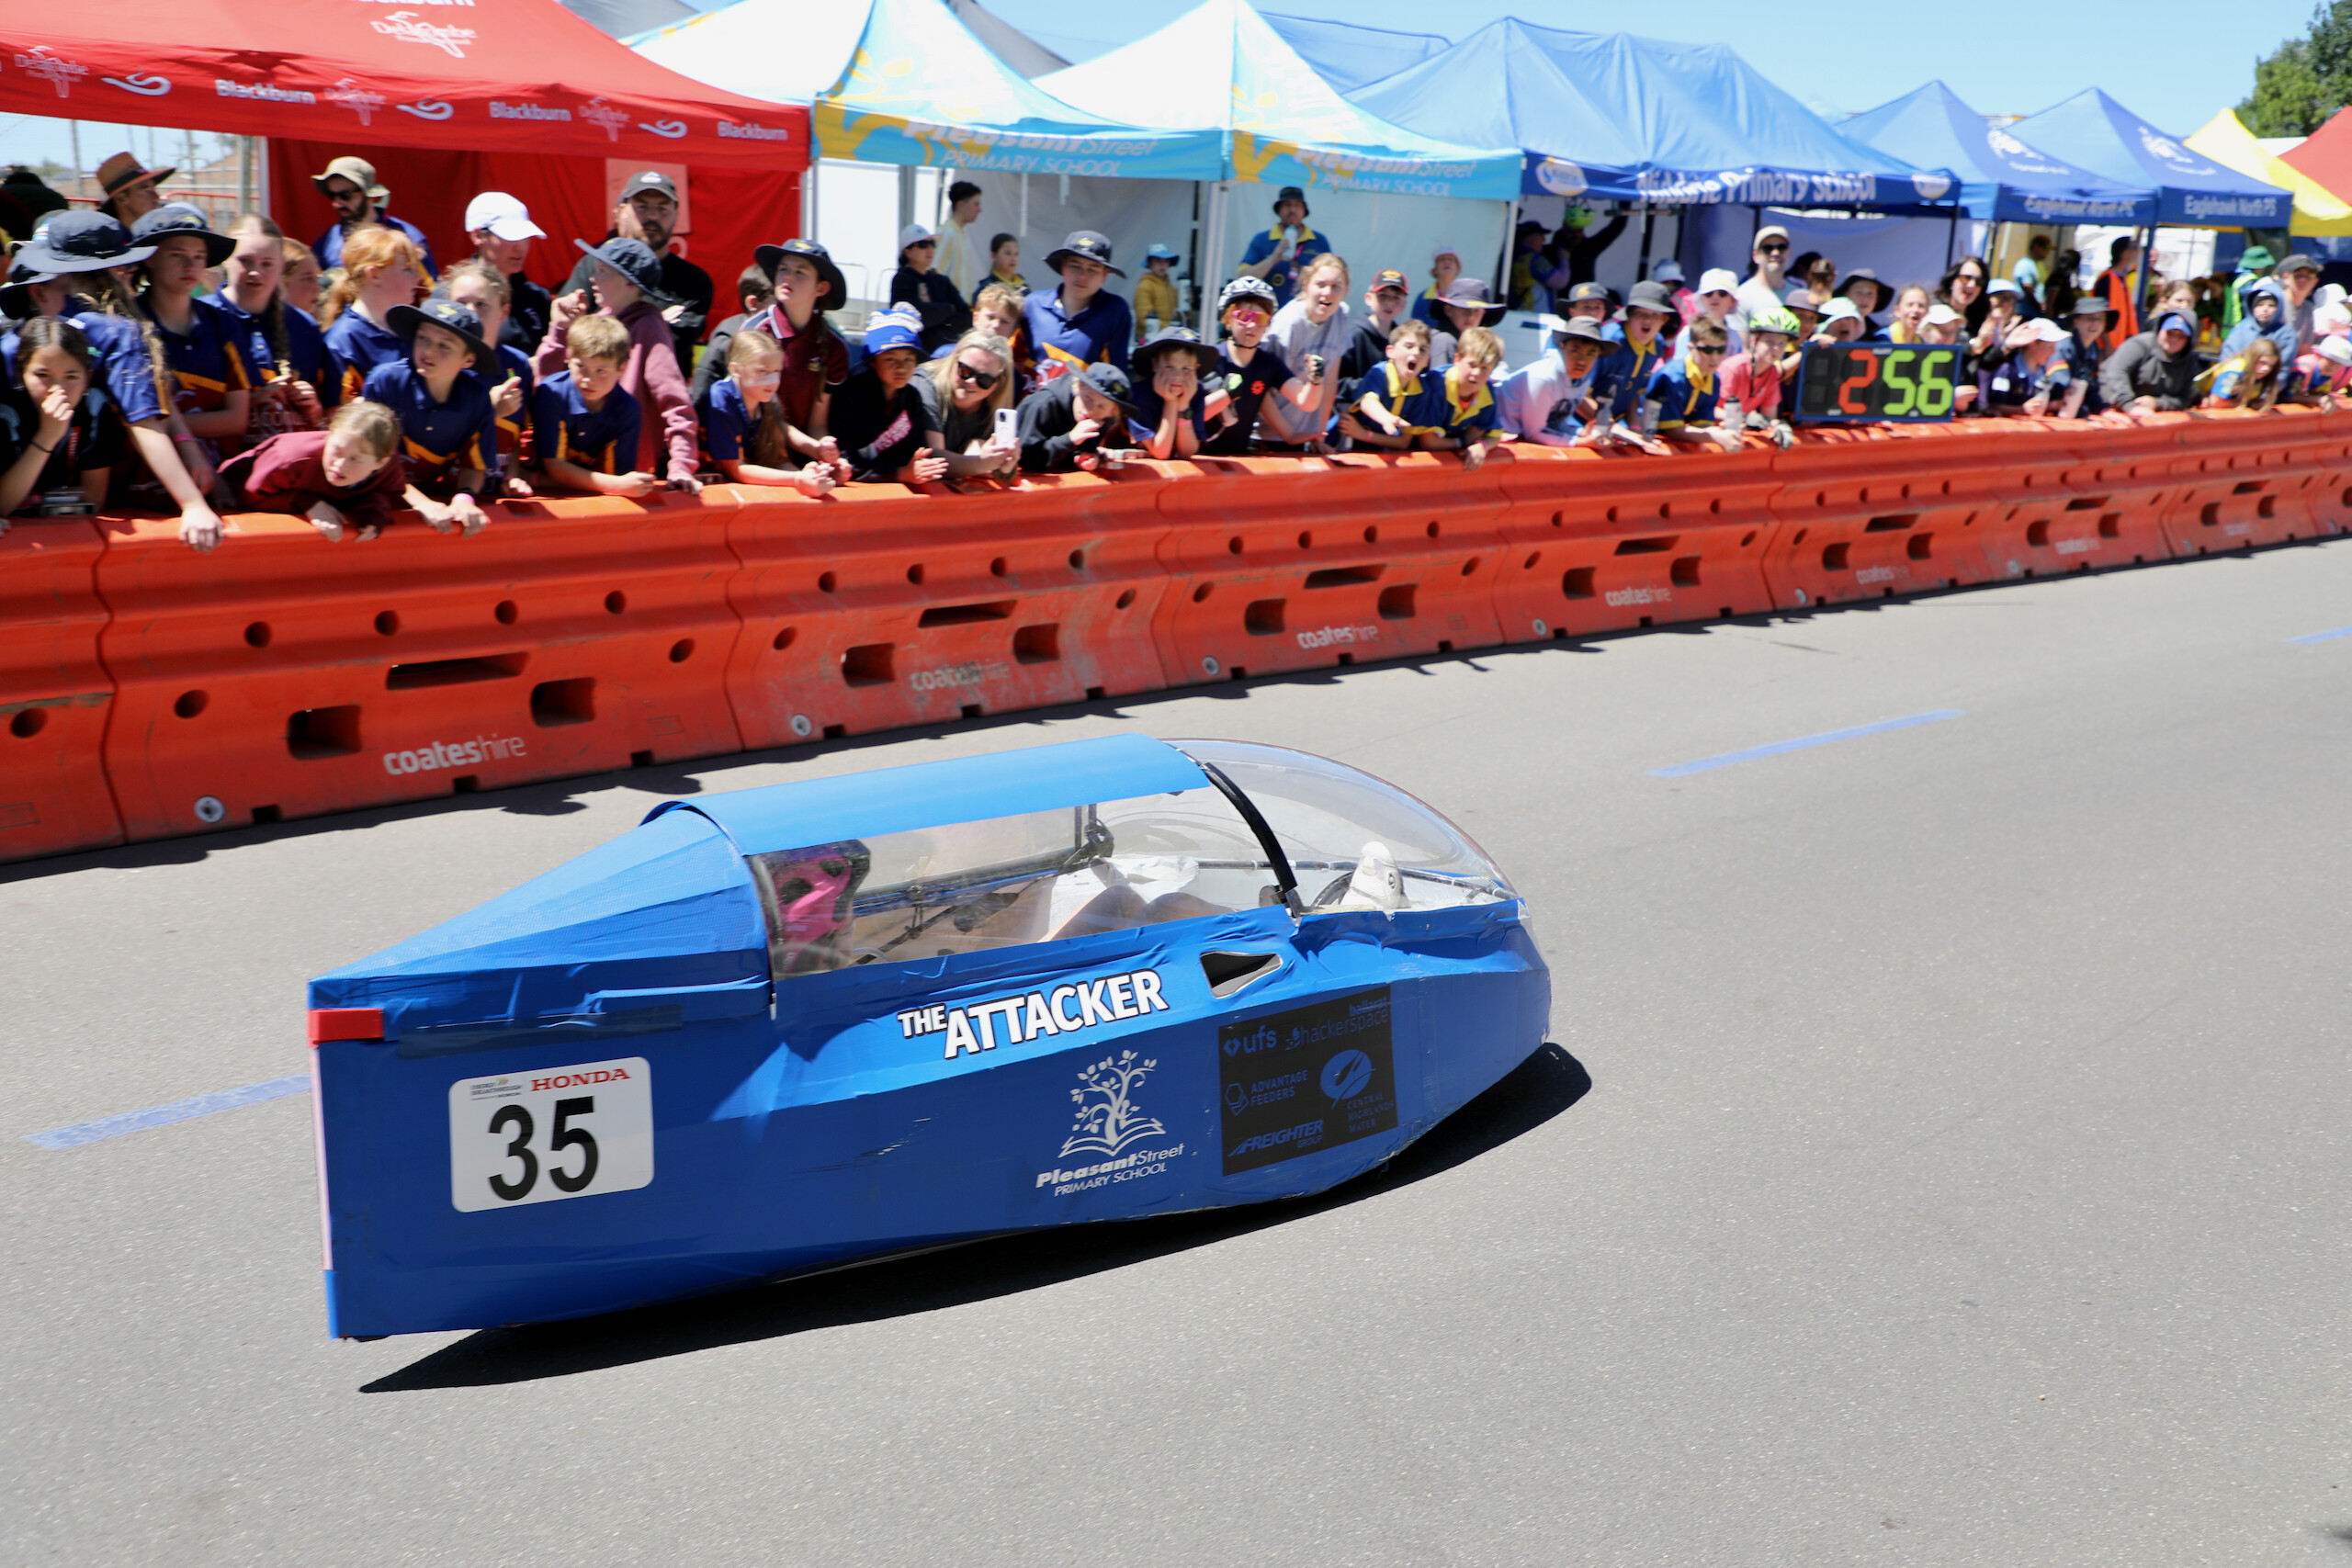
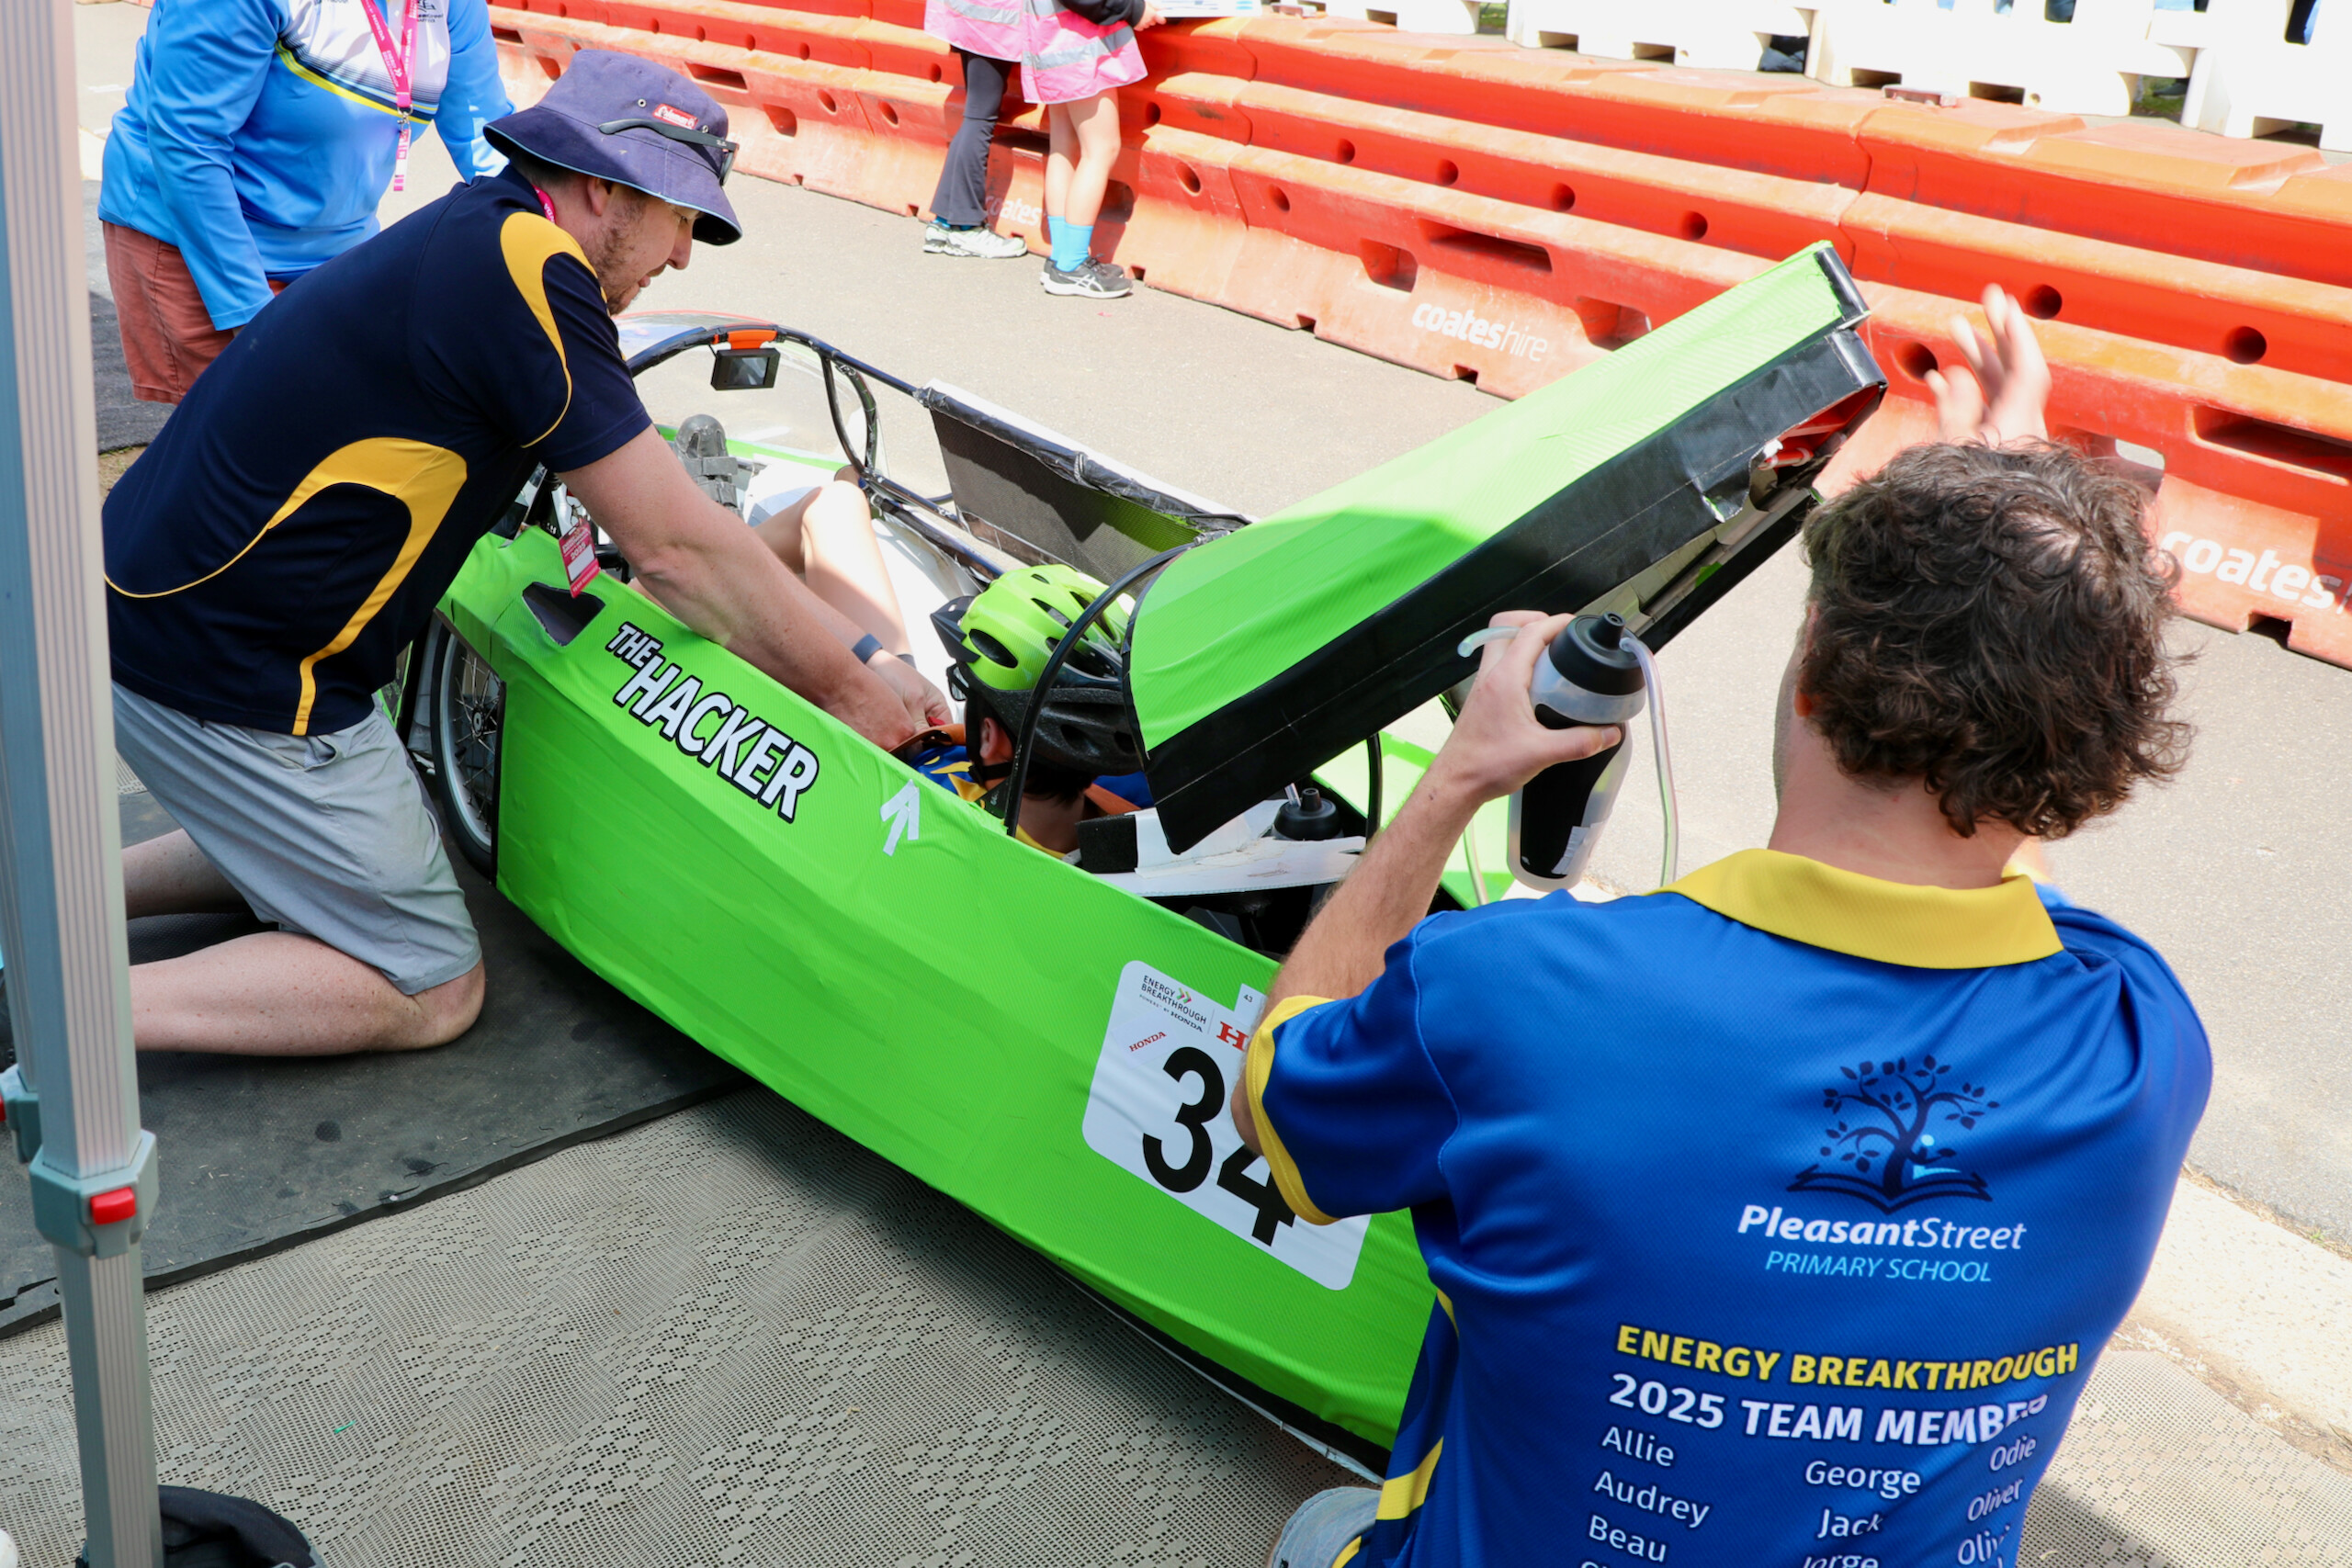
Both vehicles did very well in the 2025 race, getting their best results ever. Whether that has anything to do with our modifications is hard to meausure, but we're happy to take credit for it! In all seriousness, feedback from the children was amazing and they all loved the upgrades. We spent some time around the pits with the children and they were very open about how much nicer it was to ride in the vehicles now, how great the cooling was, how fun it was to be able to compare HUD stats with each other, and more.
These were very succesful prototypes that taught us a lot about what is needed going forward, what could be done better, etc.
2026 - Stepping it up a level
For the next season, we decided to break the modifications up into distinct categories as "upgrade kits" that can be installed onto any similar human-powered vehicles, turning it from a bunch of hacky prototypes into plug-and-play upgrades that other teams can use too. This also makes it easier to design each kit as a holistic complete upgrade package that performs a specific function and can be developed independently and iterated over time.
The packages/kits we settled on for now are:
- Steering Relocation Kit to completely move the steering underneath the vehicle
- Electronics & Sensor Kit with real-time GPS and 4G modem for remote monitoring
- Removable Tail Kit for better repair/maintenance access
- Pit Dashboard Kit with real-time GPS tracking, crash detection, and lots more for the pit crews
Steering Relocation Kit
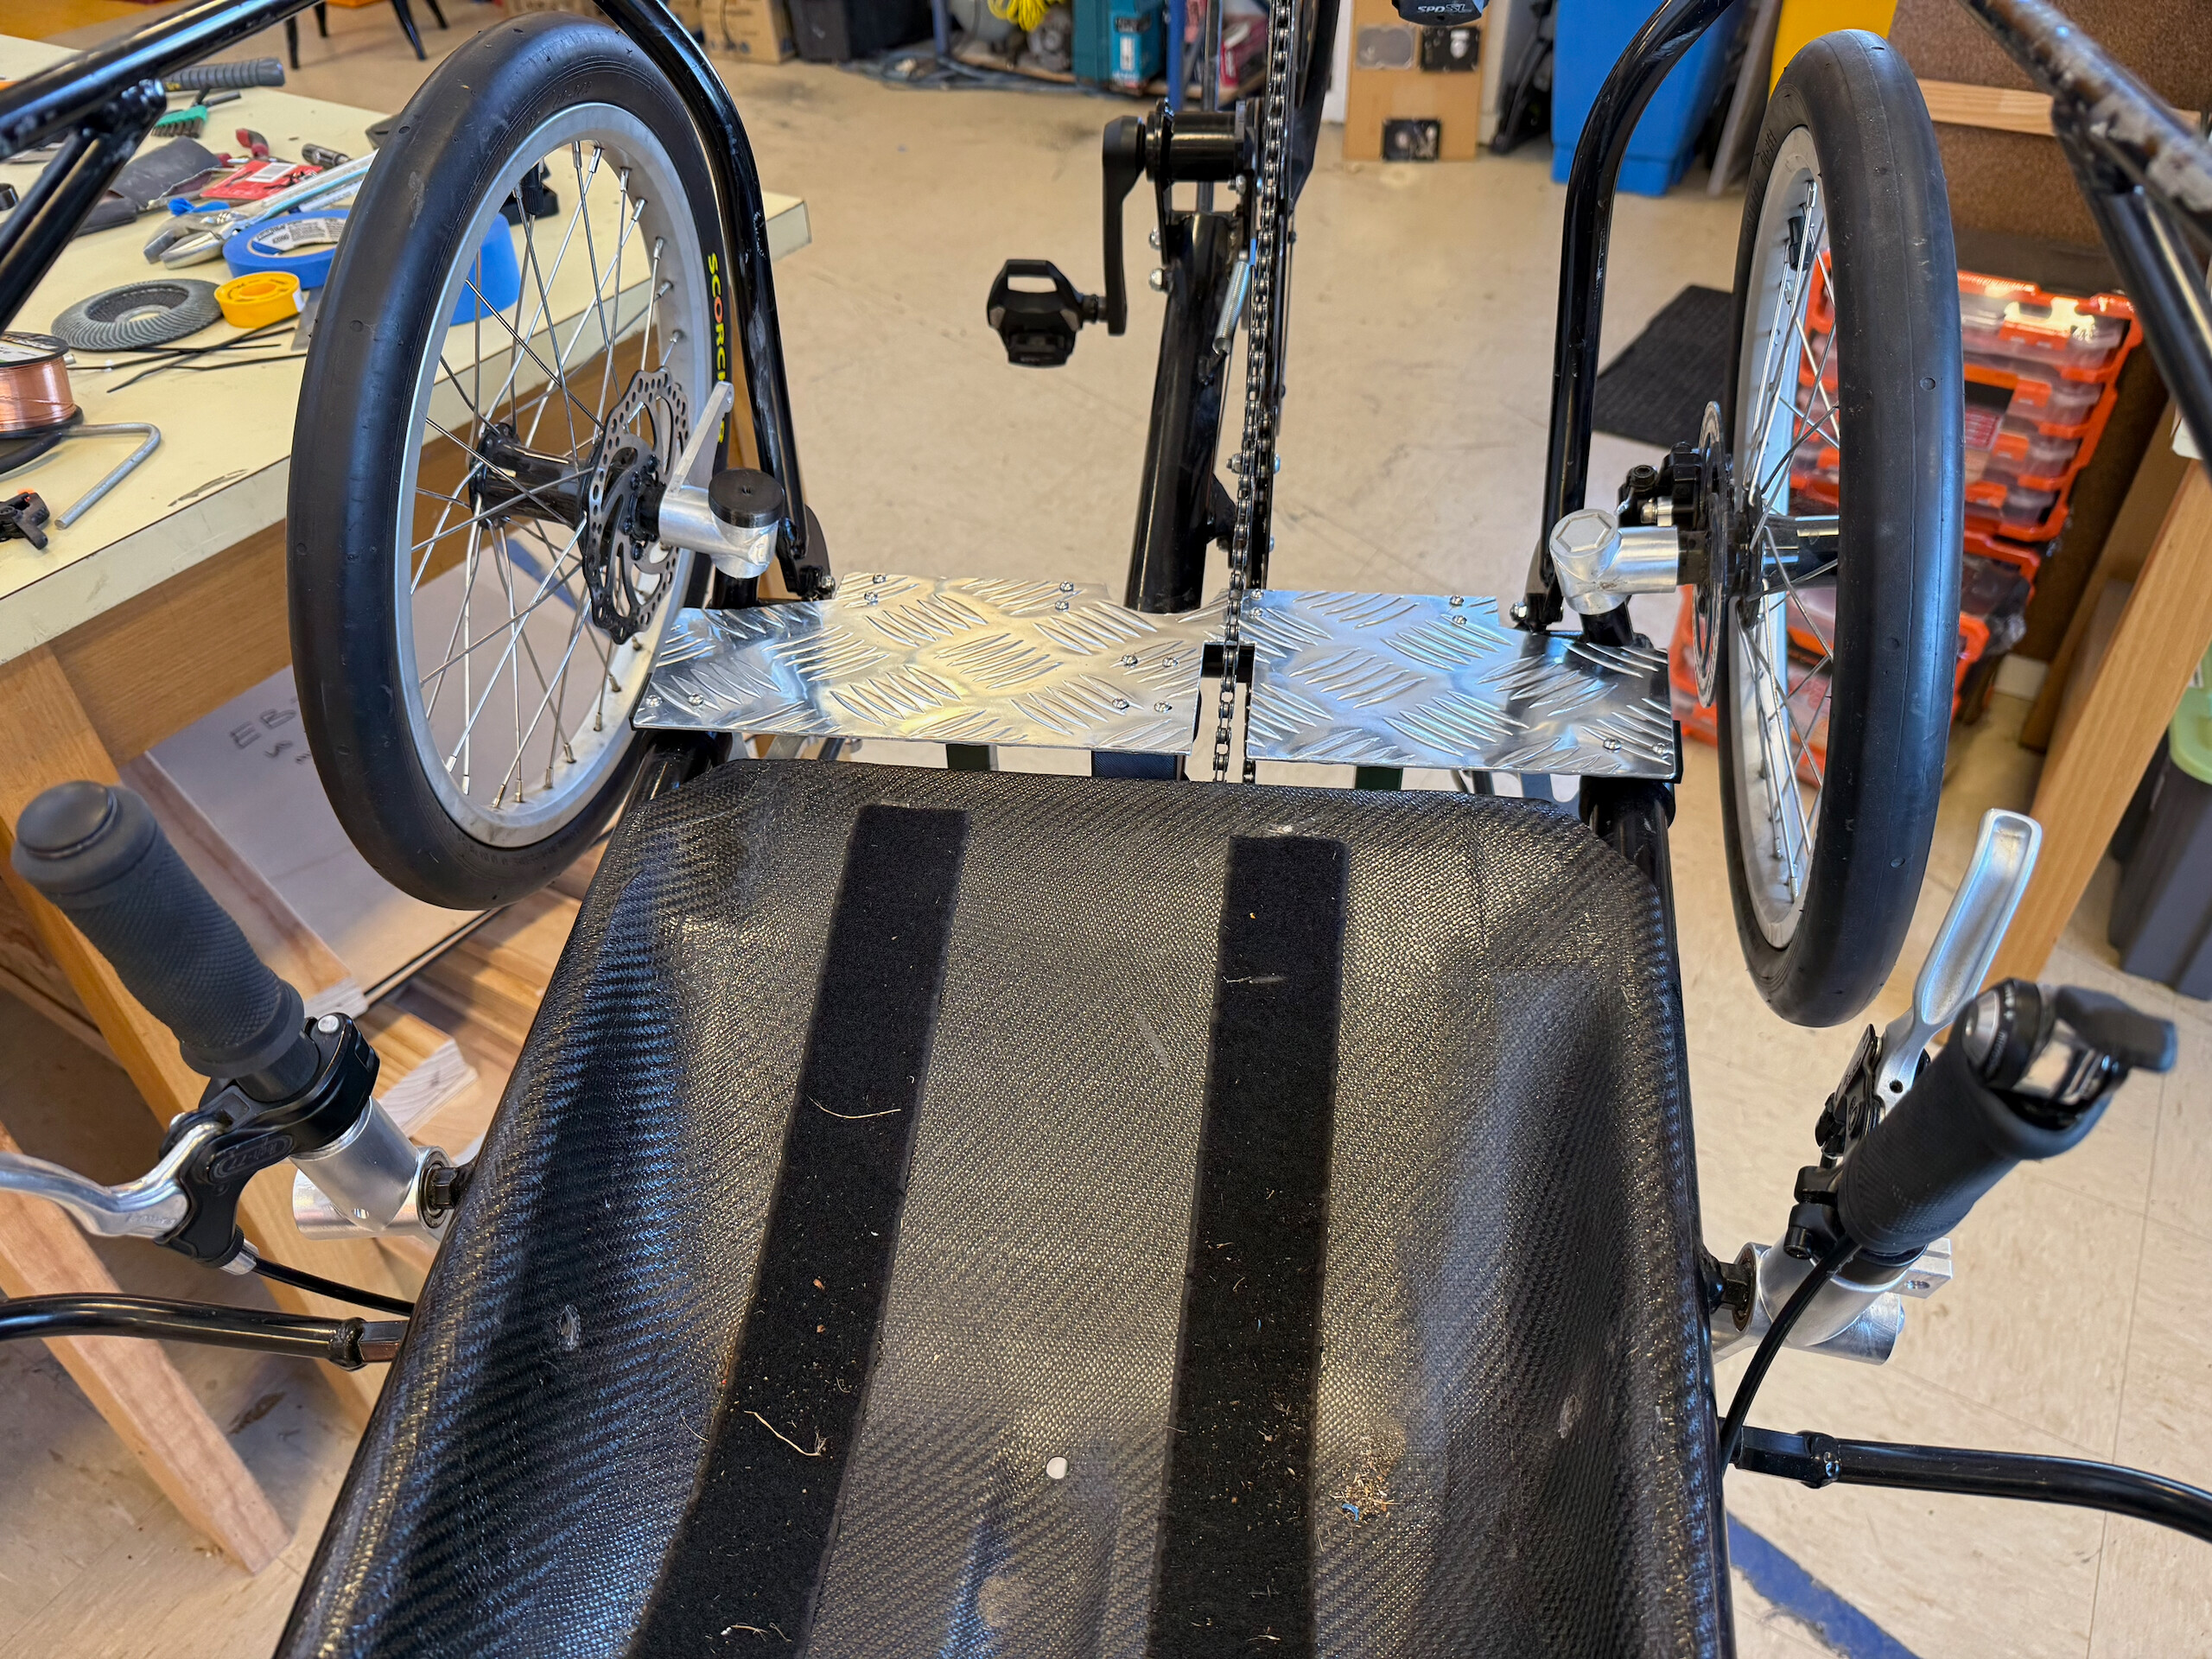
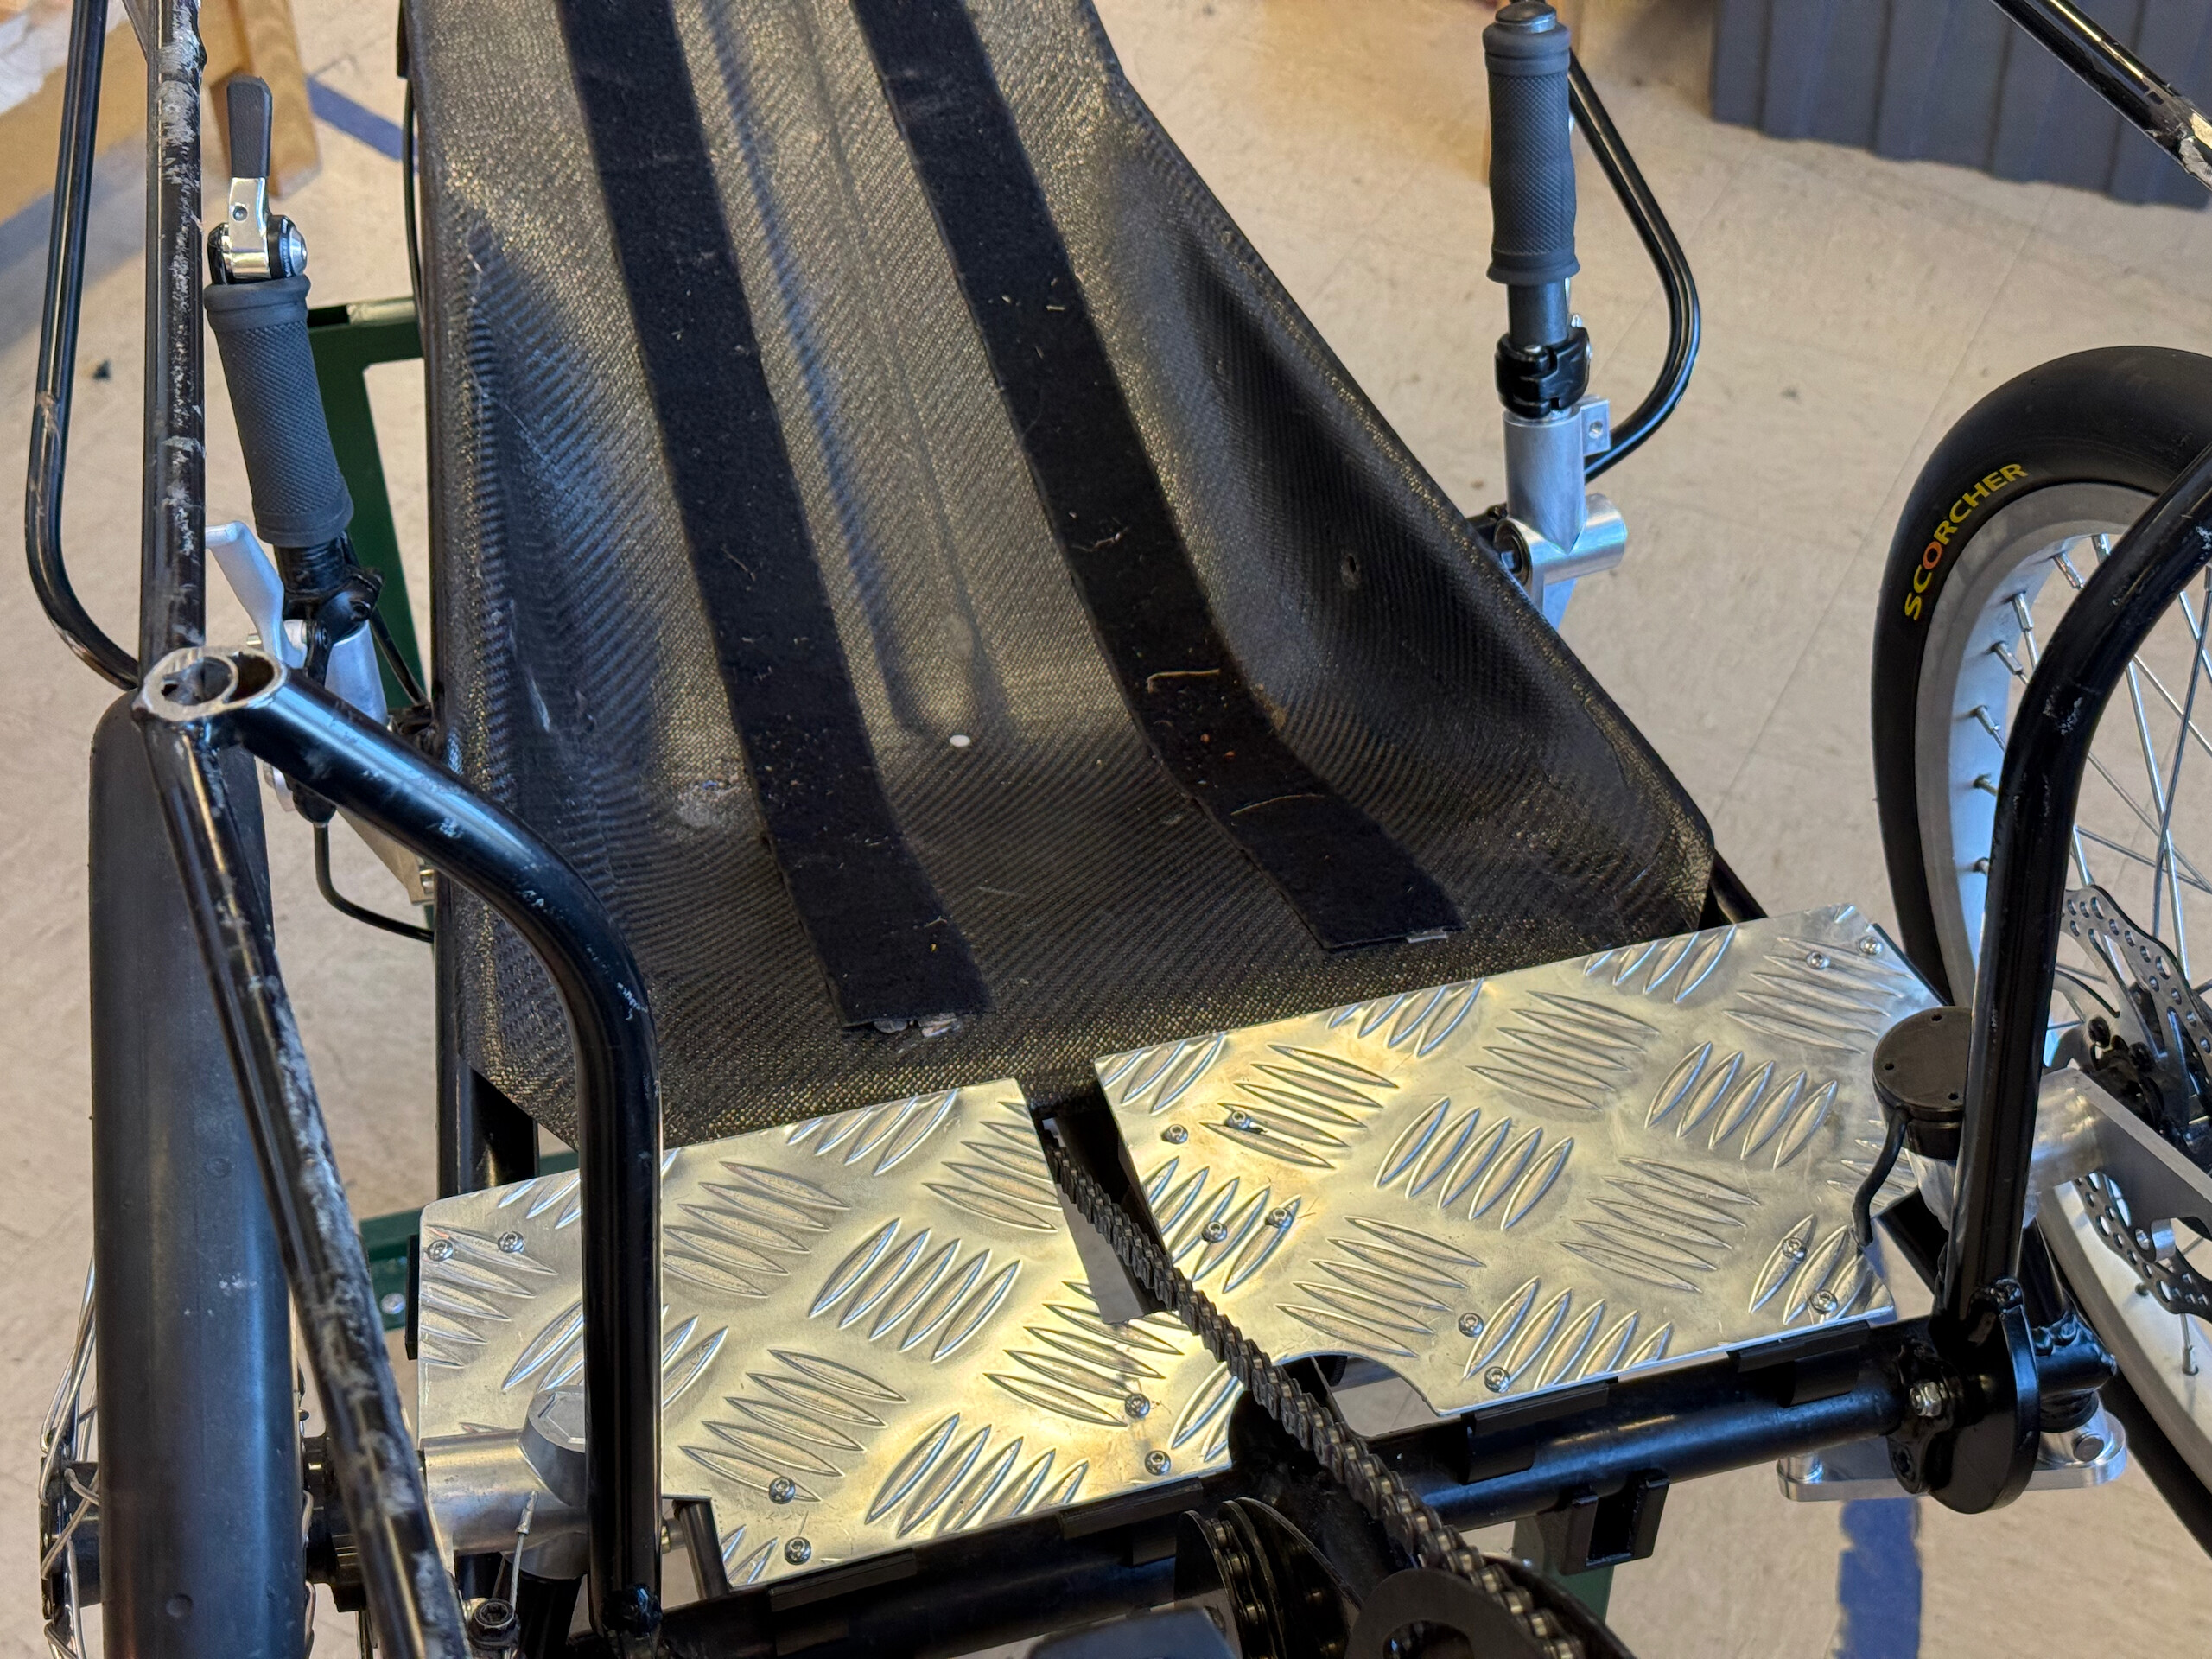
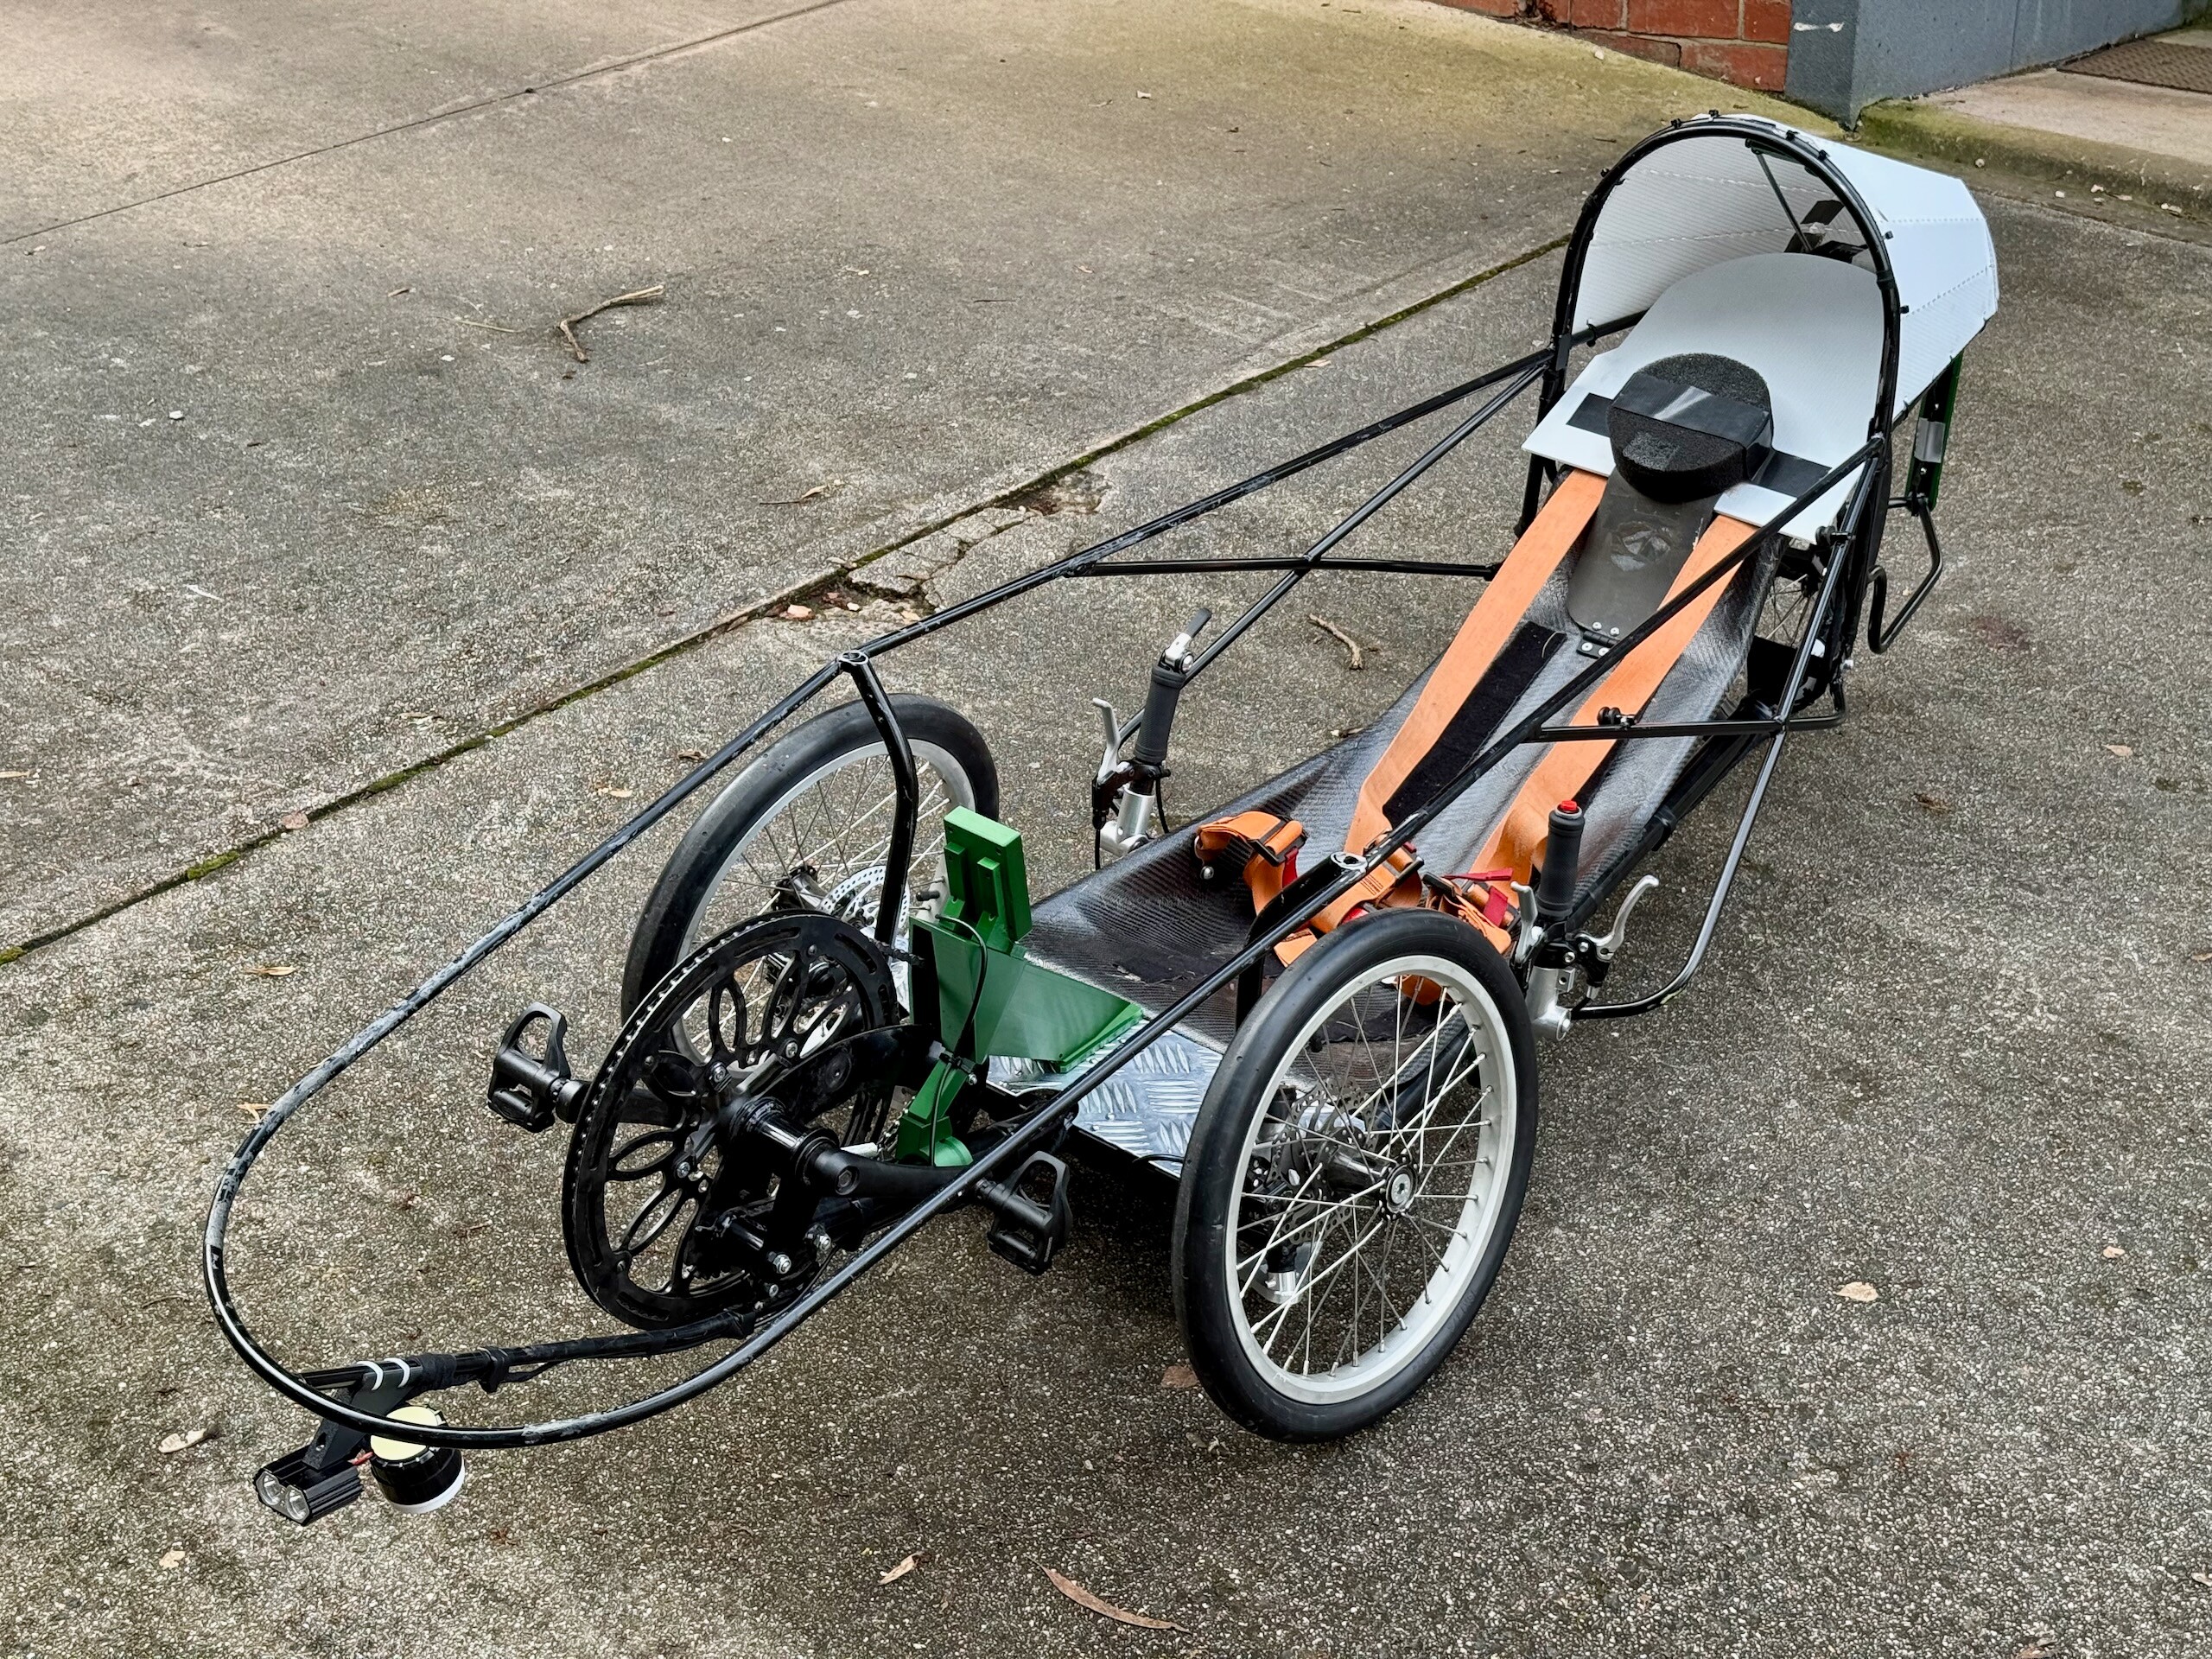
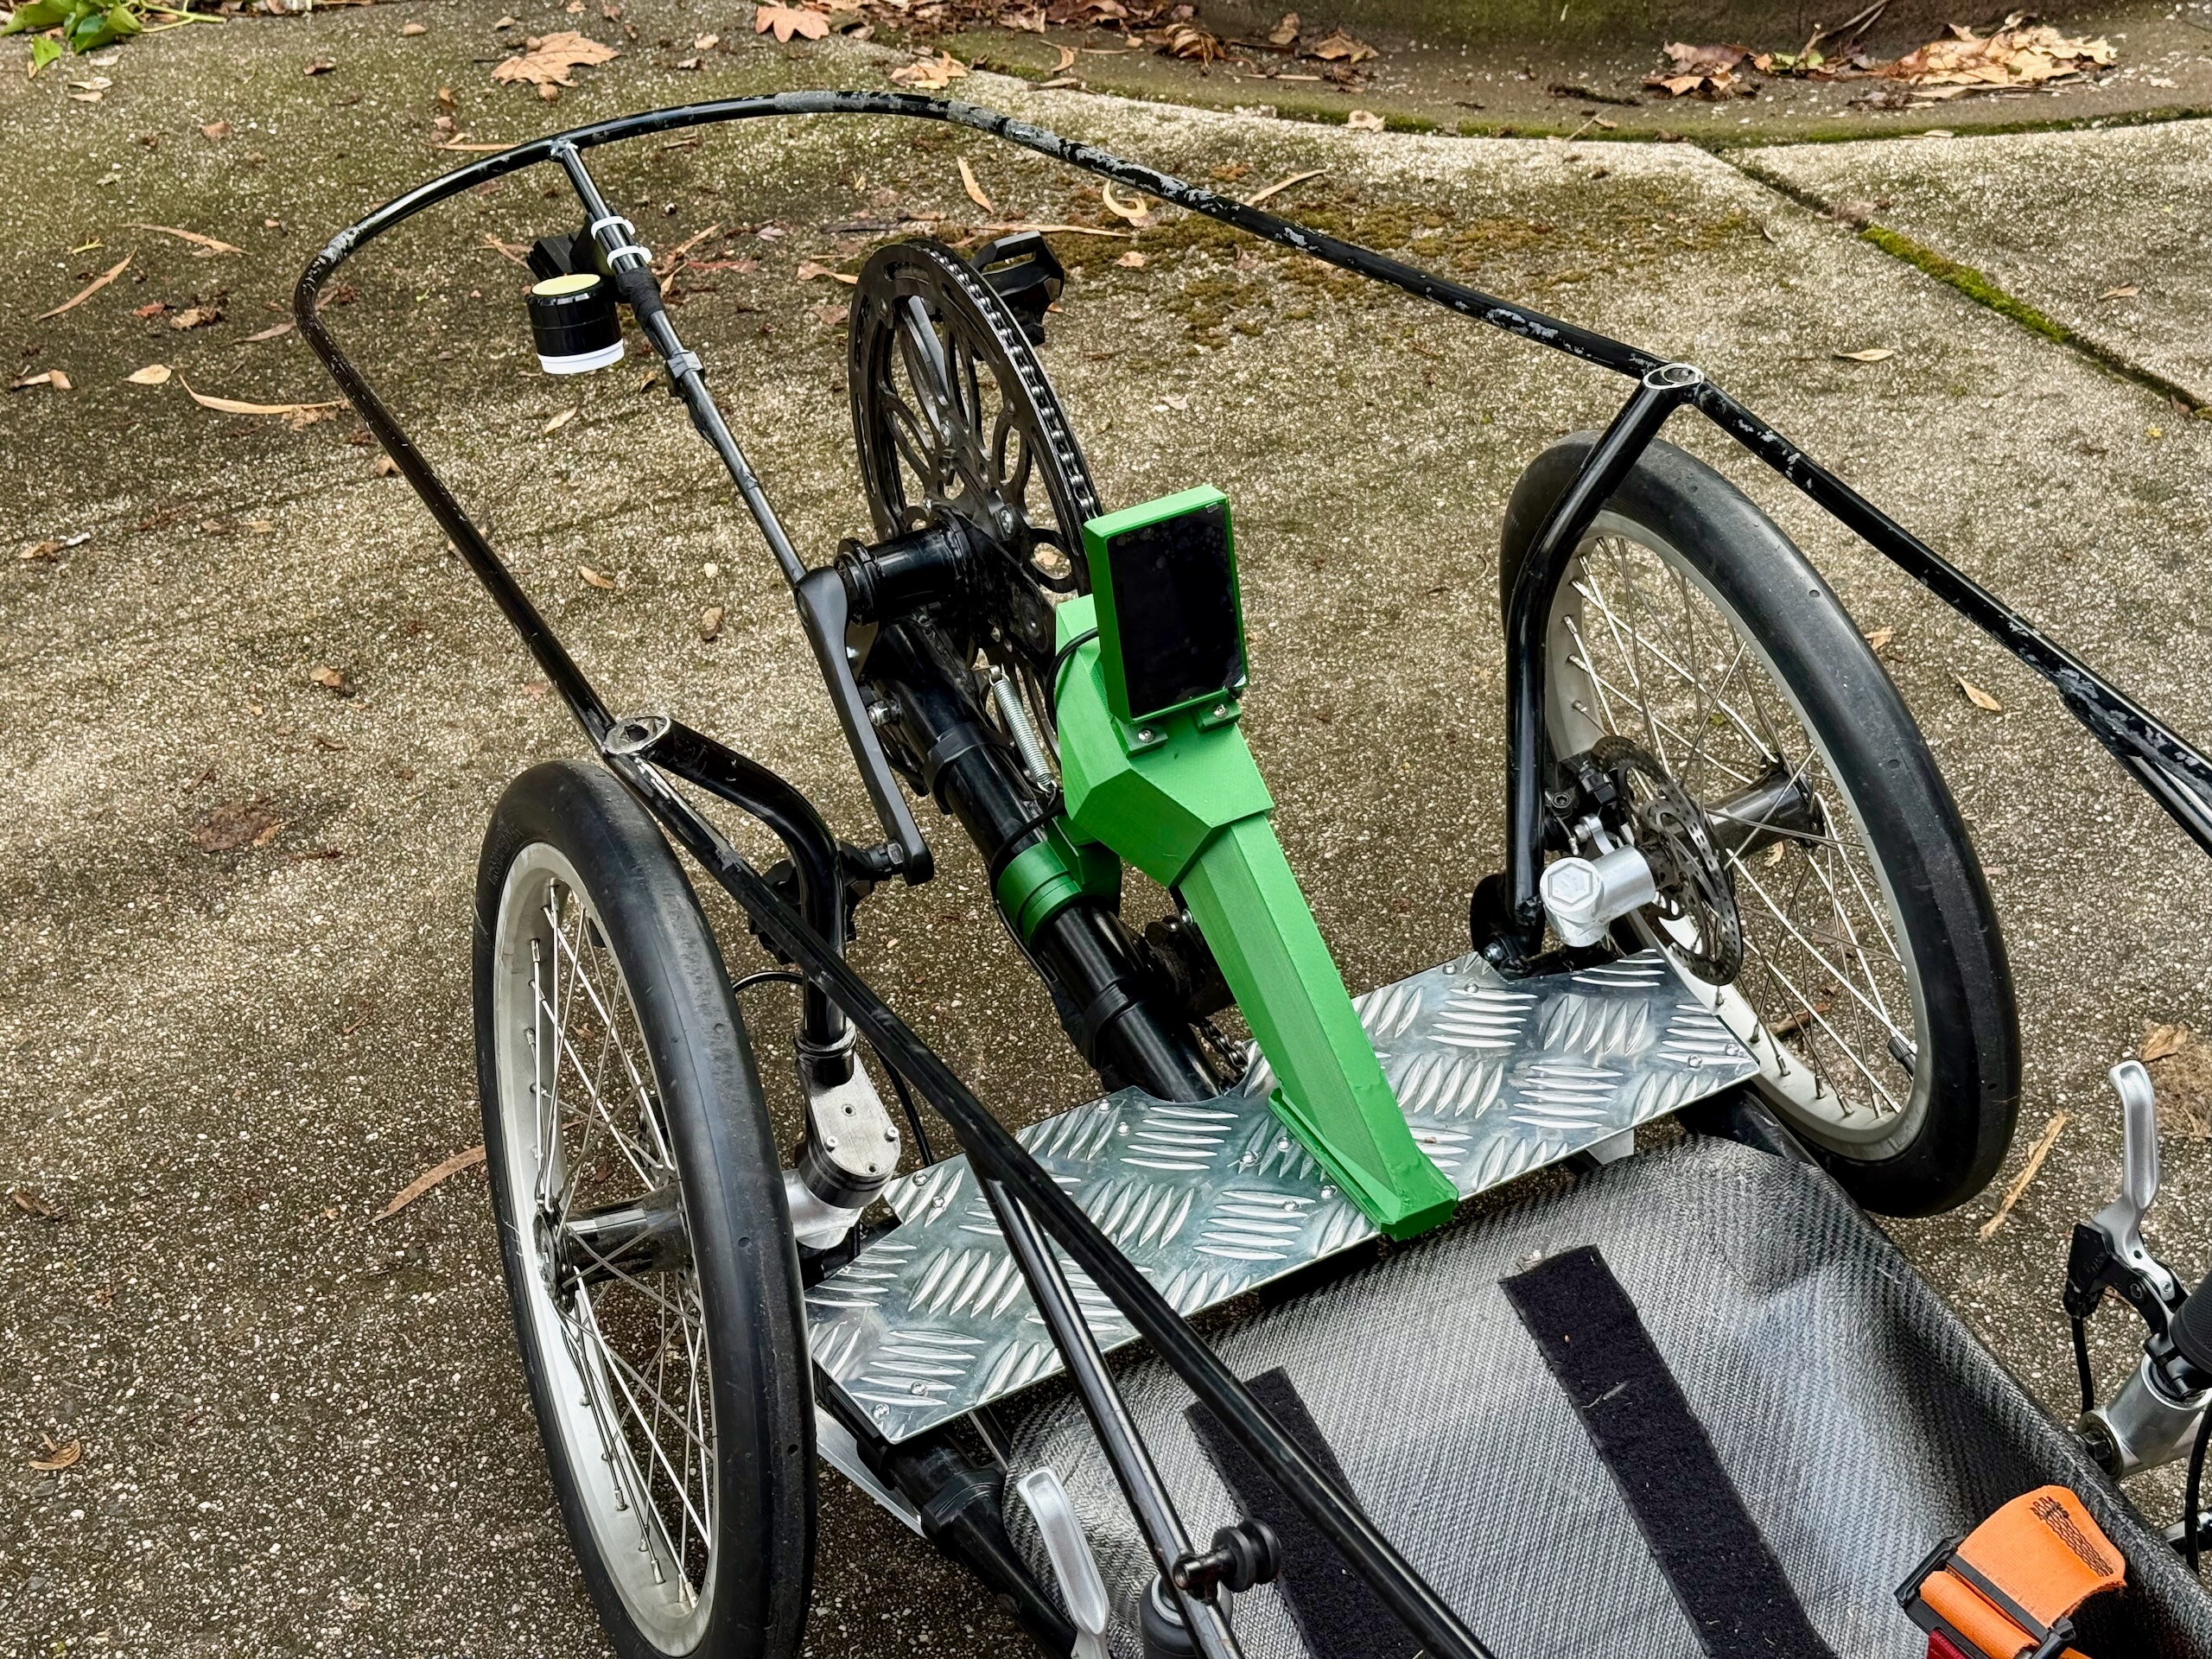
This is the most complicated thing we'd done yet for this project, engineering and developing a steering relocation kit that consists of custom-designed 5-axis CNC billet aluminium steering arms and linkages that relocate the handlebar links and steering knuckles underneath the vehicle, as well as replacing the actual handlebar brackets with new CNC machined aluminium versions that suit. This is a massive quality-of-life upgrade for the children riding, as the linkages being above the chassis and against/underneath their legs meant it was constantly in their way getting in/out of the vehicle quickly during pit stops, and also regularly interfered with clothing and limbs.
First we designed and 3D printed prototypes of the new steeering system to test it all fits/works and that the ratios and angles all line up. We then got the parts CNC-machined in billet aluminium and some of our members used our lathe to create new custom bushings and hardware to fit all the parts to the vehicle.
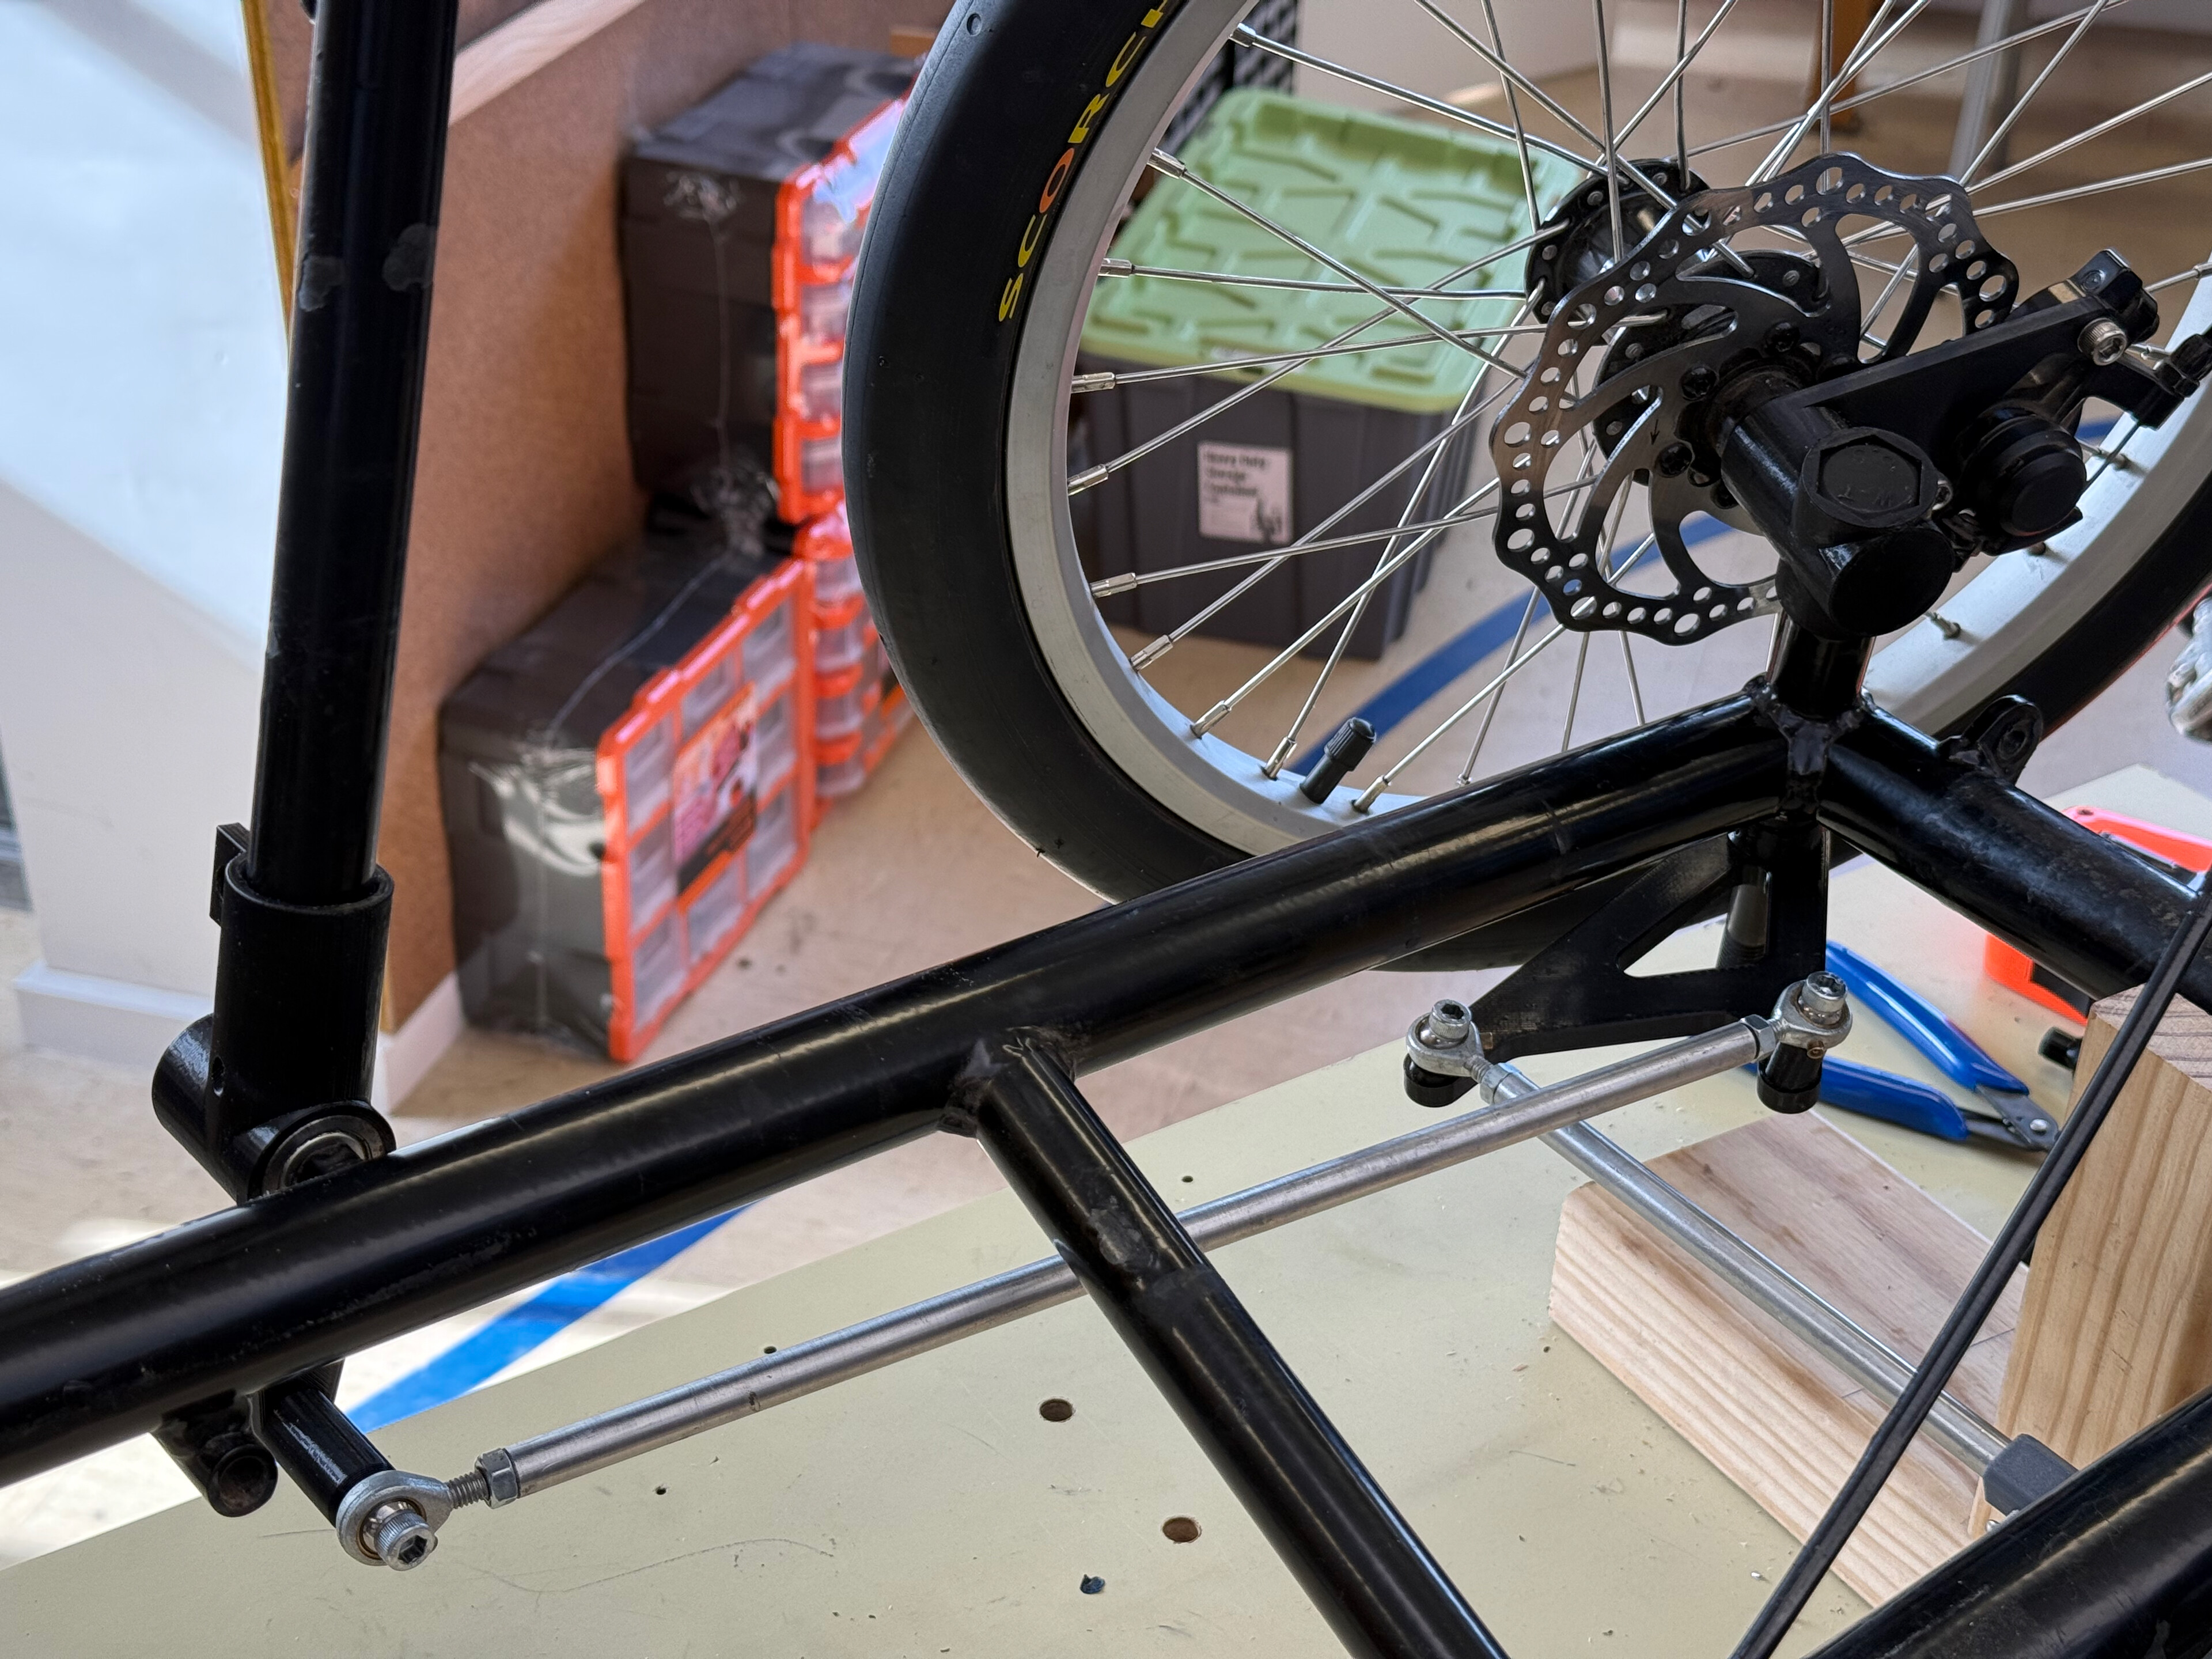
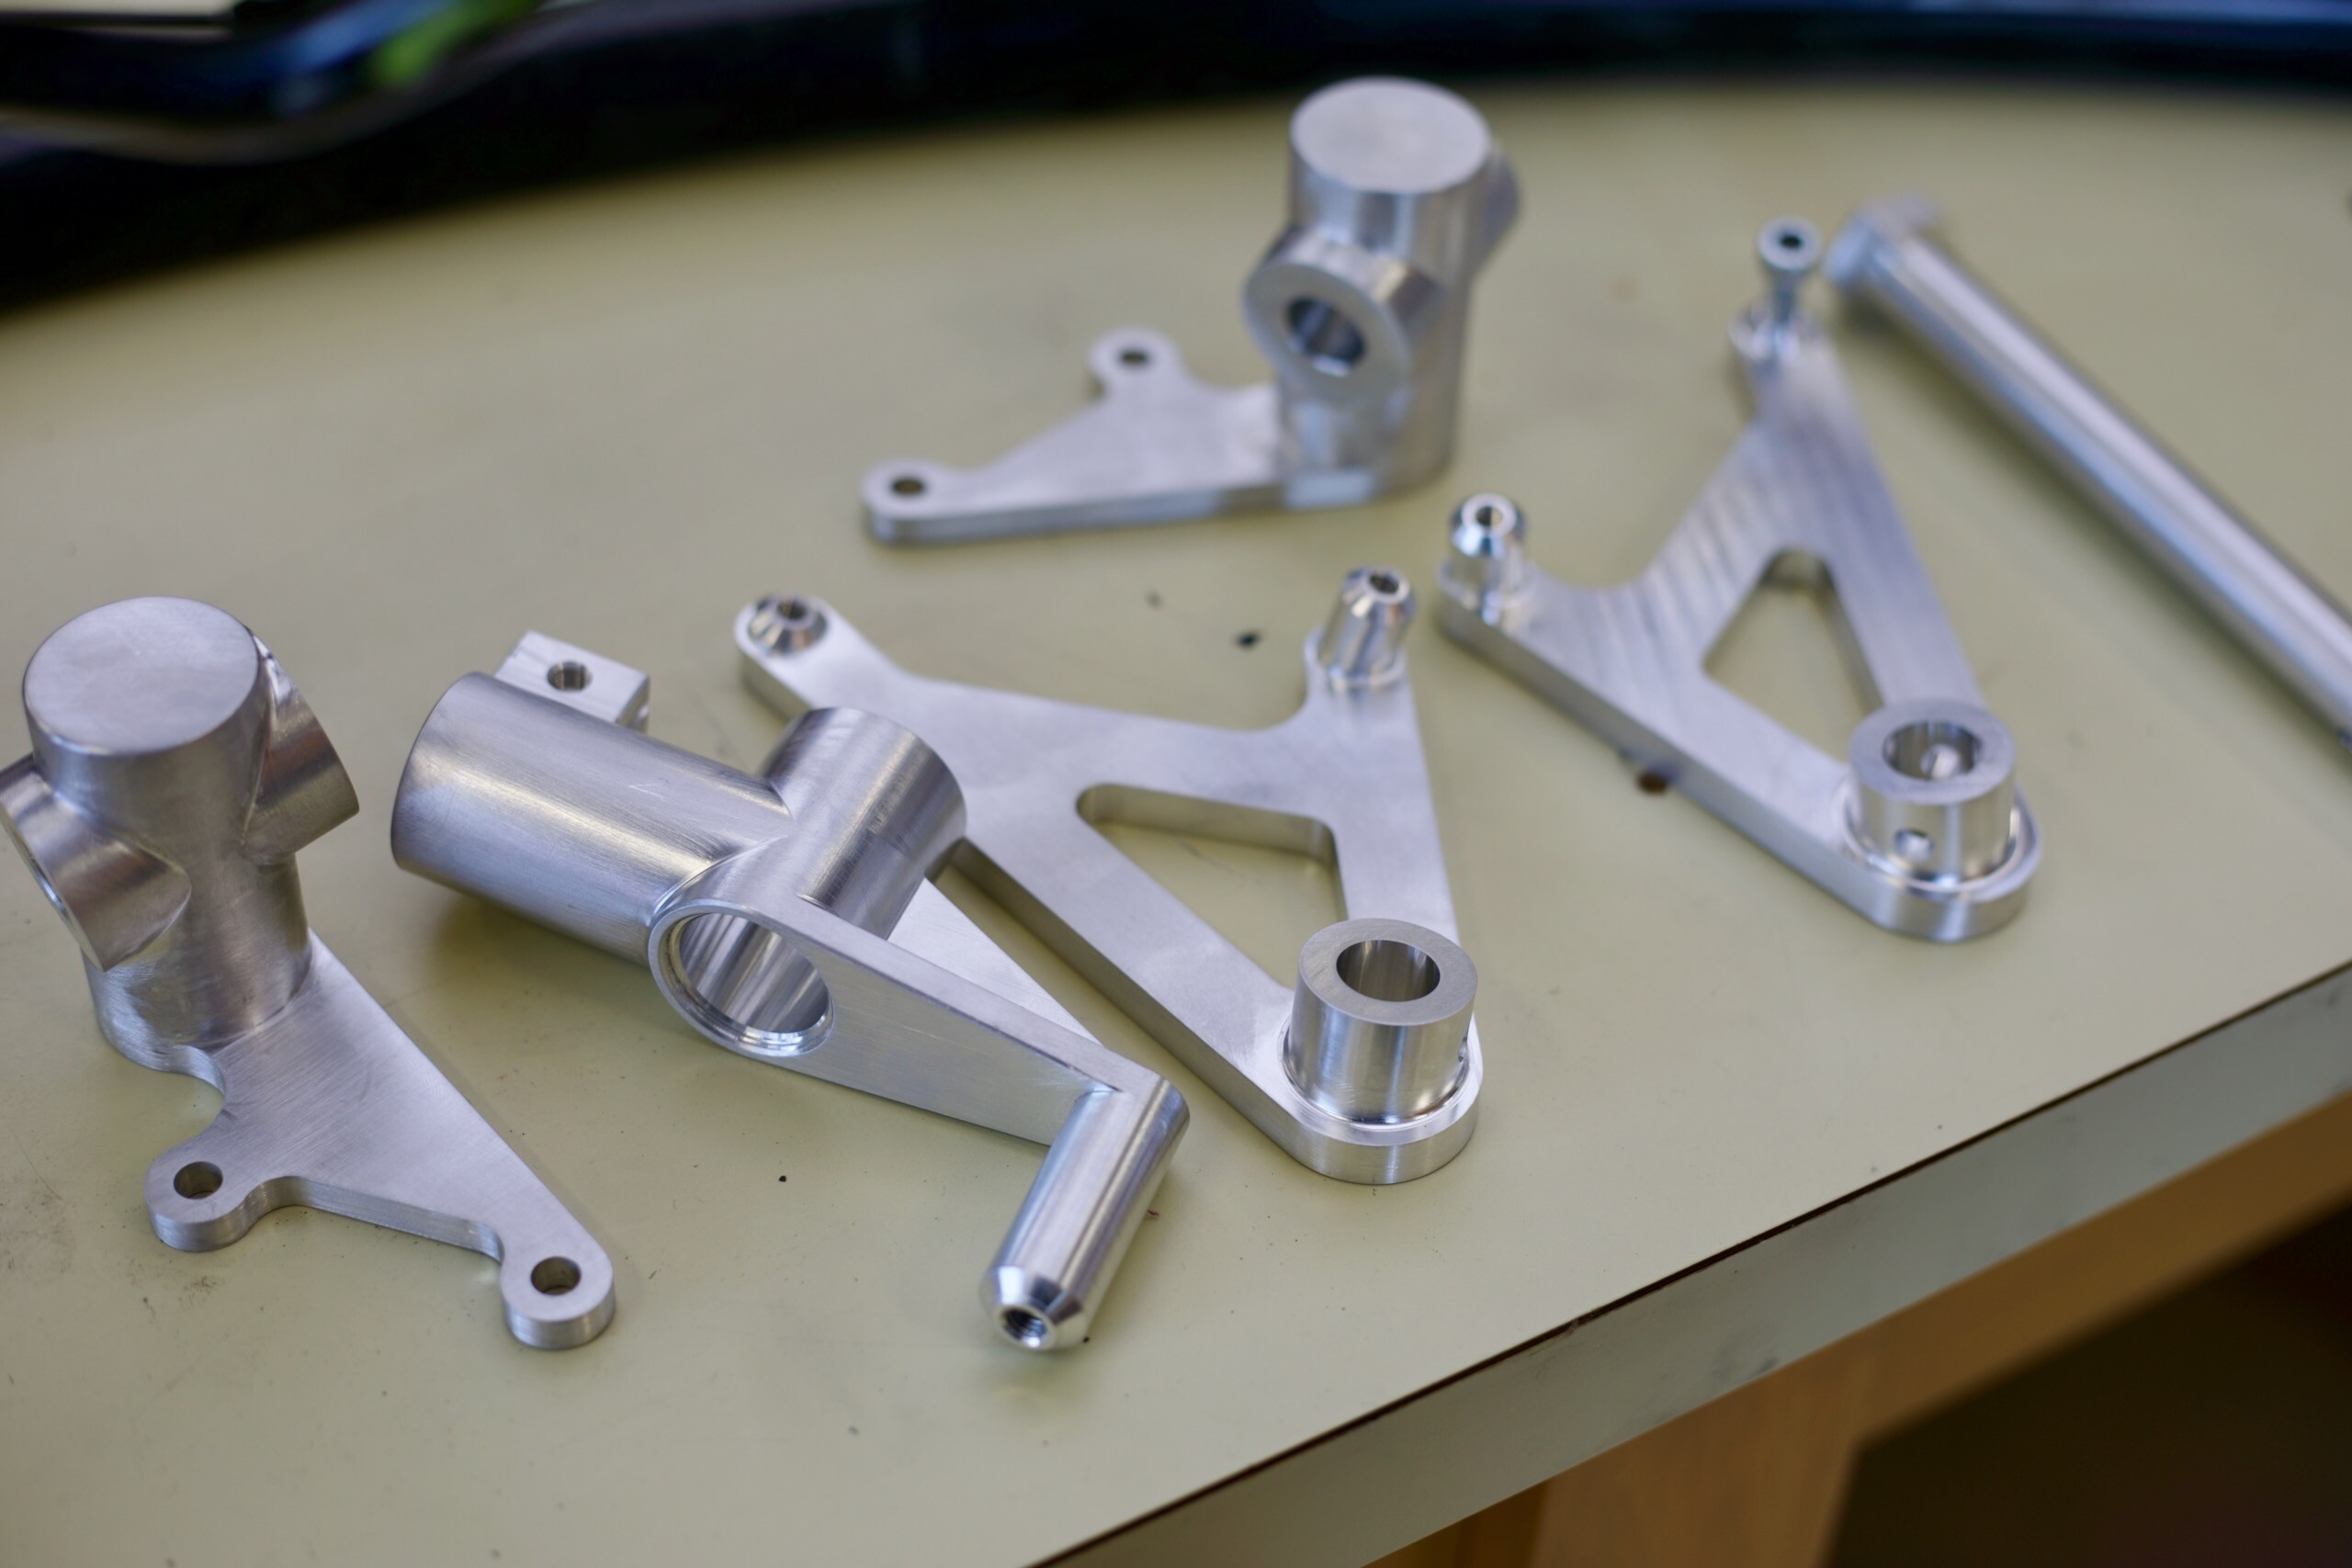
The relocation of all the steering parts under the chassis left the entire area in front of the seat empty, so we laser-cut a template for a foot-plate and then hand cut/filed it out of checkerplate aluminium as a place for the riders to step on when getting in/out.
Electronics & Sensor Kit
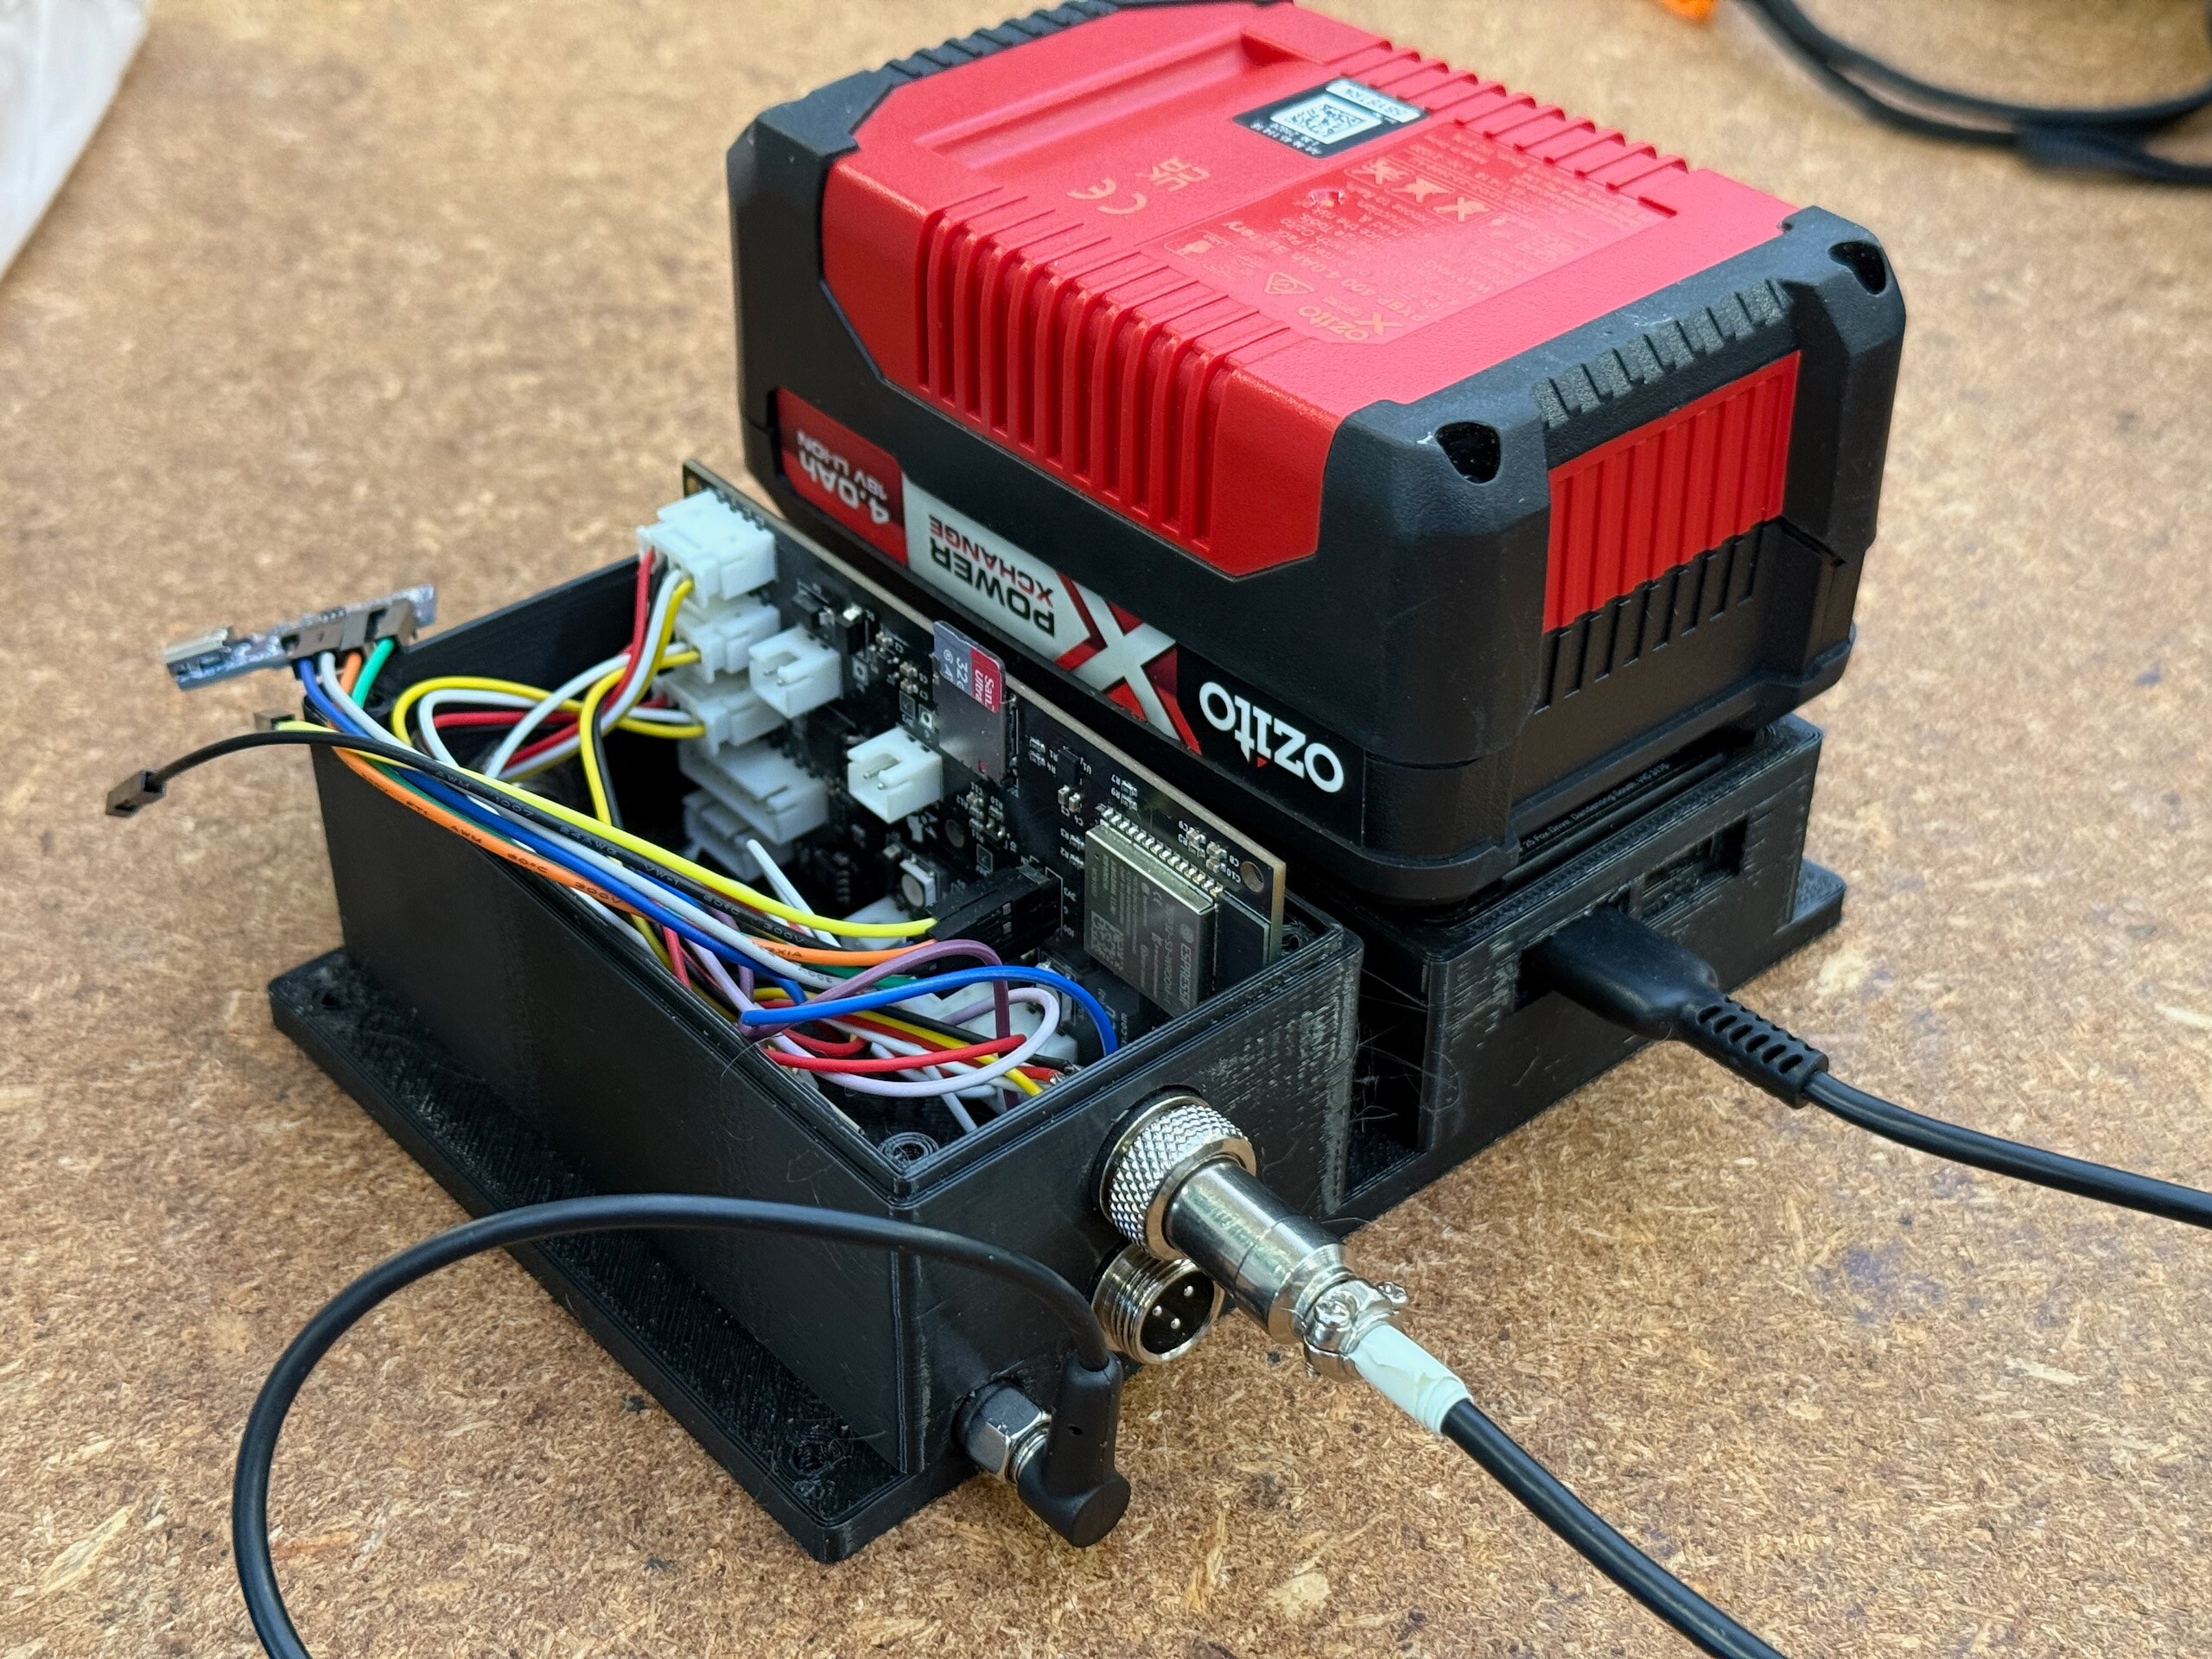
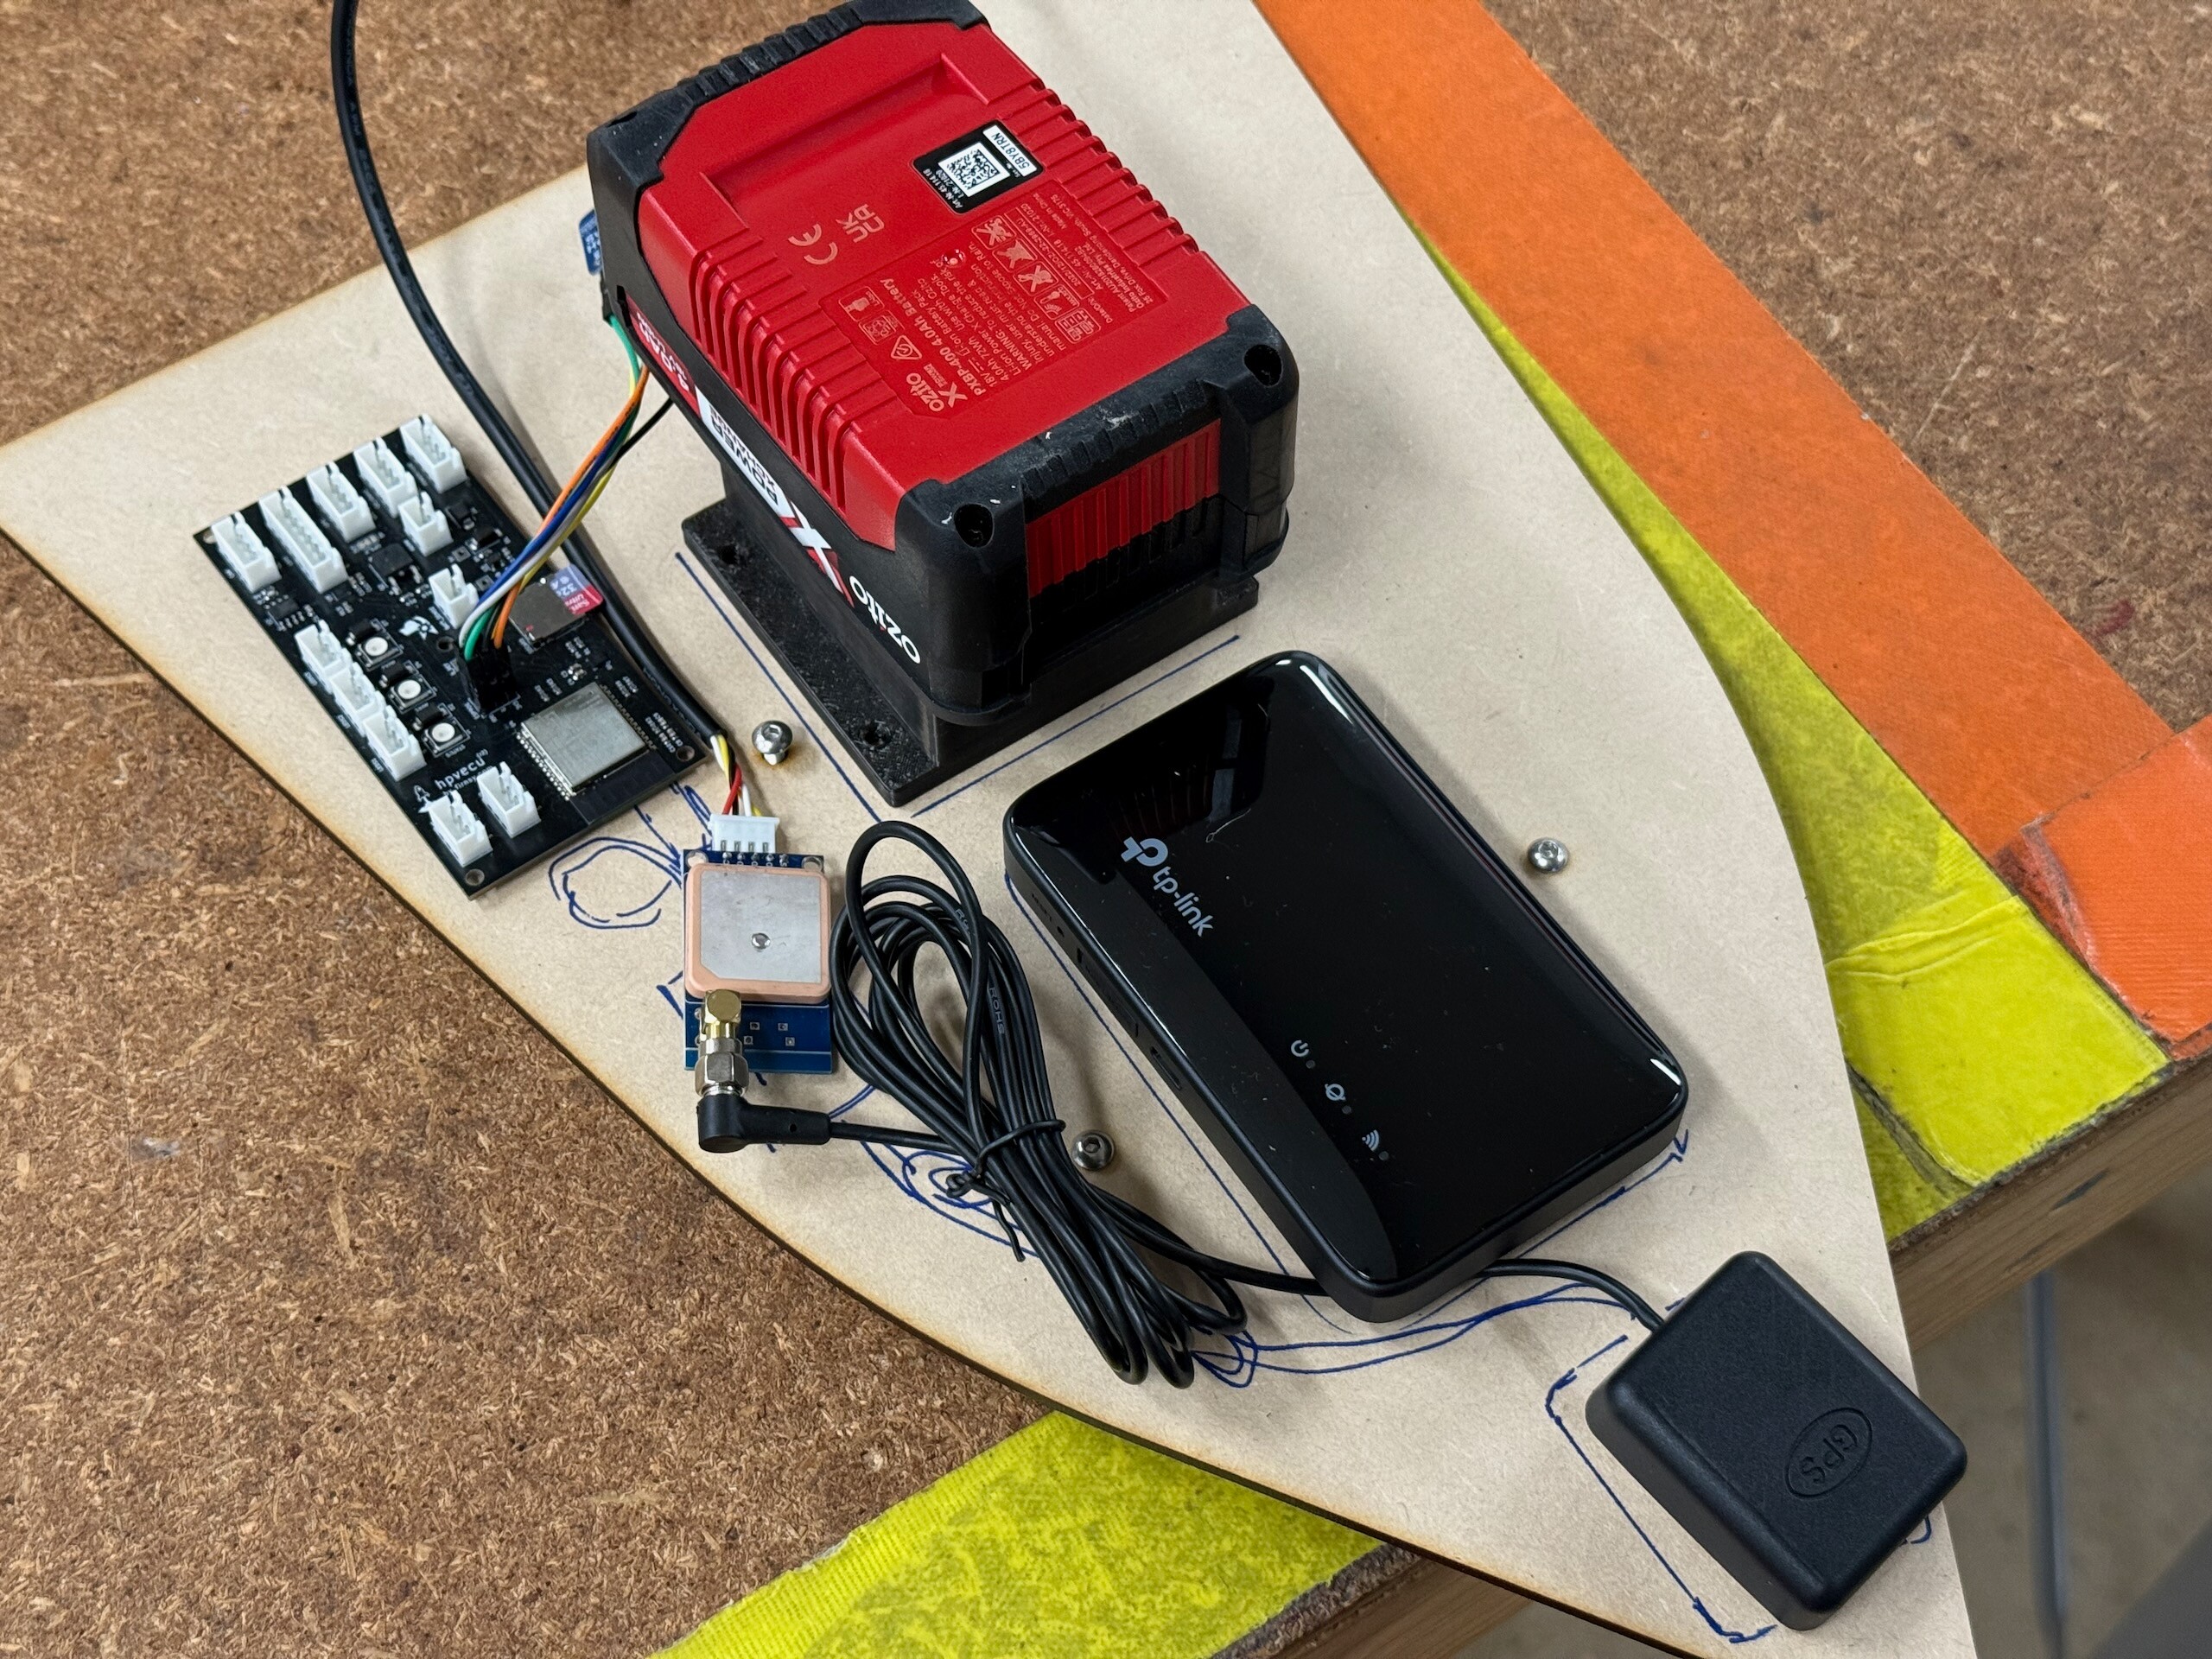
Based on what we learned from the first prototype, a new custom PCB was developed that adds a lot more sensors and a GPS module with external antenna. This will let us send live GPS tracking back to the pits as well as integrate automated lap timing, and along with the IMU and other sensors we can now do crash detection and lots more.
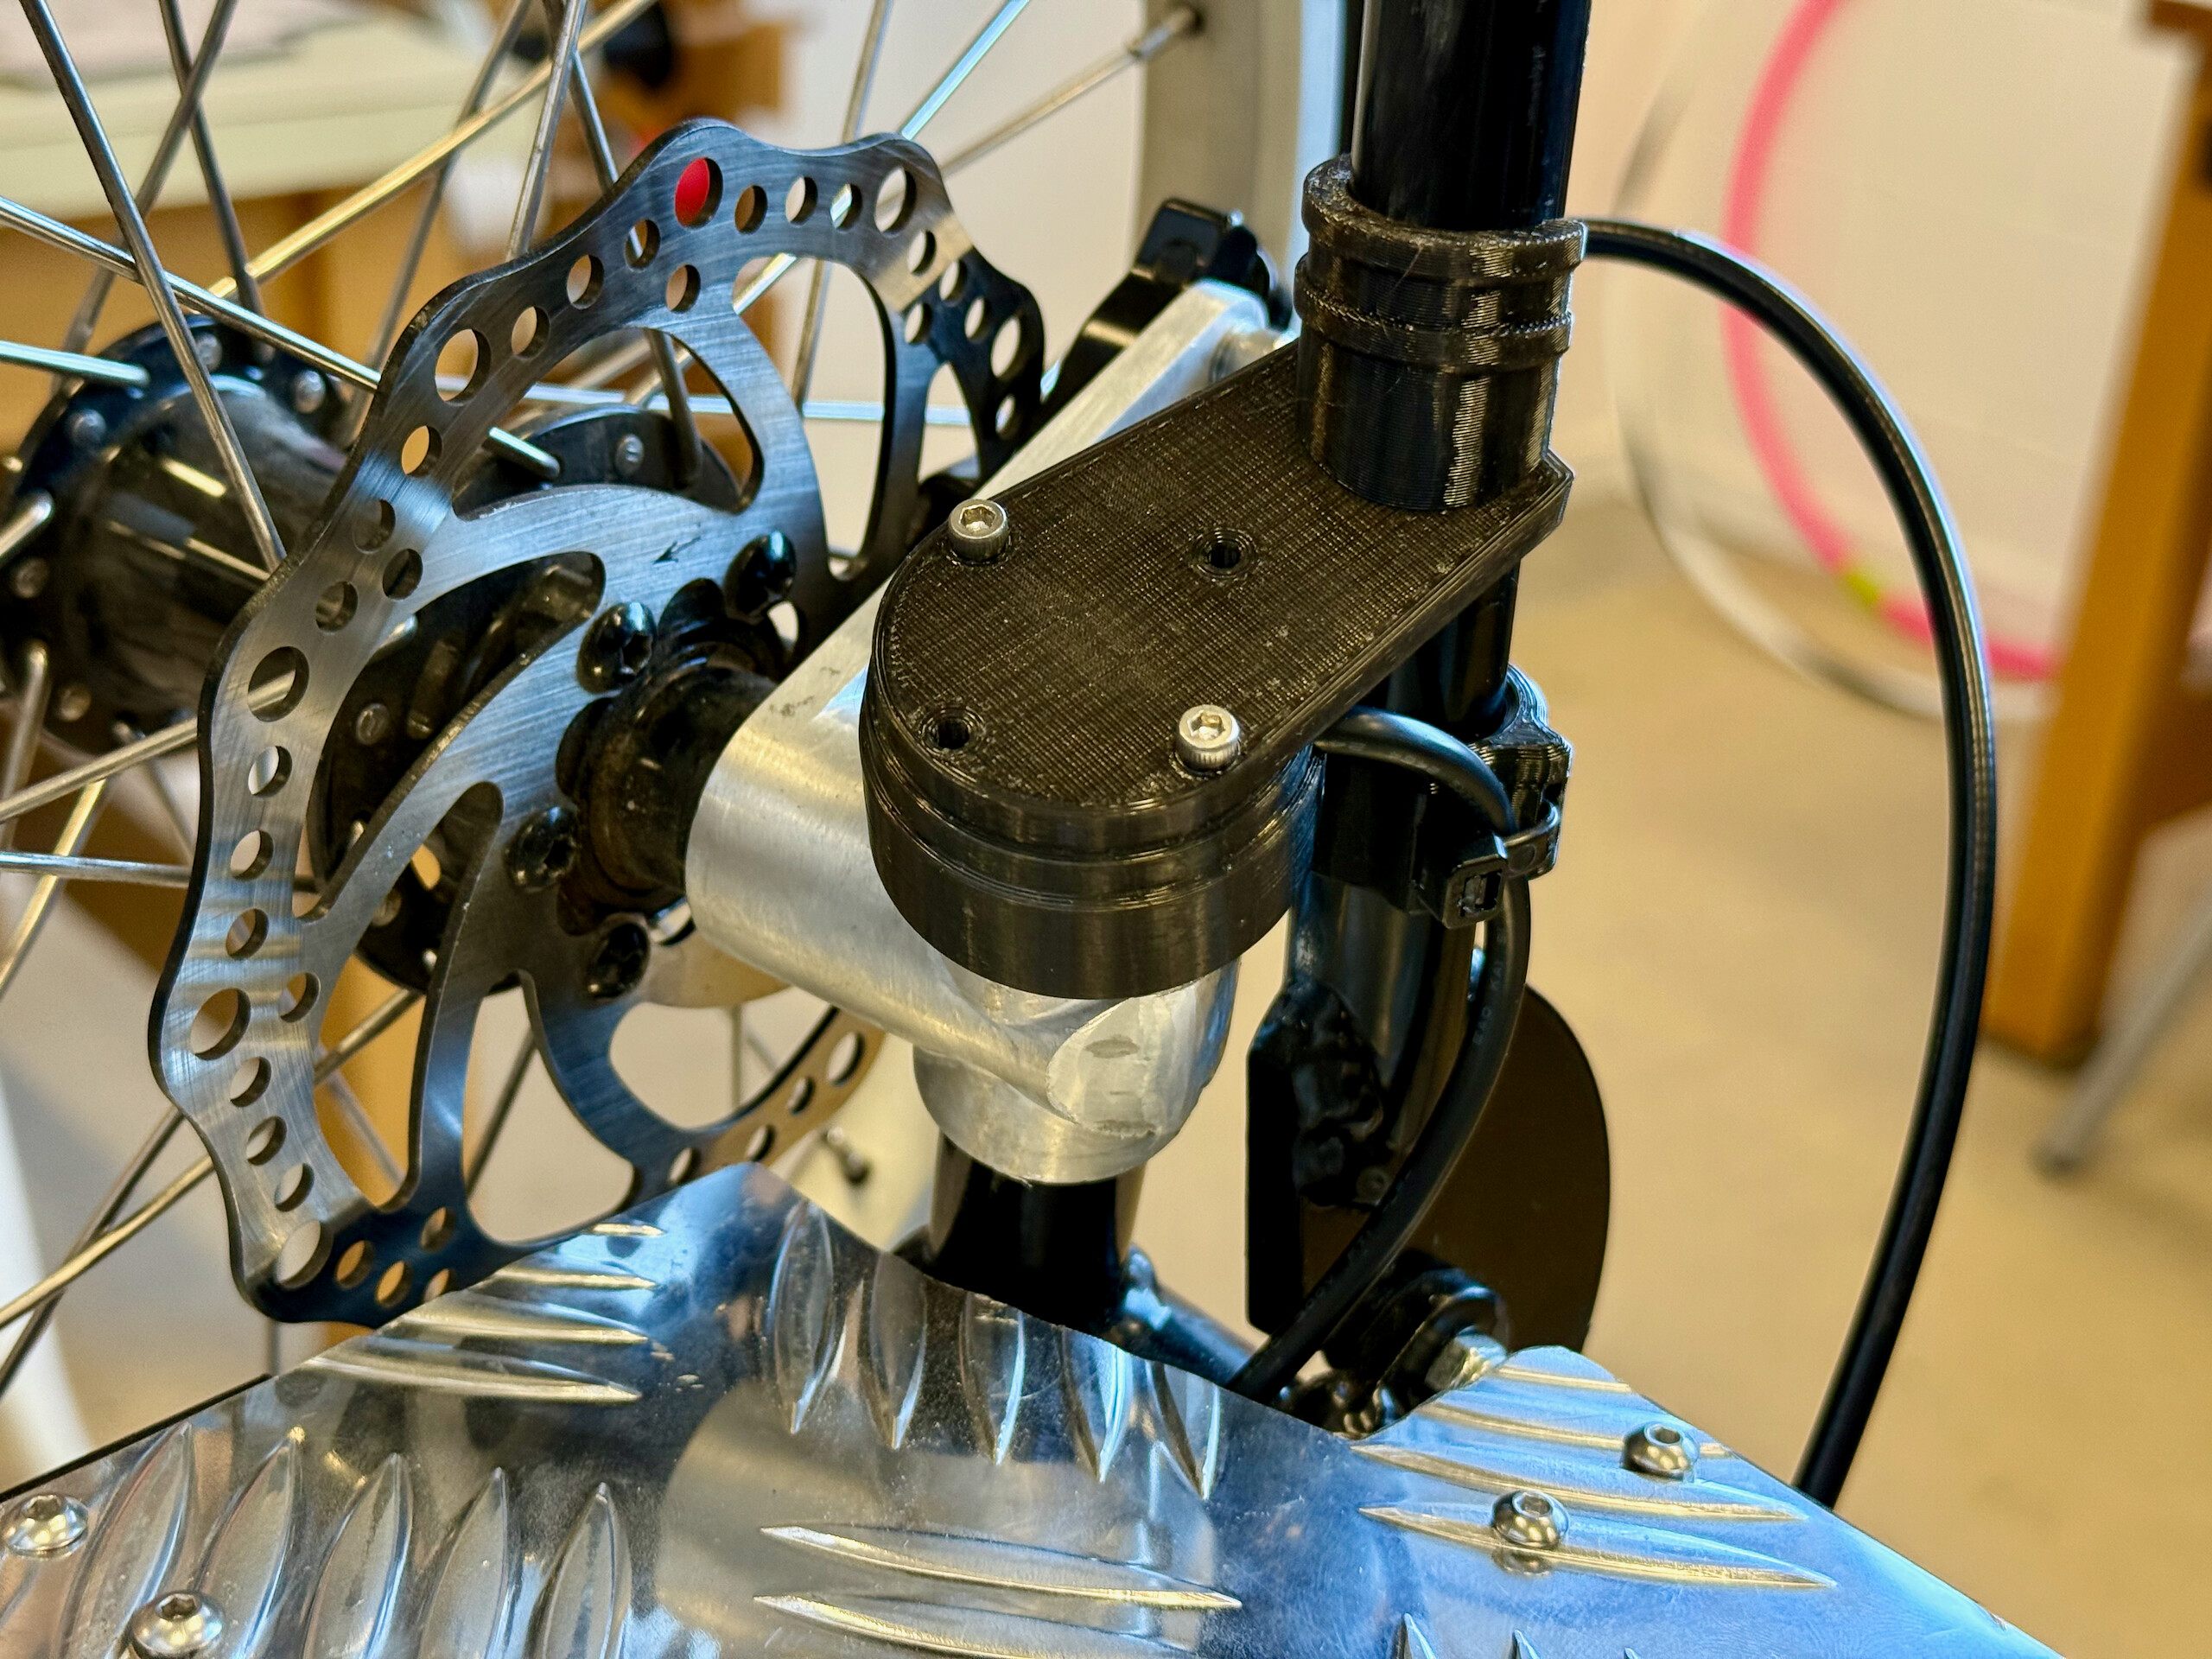
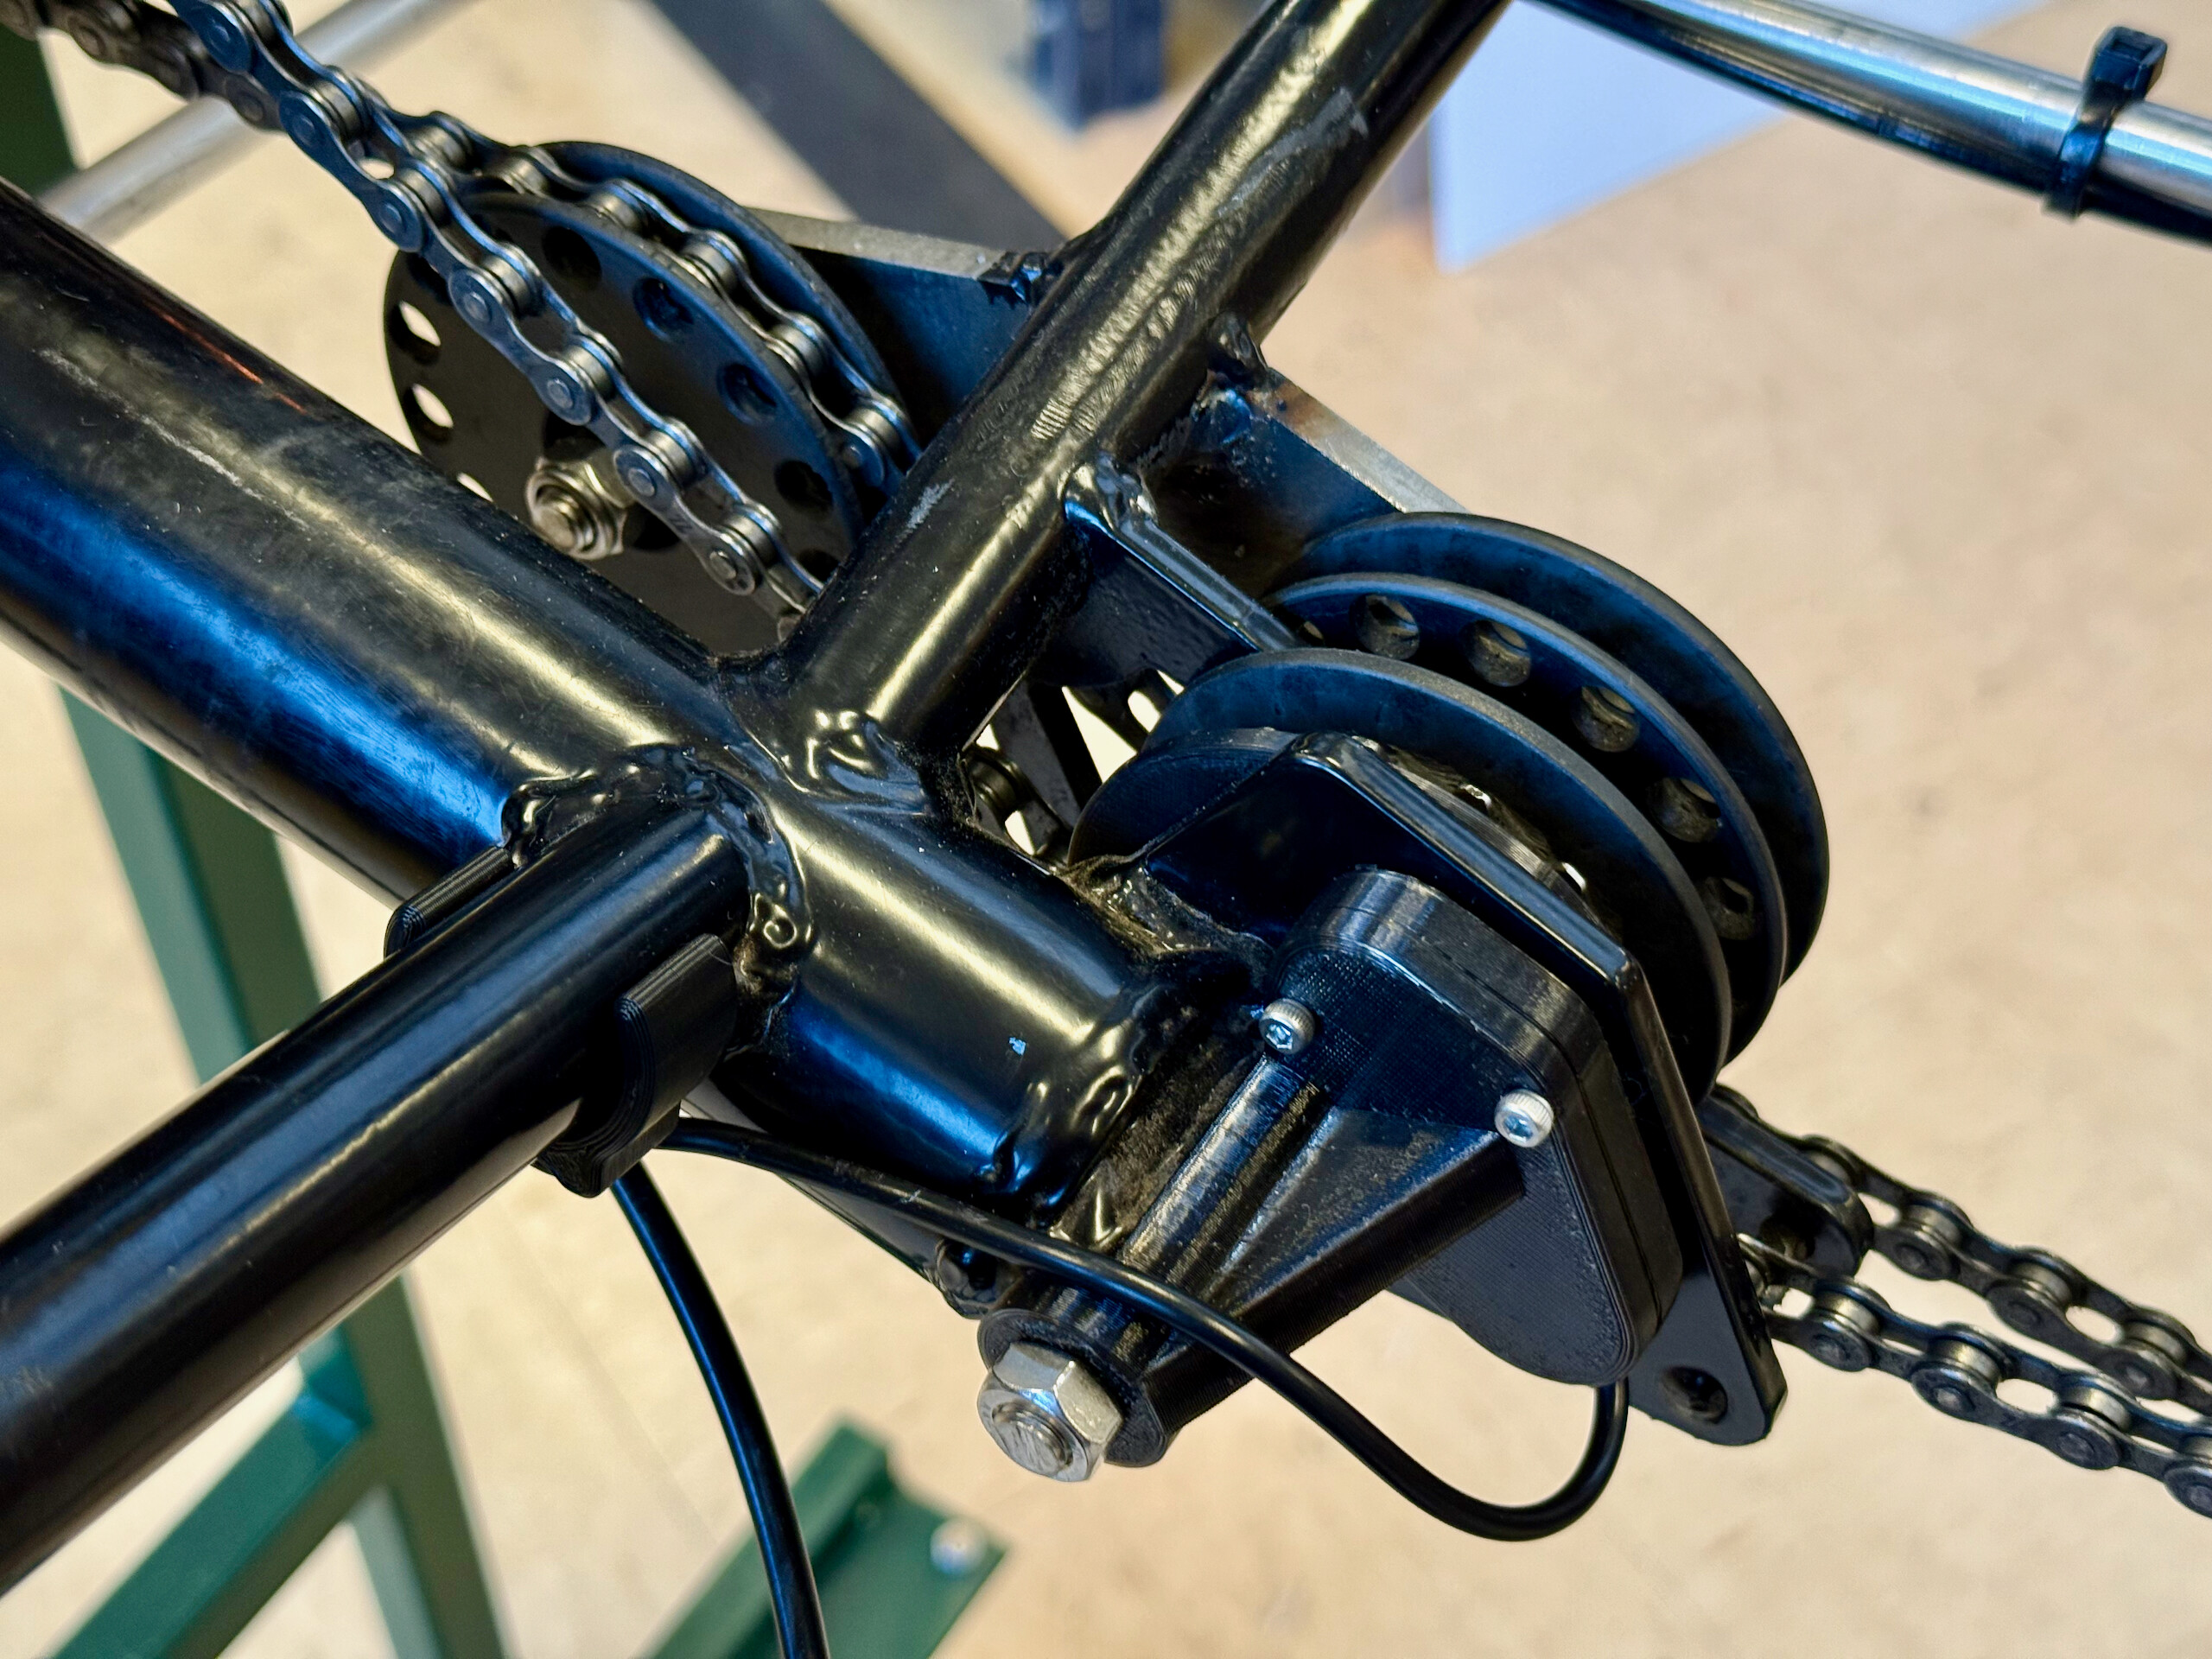
The new steering sensor is hidden in the top-cap of the new billet aluminium steering knuckle, and the speed sensor has been moved from the front sprocket to the chain tensioner sprockets underneath the seat, embedded in a module to keep it sealed and out of the way. Both of these are massive improvements on last year, hiding both completely away and yet doing the same job.
The chain tensioner itself is yet another mini-project in this project, helping stop the chain from dragging on the bodywork like it did in previous years. We fabricated some new steel brackets that are welded to the frame and allow adding another gear to redirect and tension the chain.
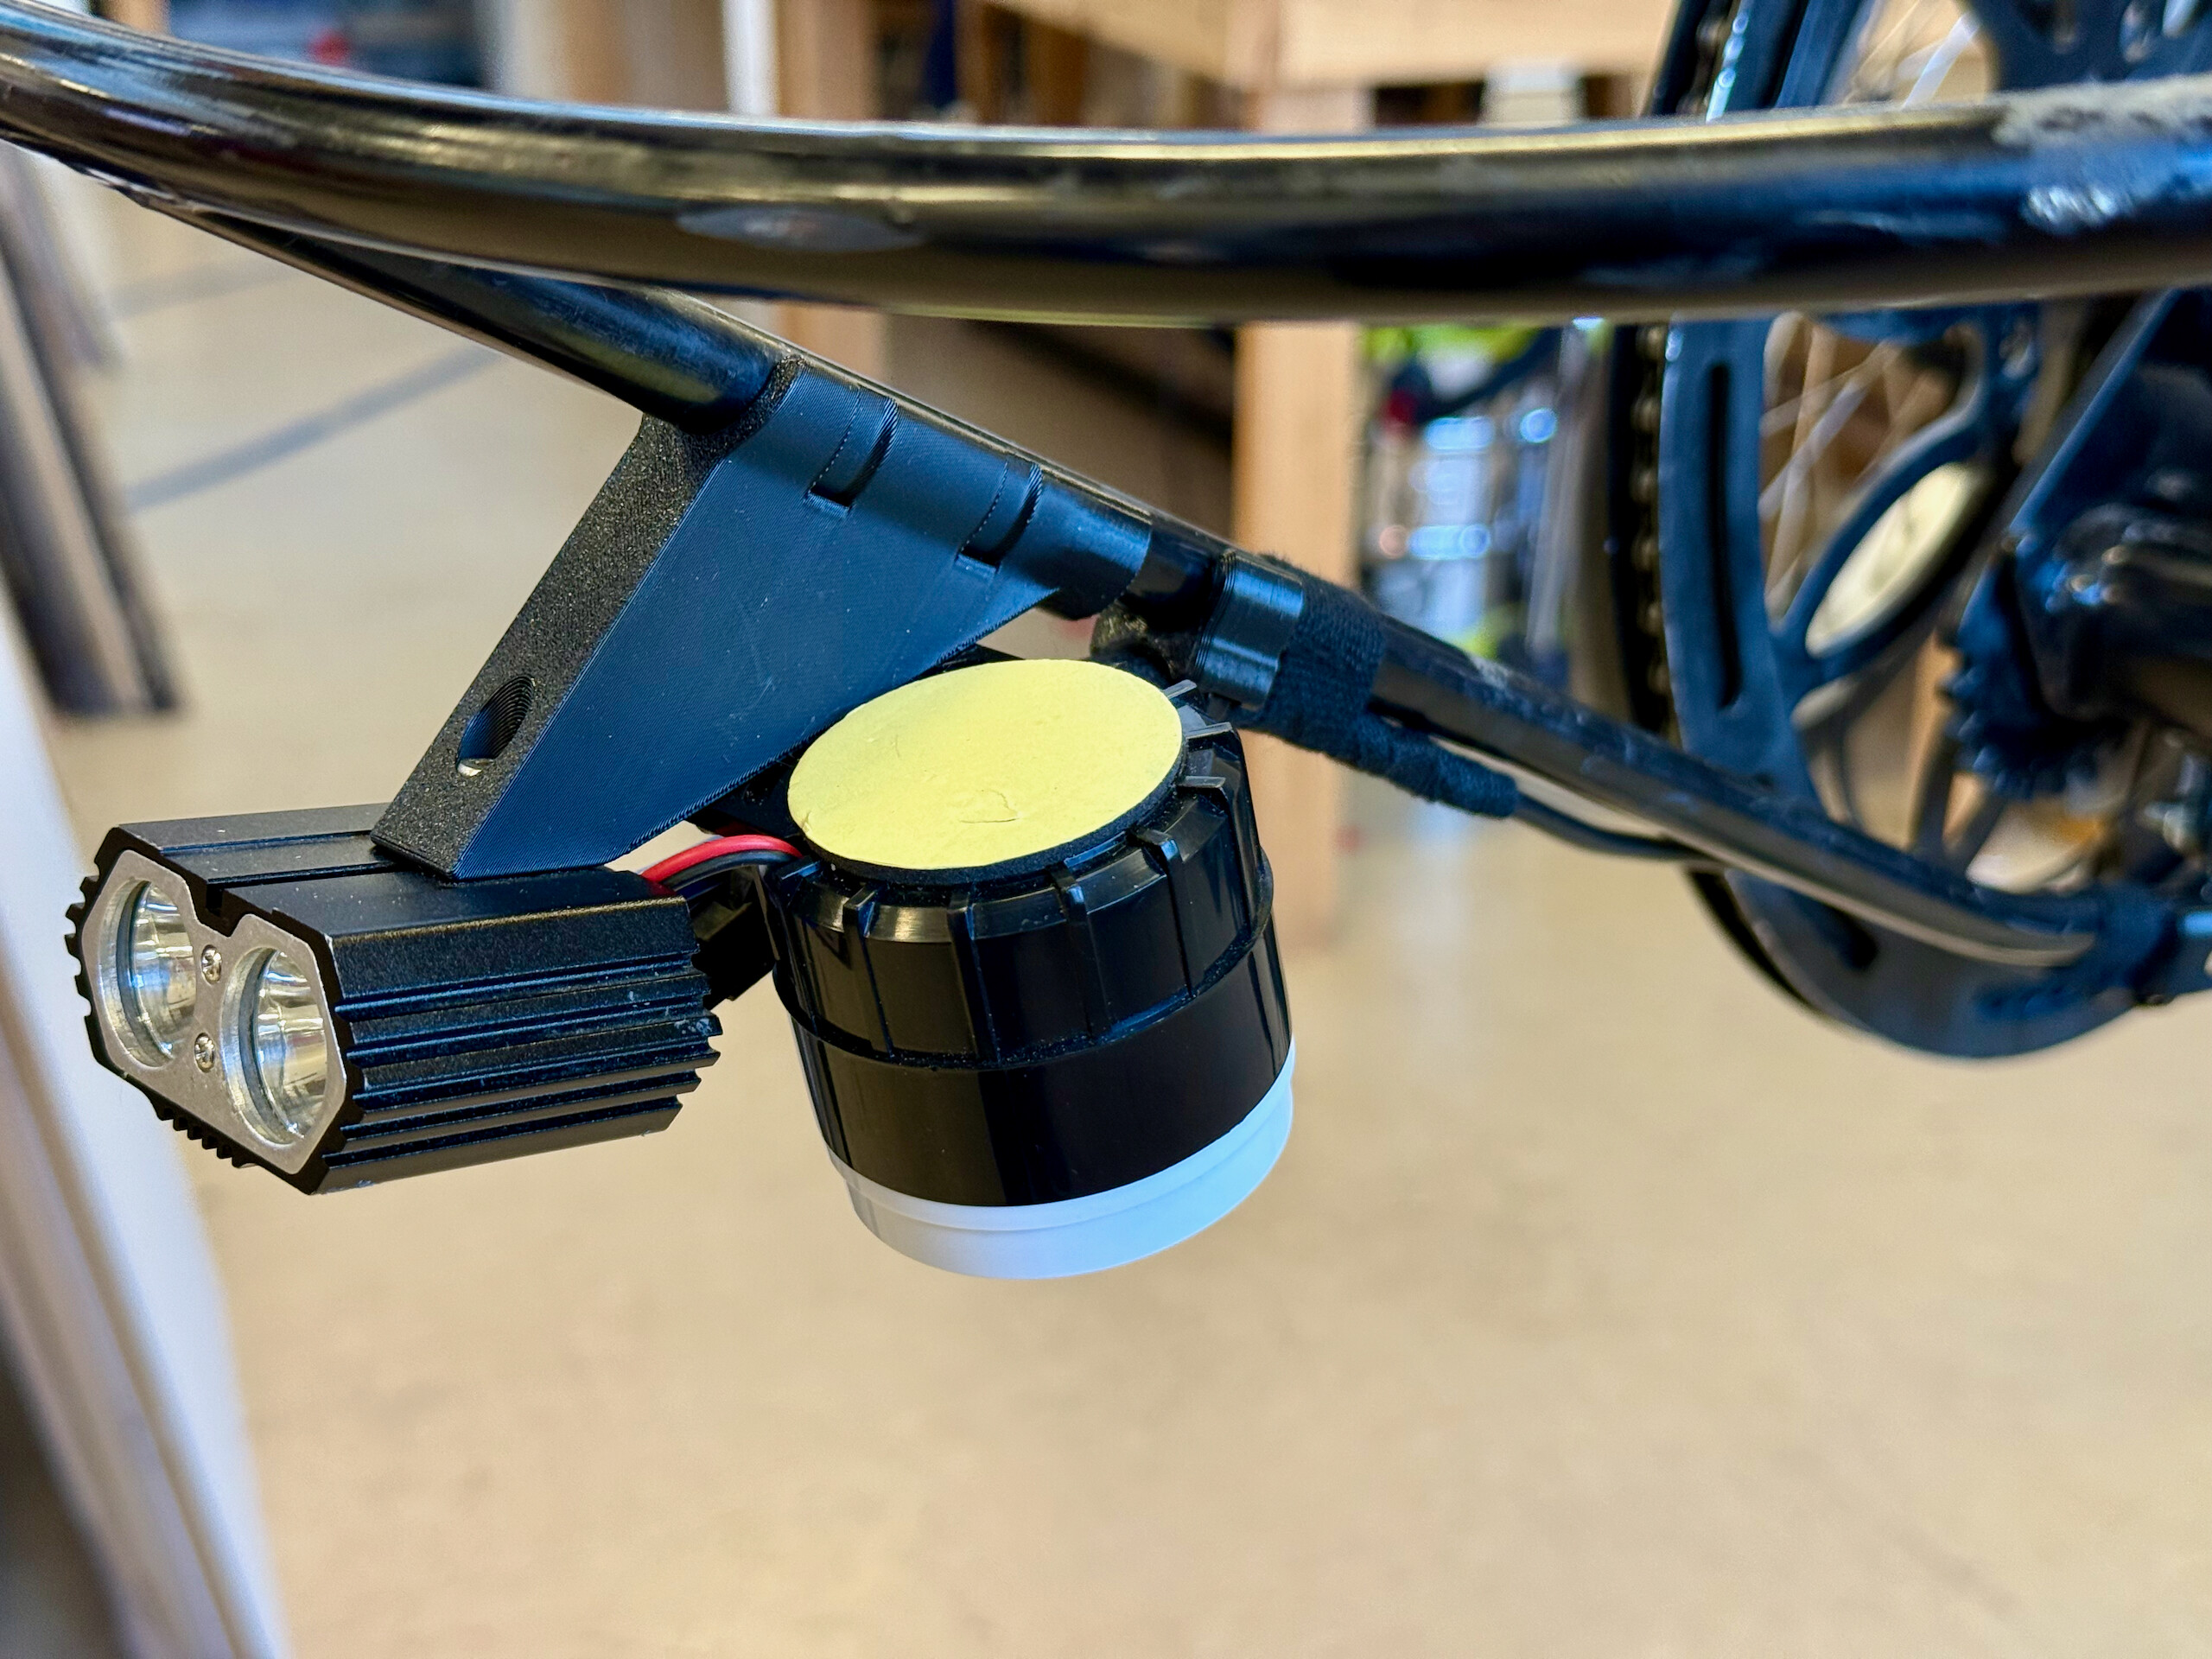
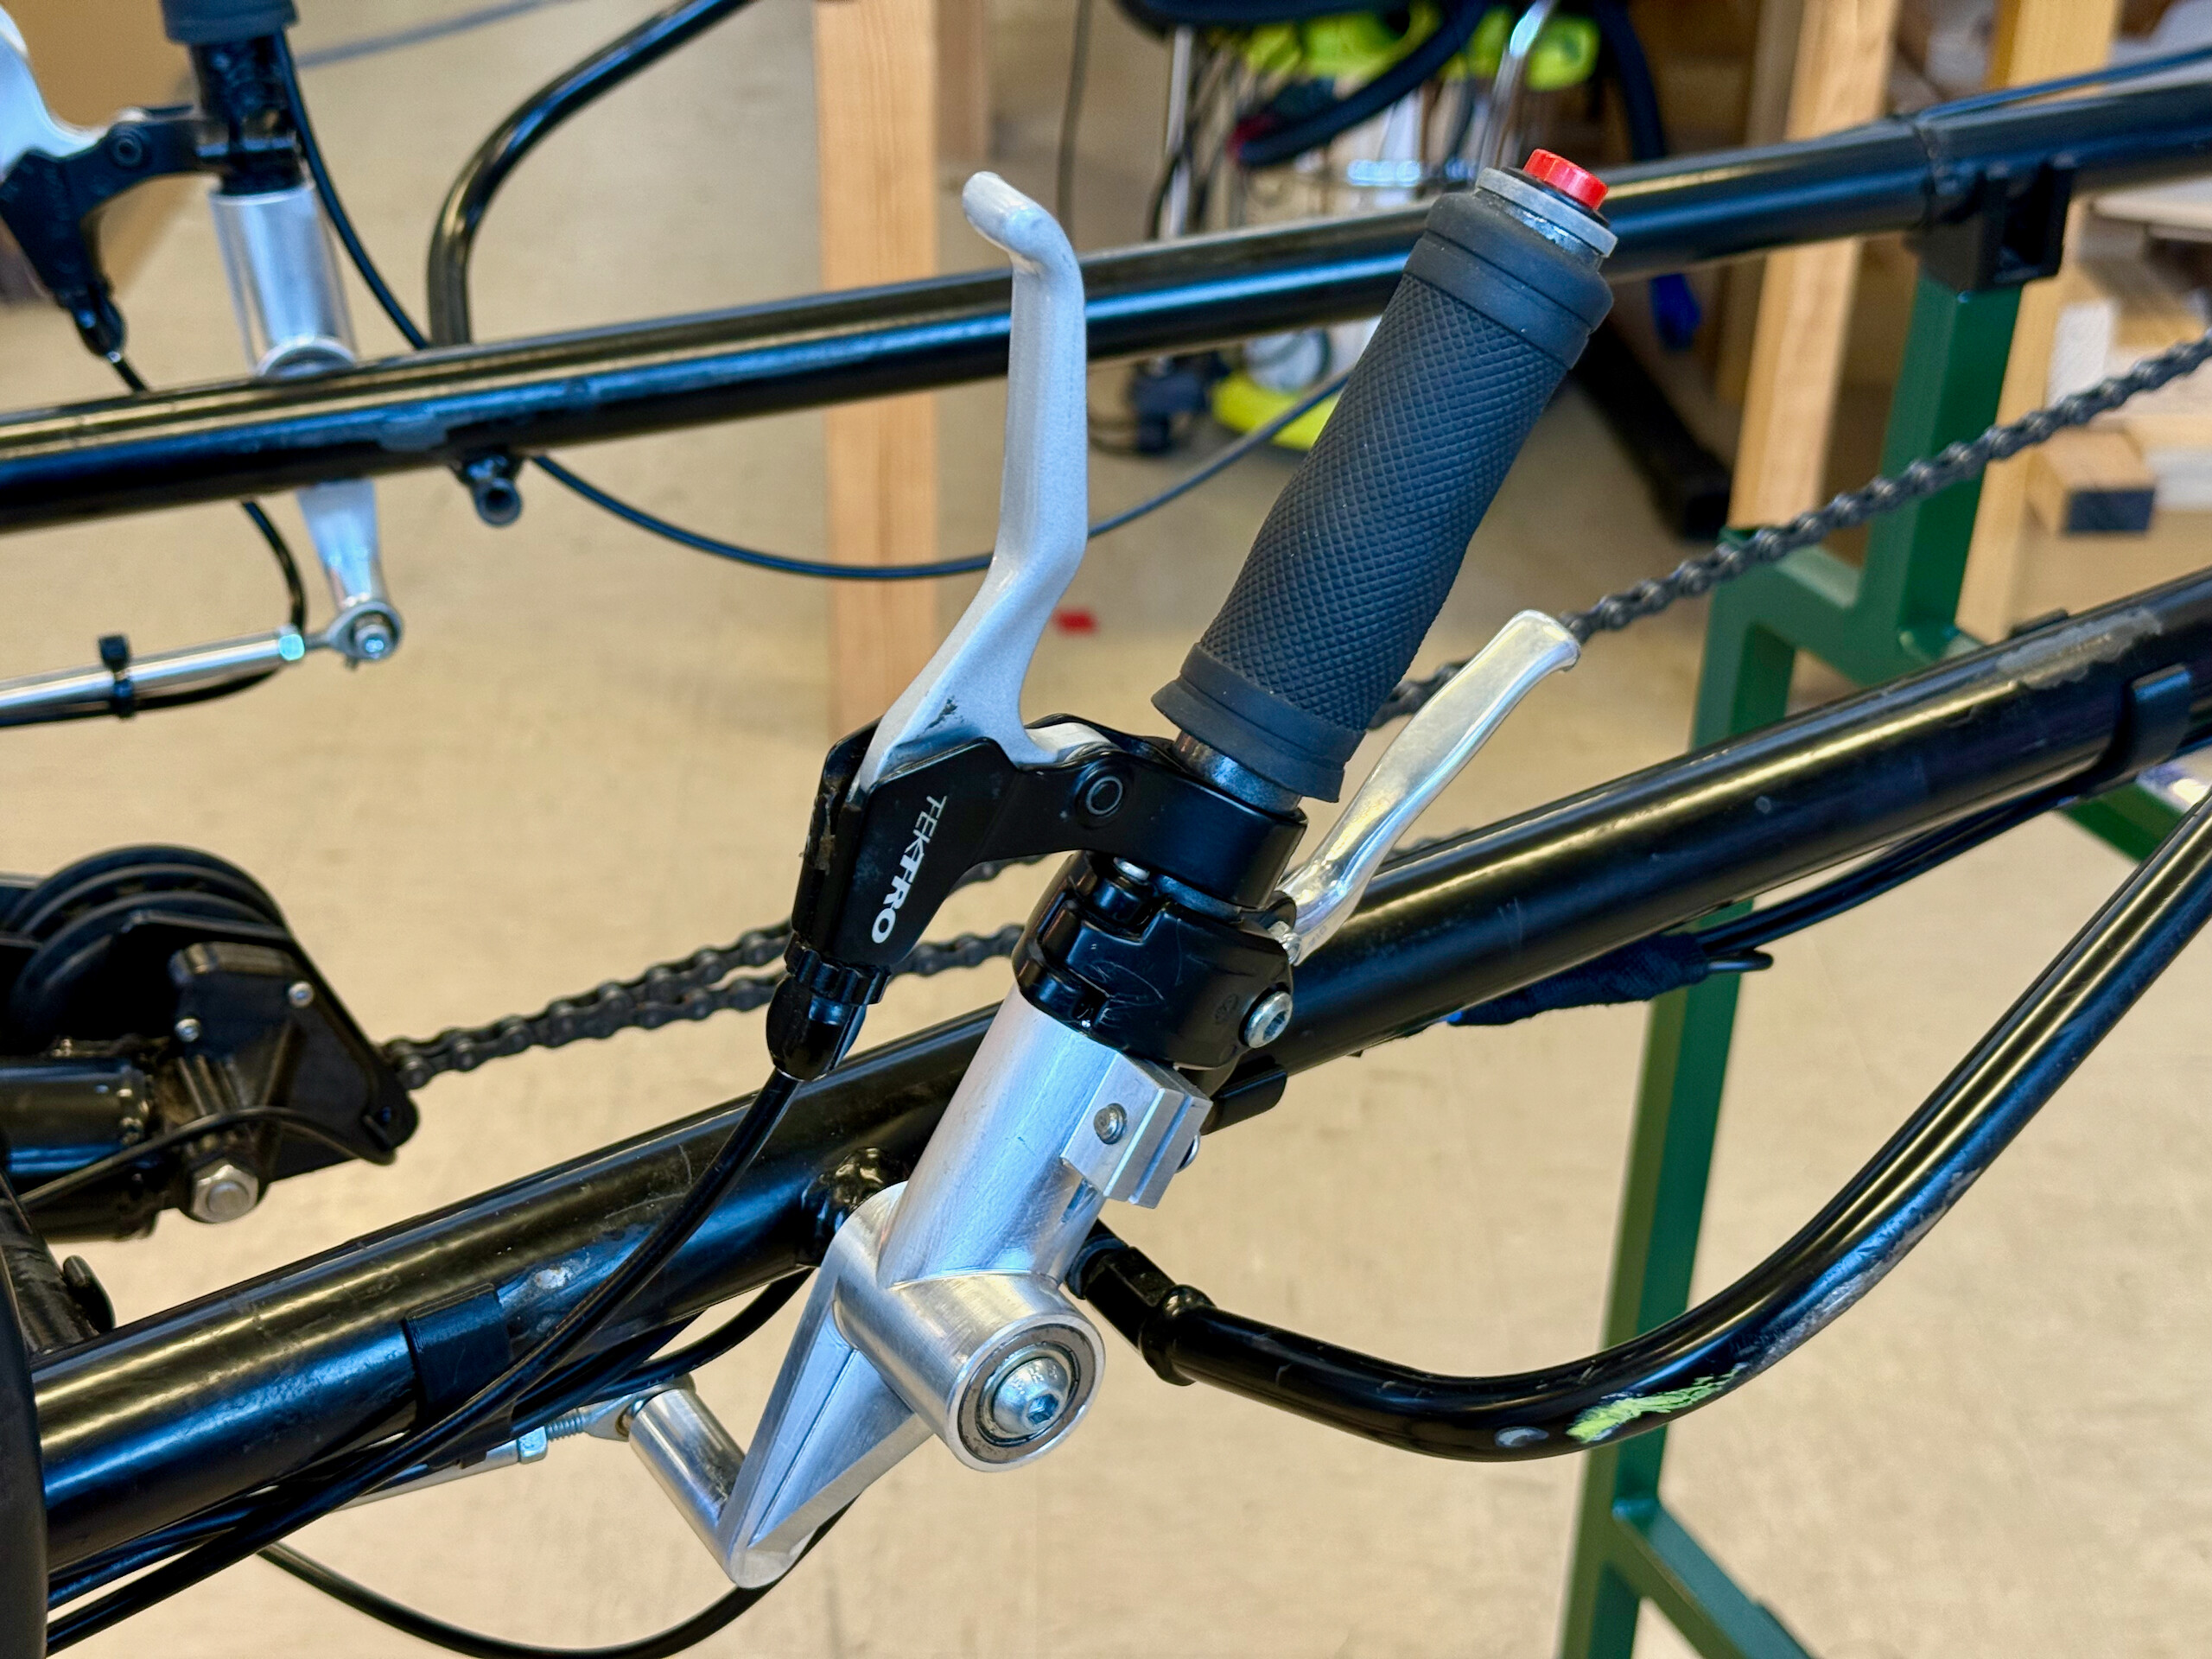
Previous years used an off-the-shelf bicycle horn with its own battery inside along with a minijack extension cable running to a handlebar-mounted switch, which was all incredibly bulky and flaky. We replaced the horn with a hard-wired speaker powering directly off the main power, and embedded an industrial button in the actual handlebar tube itself with the wires running through the tube and through channels we designed in the new CNC aluminium handlebar brackets. We also hardwired a much better dual-LED headlight system running off the same power loom.
Removable Tail Kit
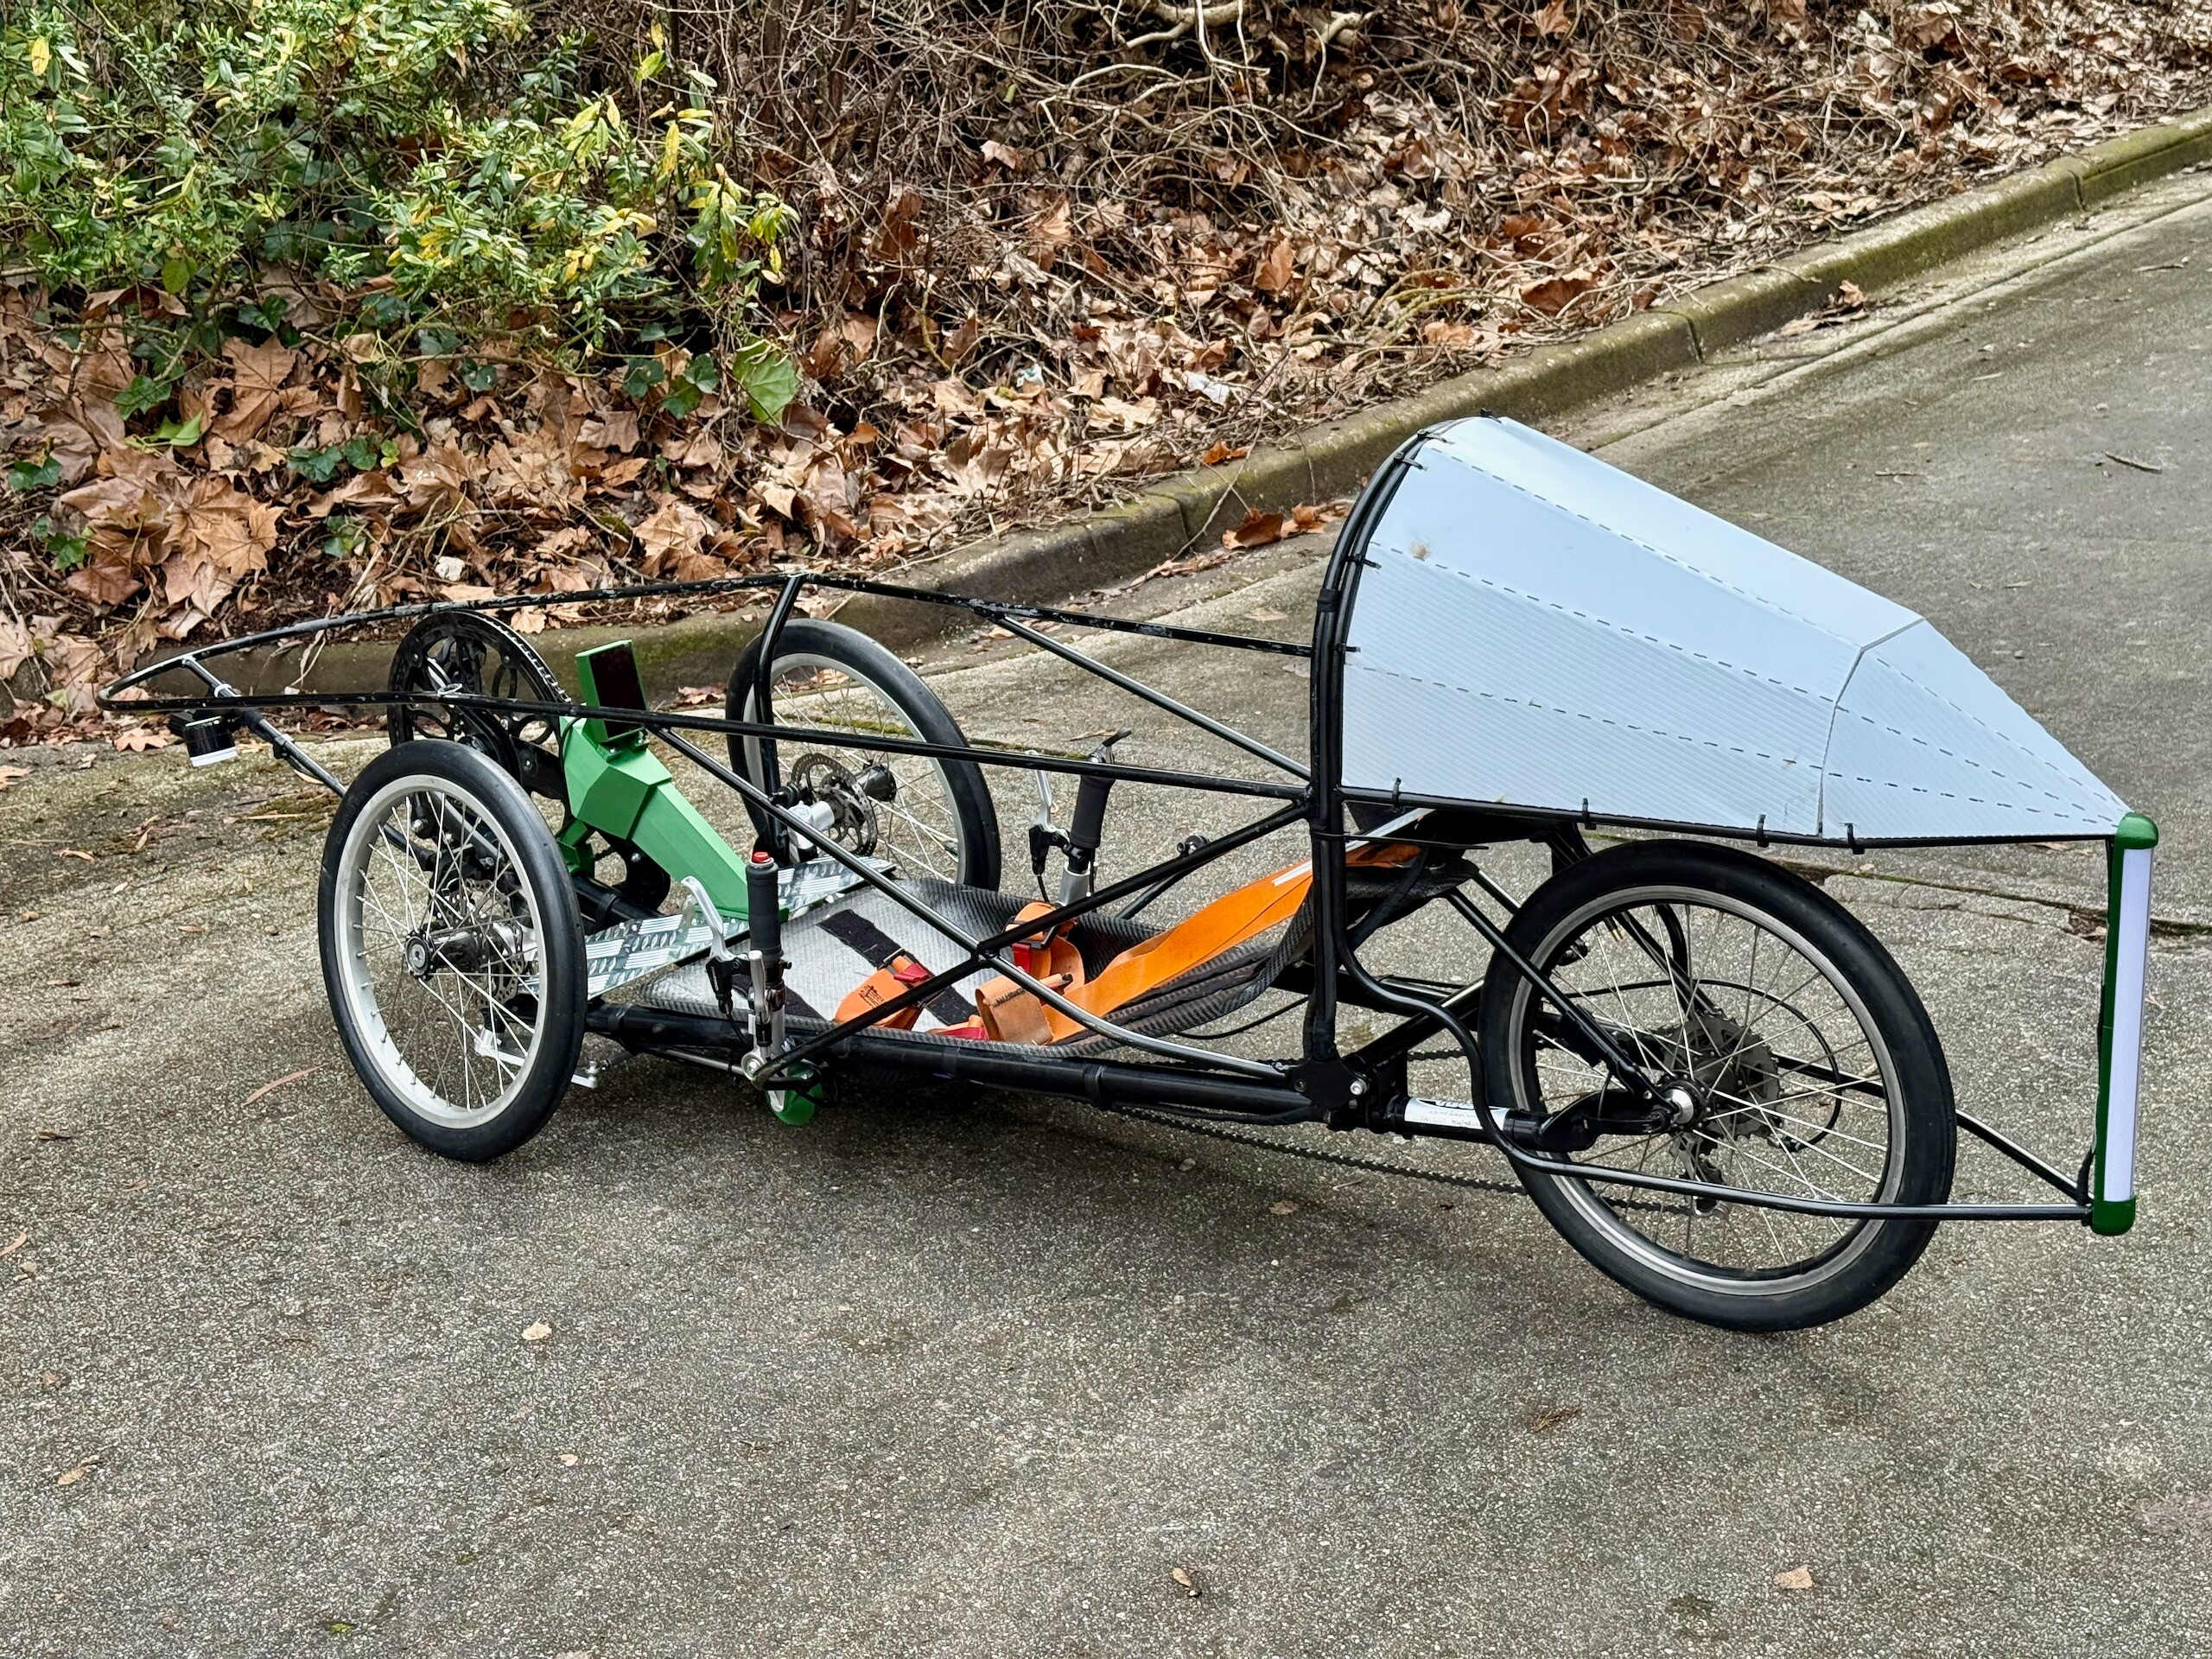
We fully redesigned the tail section of the vehicle from scratch, creating a structural-but-removable tail piece that gives very quick/convenient access to the rear wheel assembly and drivetrain for repairs or maintenance. The tail unit now contains the ECU and battery, so it's all one piece that can be taken off when not needed, with a single aircraft-grade waterproof connector rather than the mixture of wires leading everywhere previously. Along with the new aircraft connectors we also redid all the wiring, creating proper looms and designing 3D printed brackets that along with zipties help secure the loom on the vehicle, while also allowing the entire loom to come off for maintenance/repairs/upgrades.
We also redesigned the hair shield that sits behind the headrest and stops ponytails or other things getting into the rear wheel. We designed it now to meet perfectly with the deck of the removable tail, leaving no space for hair/hats/fingers to fall into the rear wheel area.
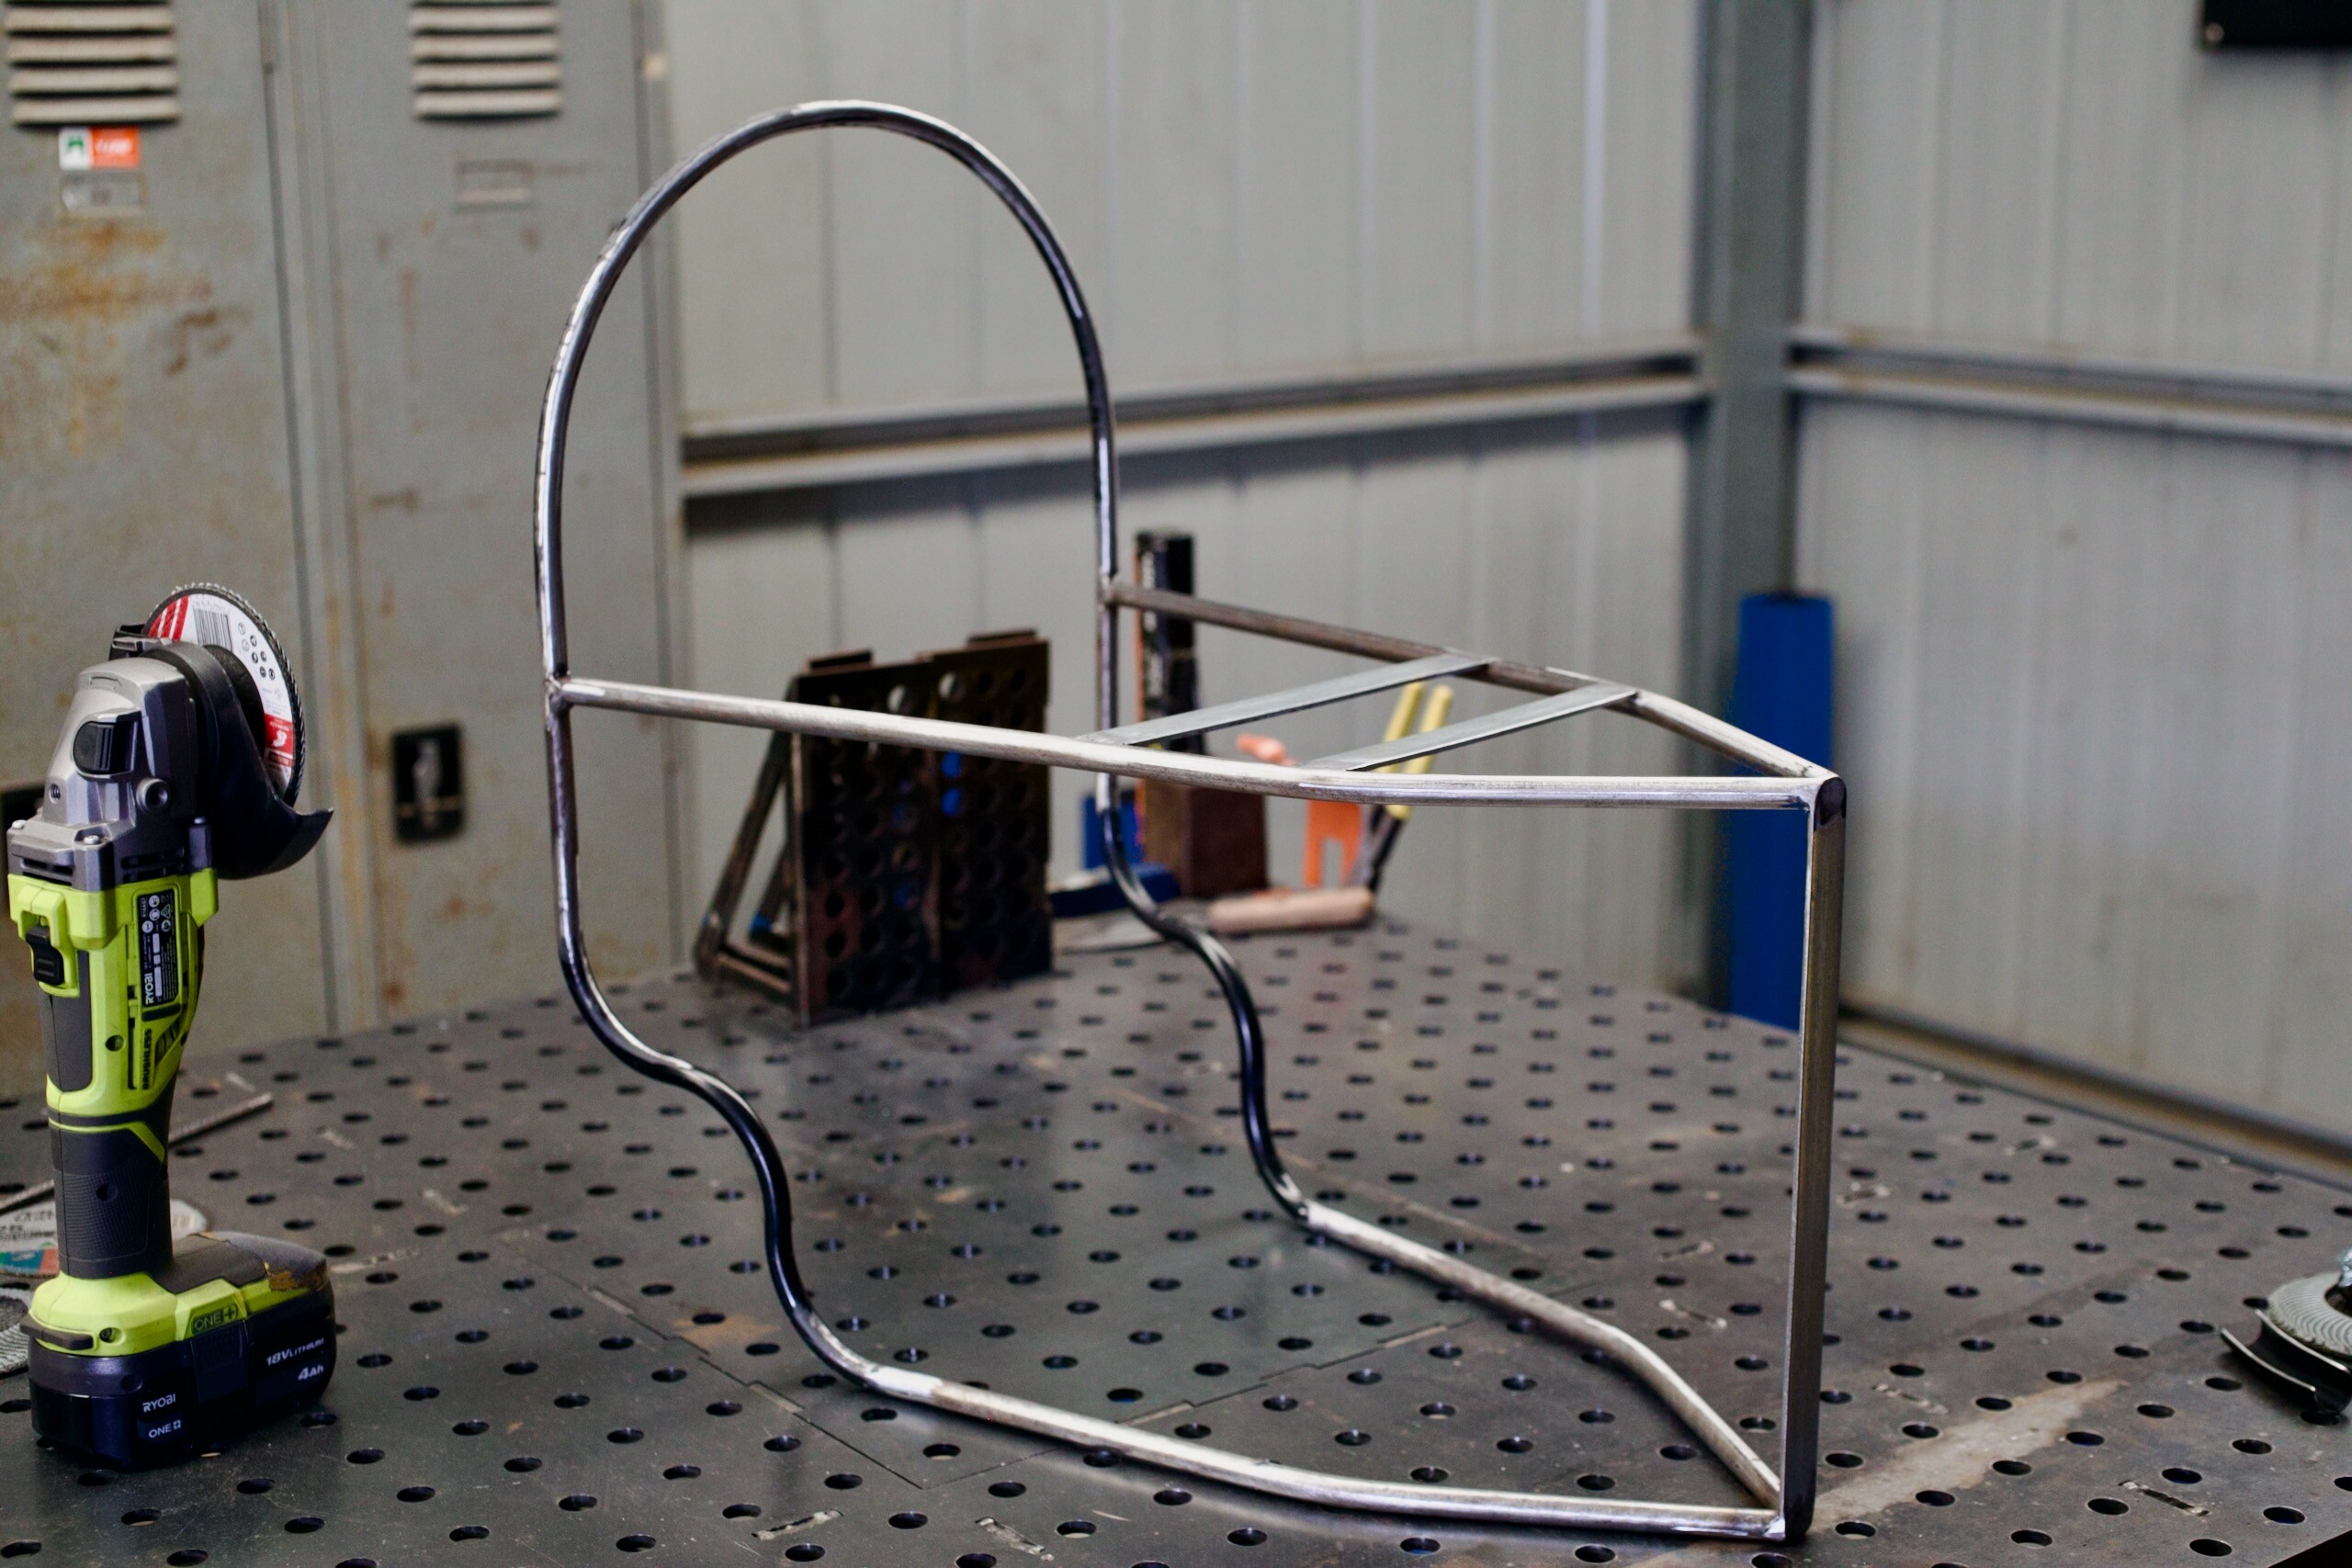
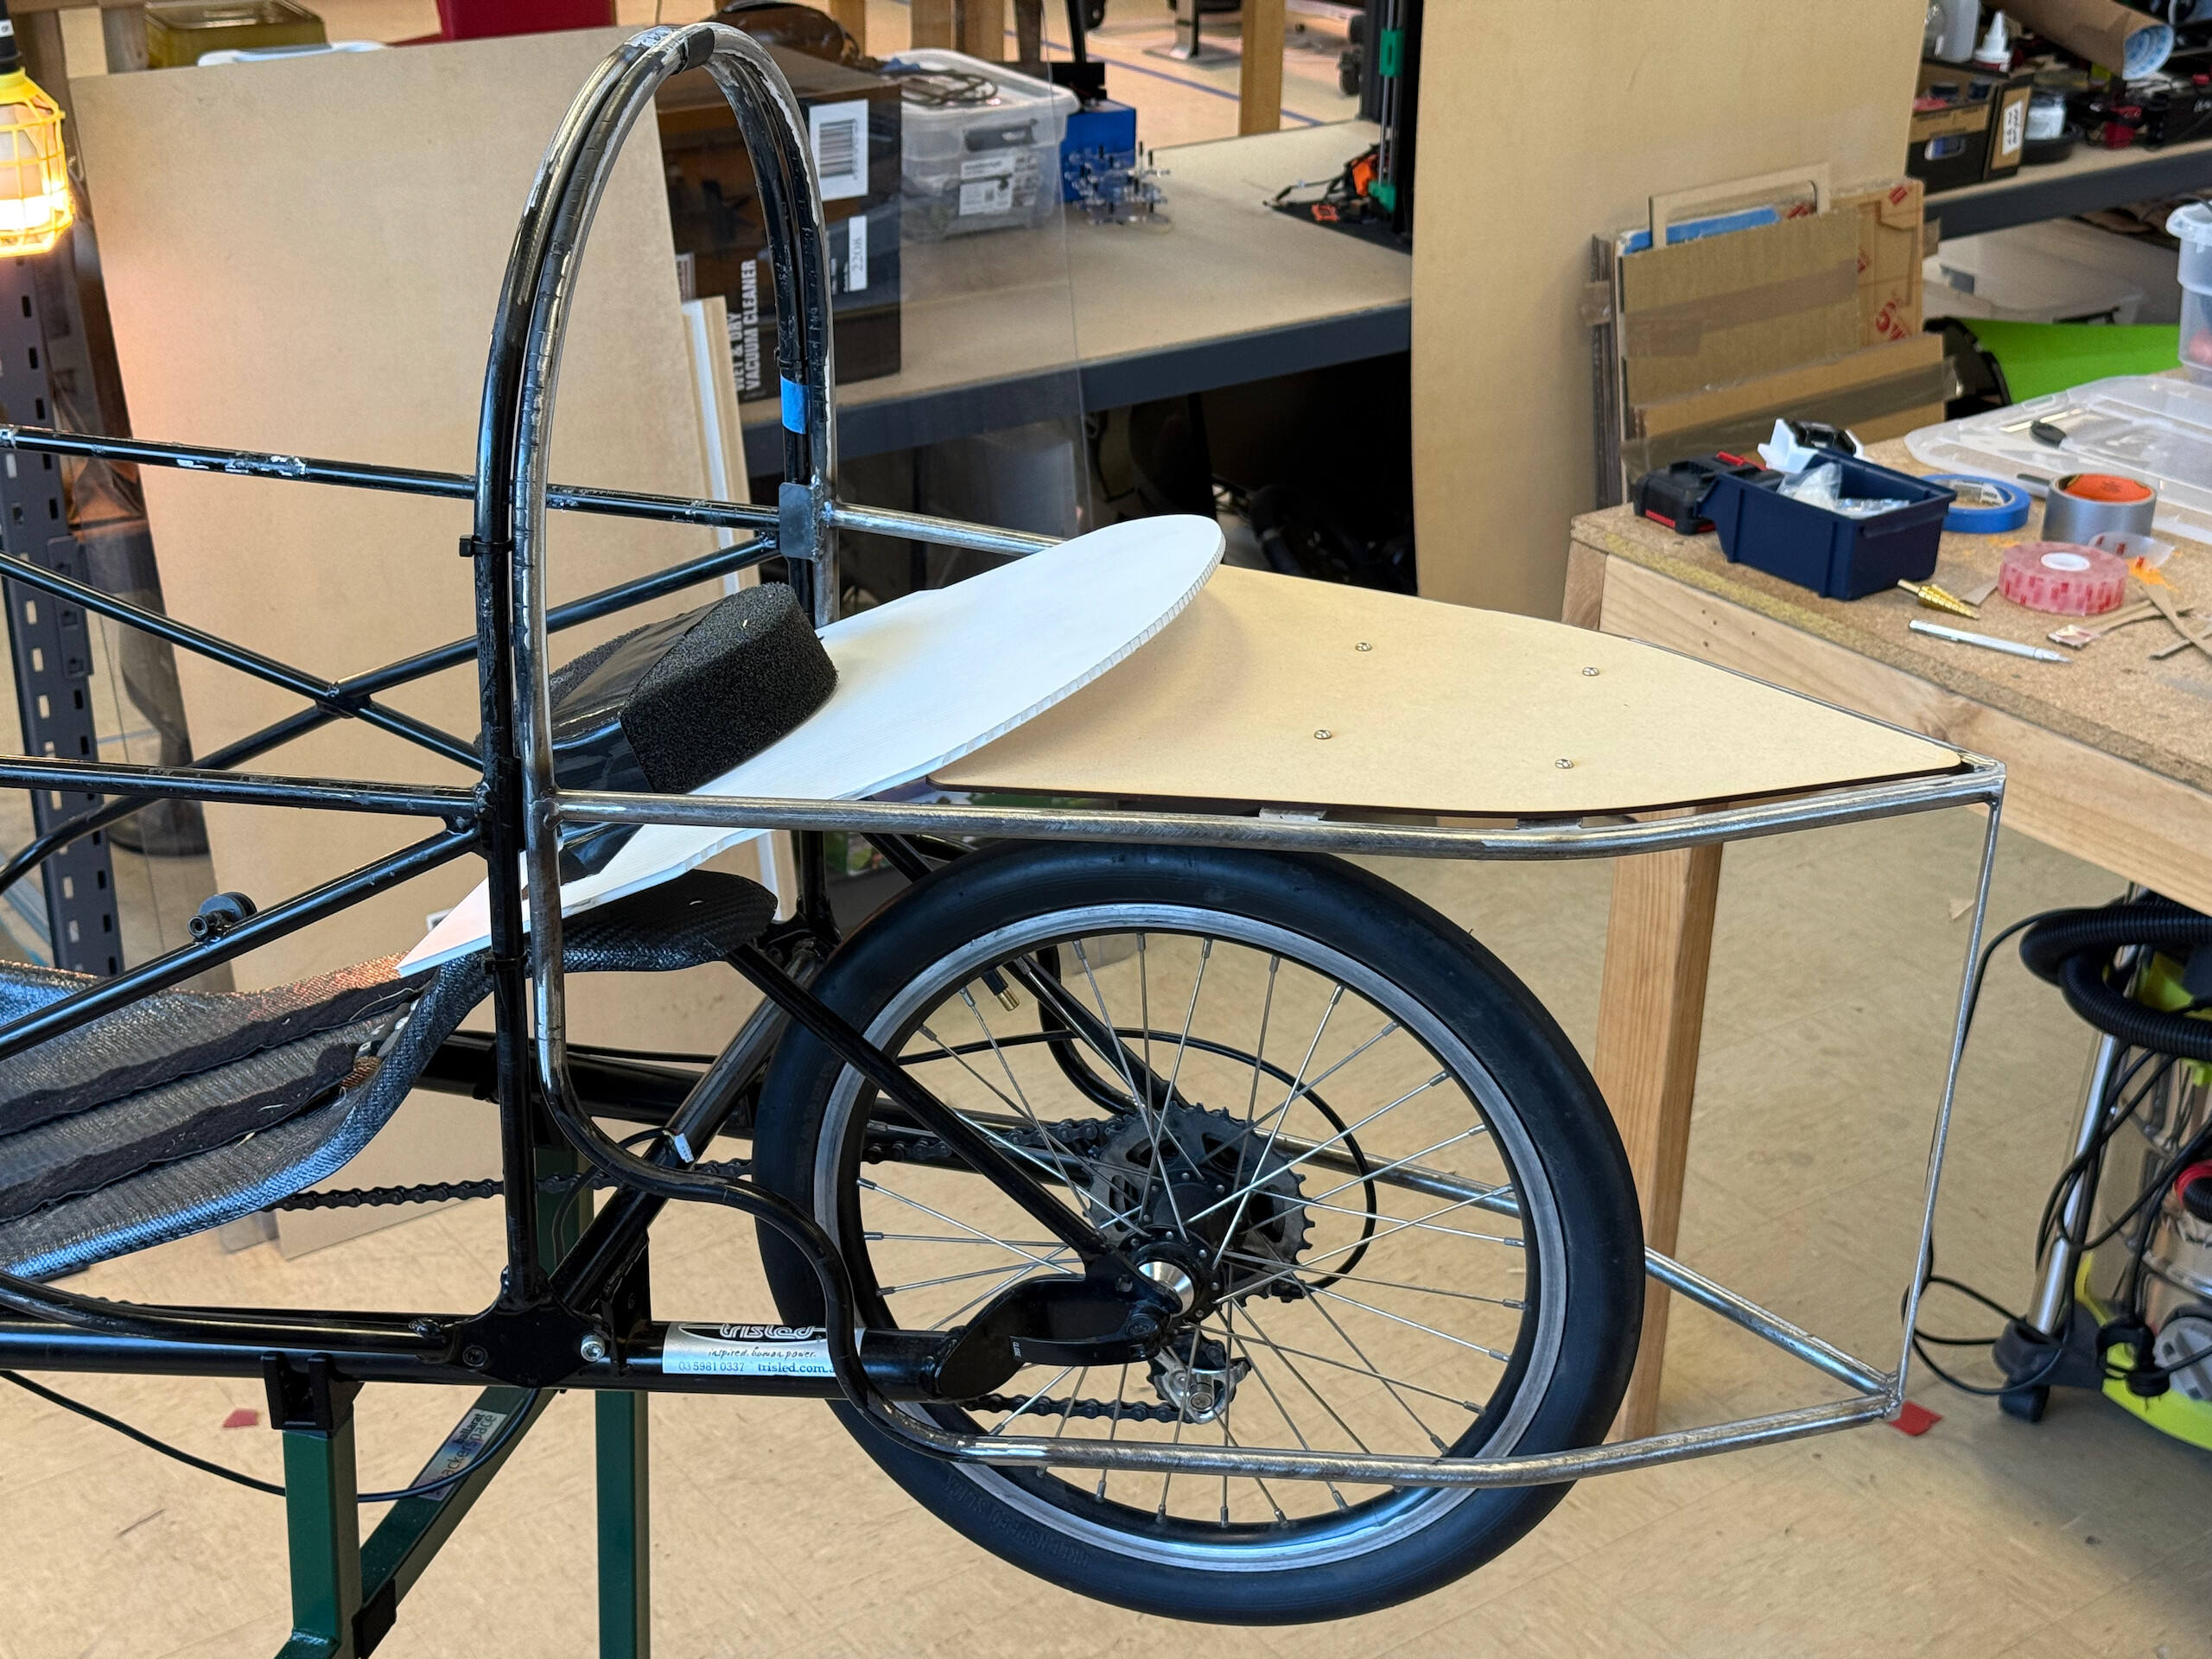
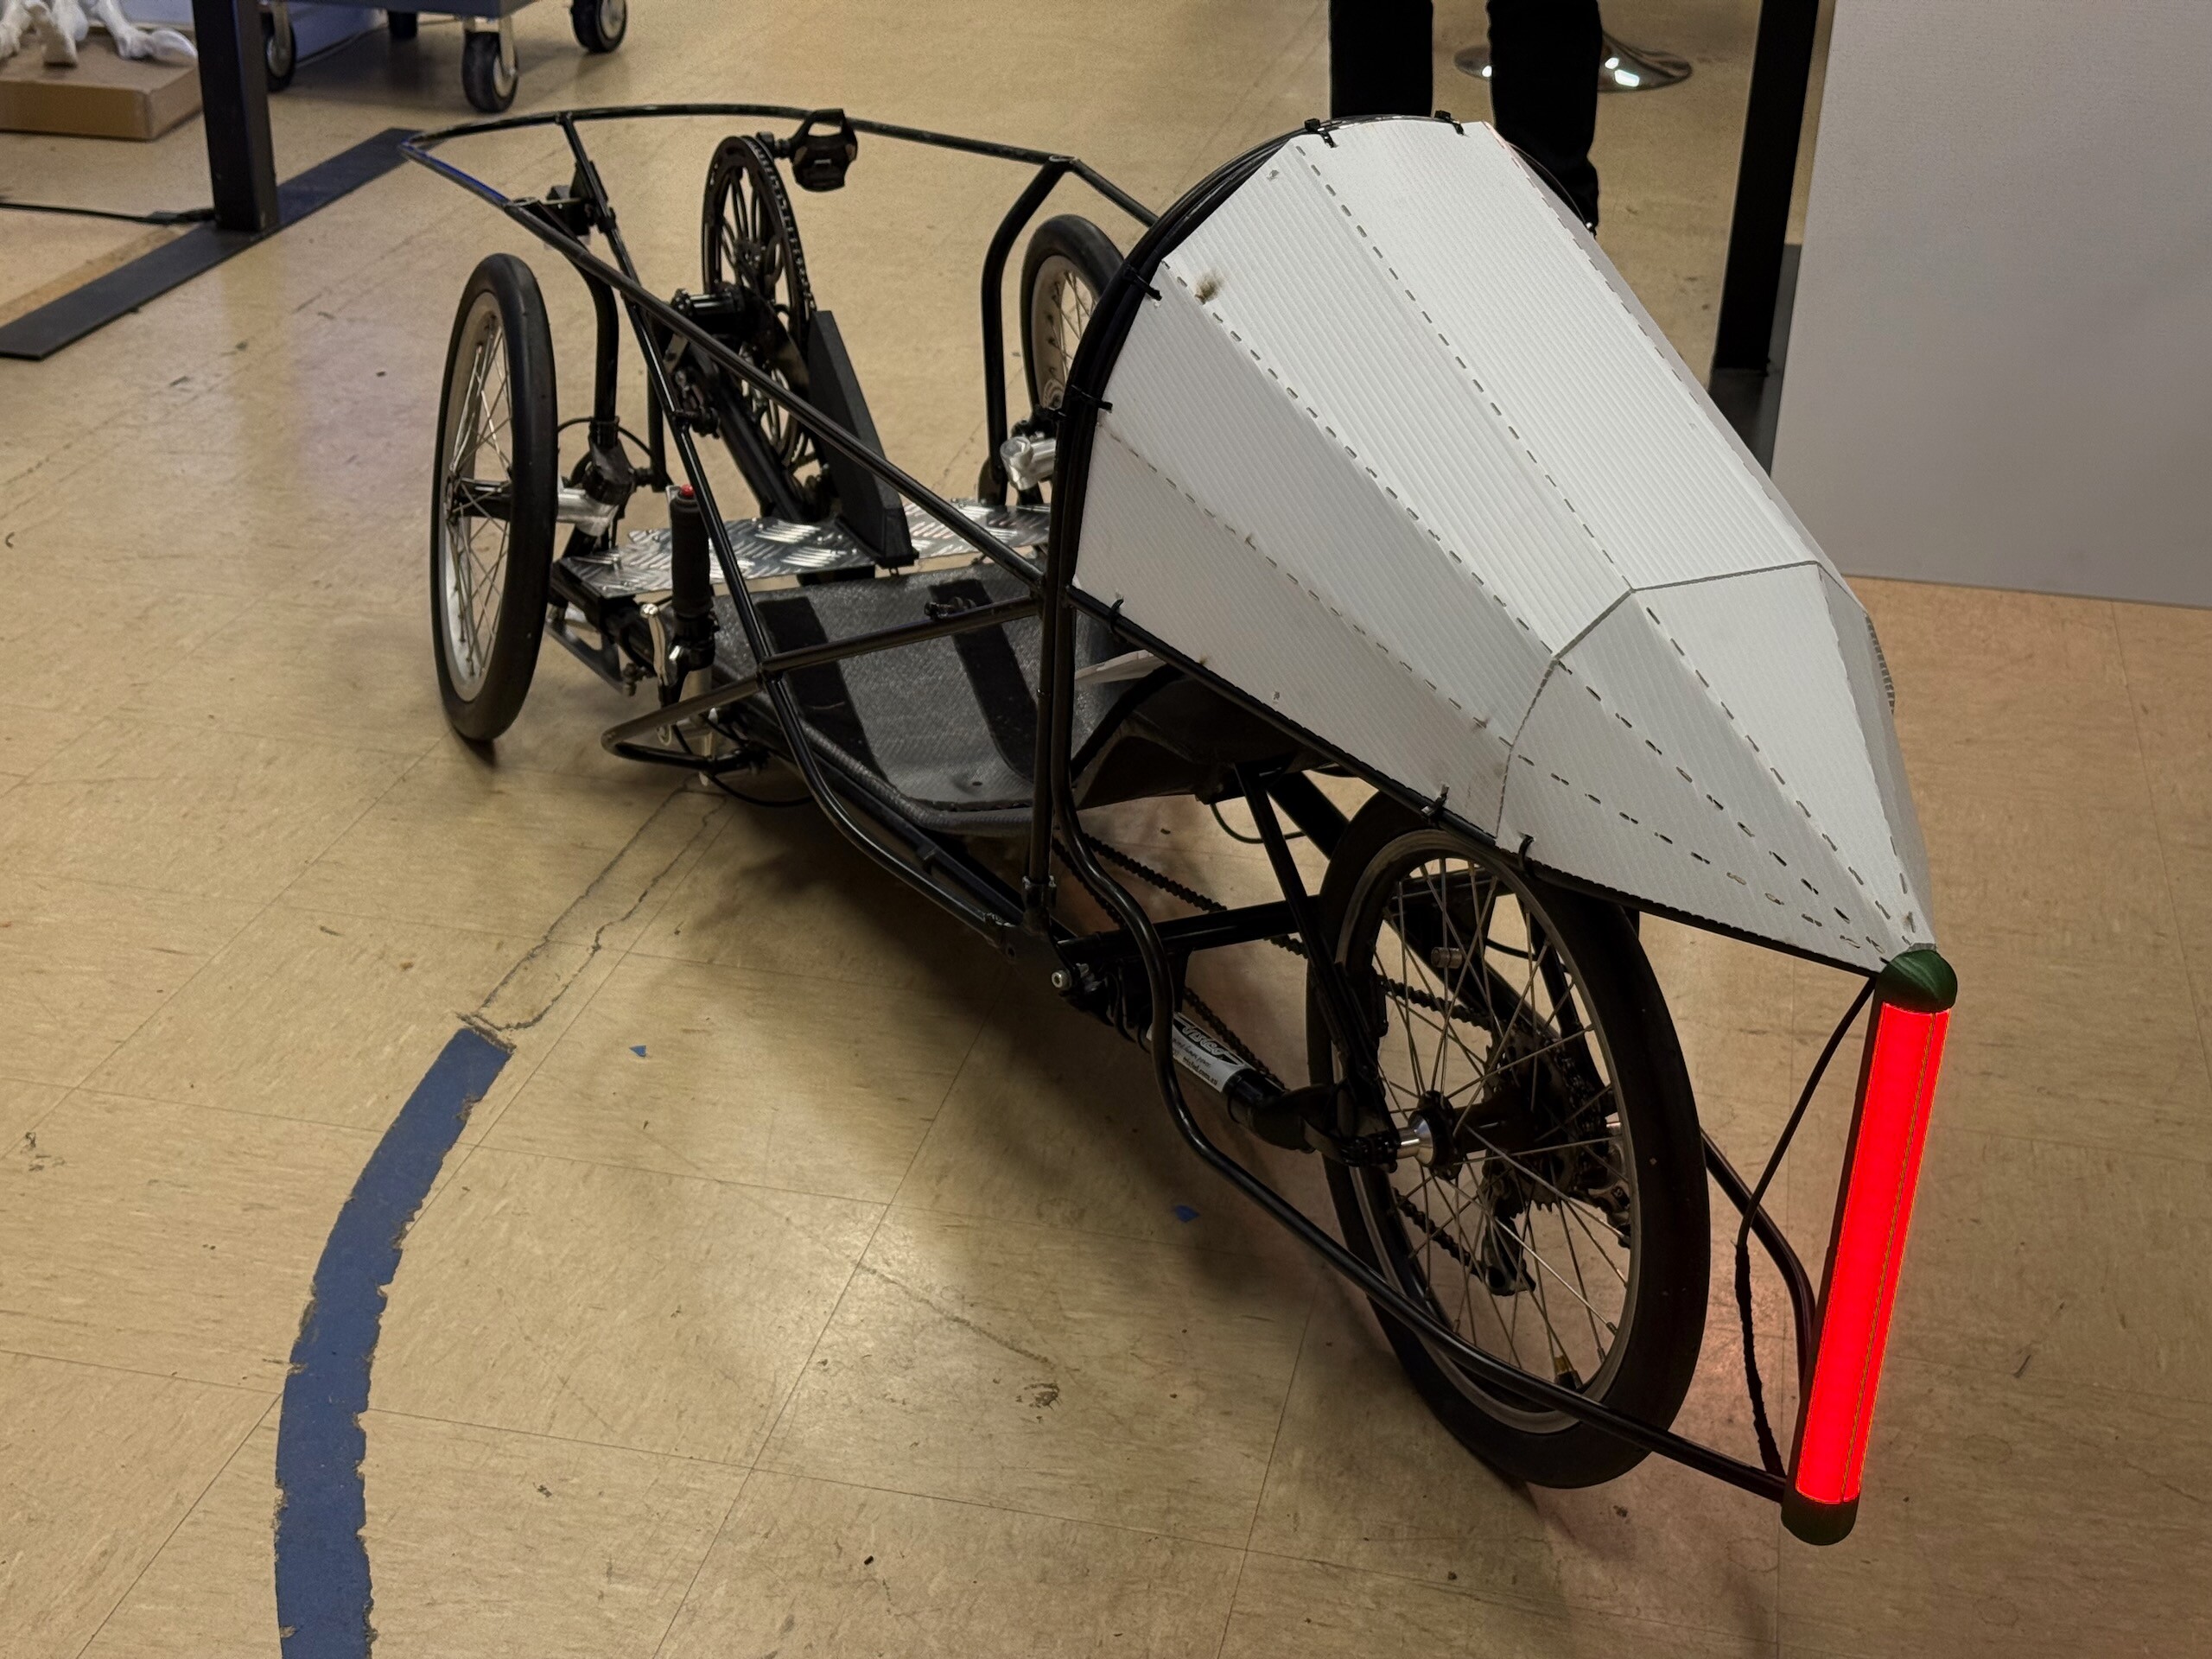
Lastly for the tail we used some sheet-metal techniques to CAD-design new bodywork for the tail that lets us laser-cut the corflute panels in a single piece that origami-fold together into the 3D shape. This makes assembly of the bodywork panels a lot easier, and modular, so damaged panels can be replaced in minutes. Previous body damage meant bandaid fixes until enough damage was done to justify buying an entirely new body for the vehicle.
The first piece we designed was the electronics cover on the tail, pictured below with the new RGB LED tail lights that can do all sorts of fun tricks (to be revealed on race day).
Pit Dashboard Kit
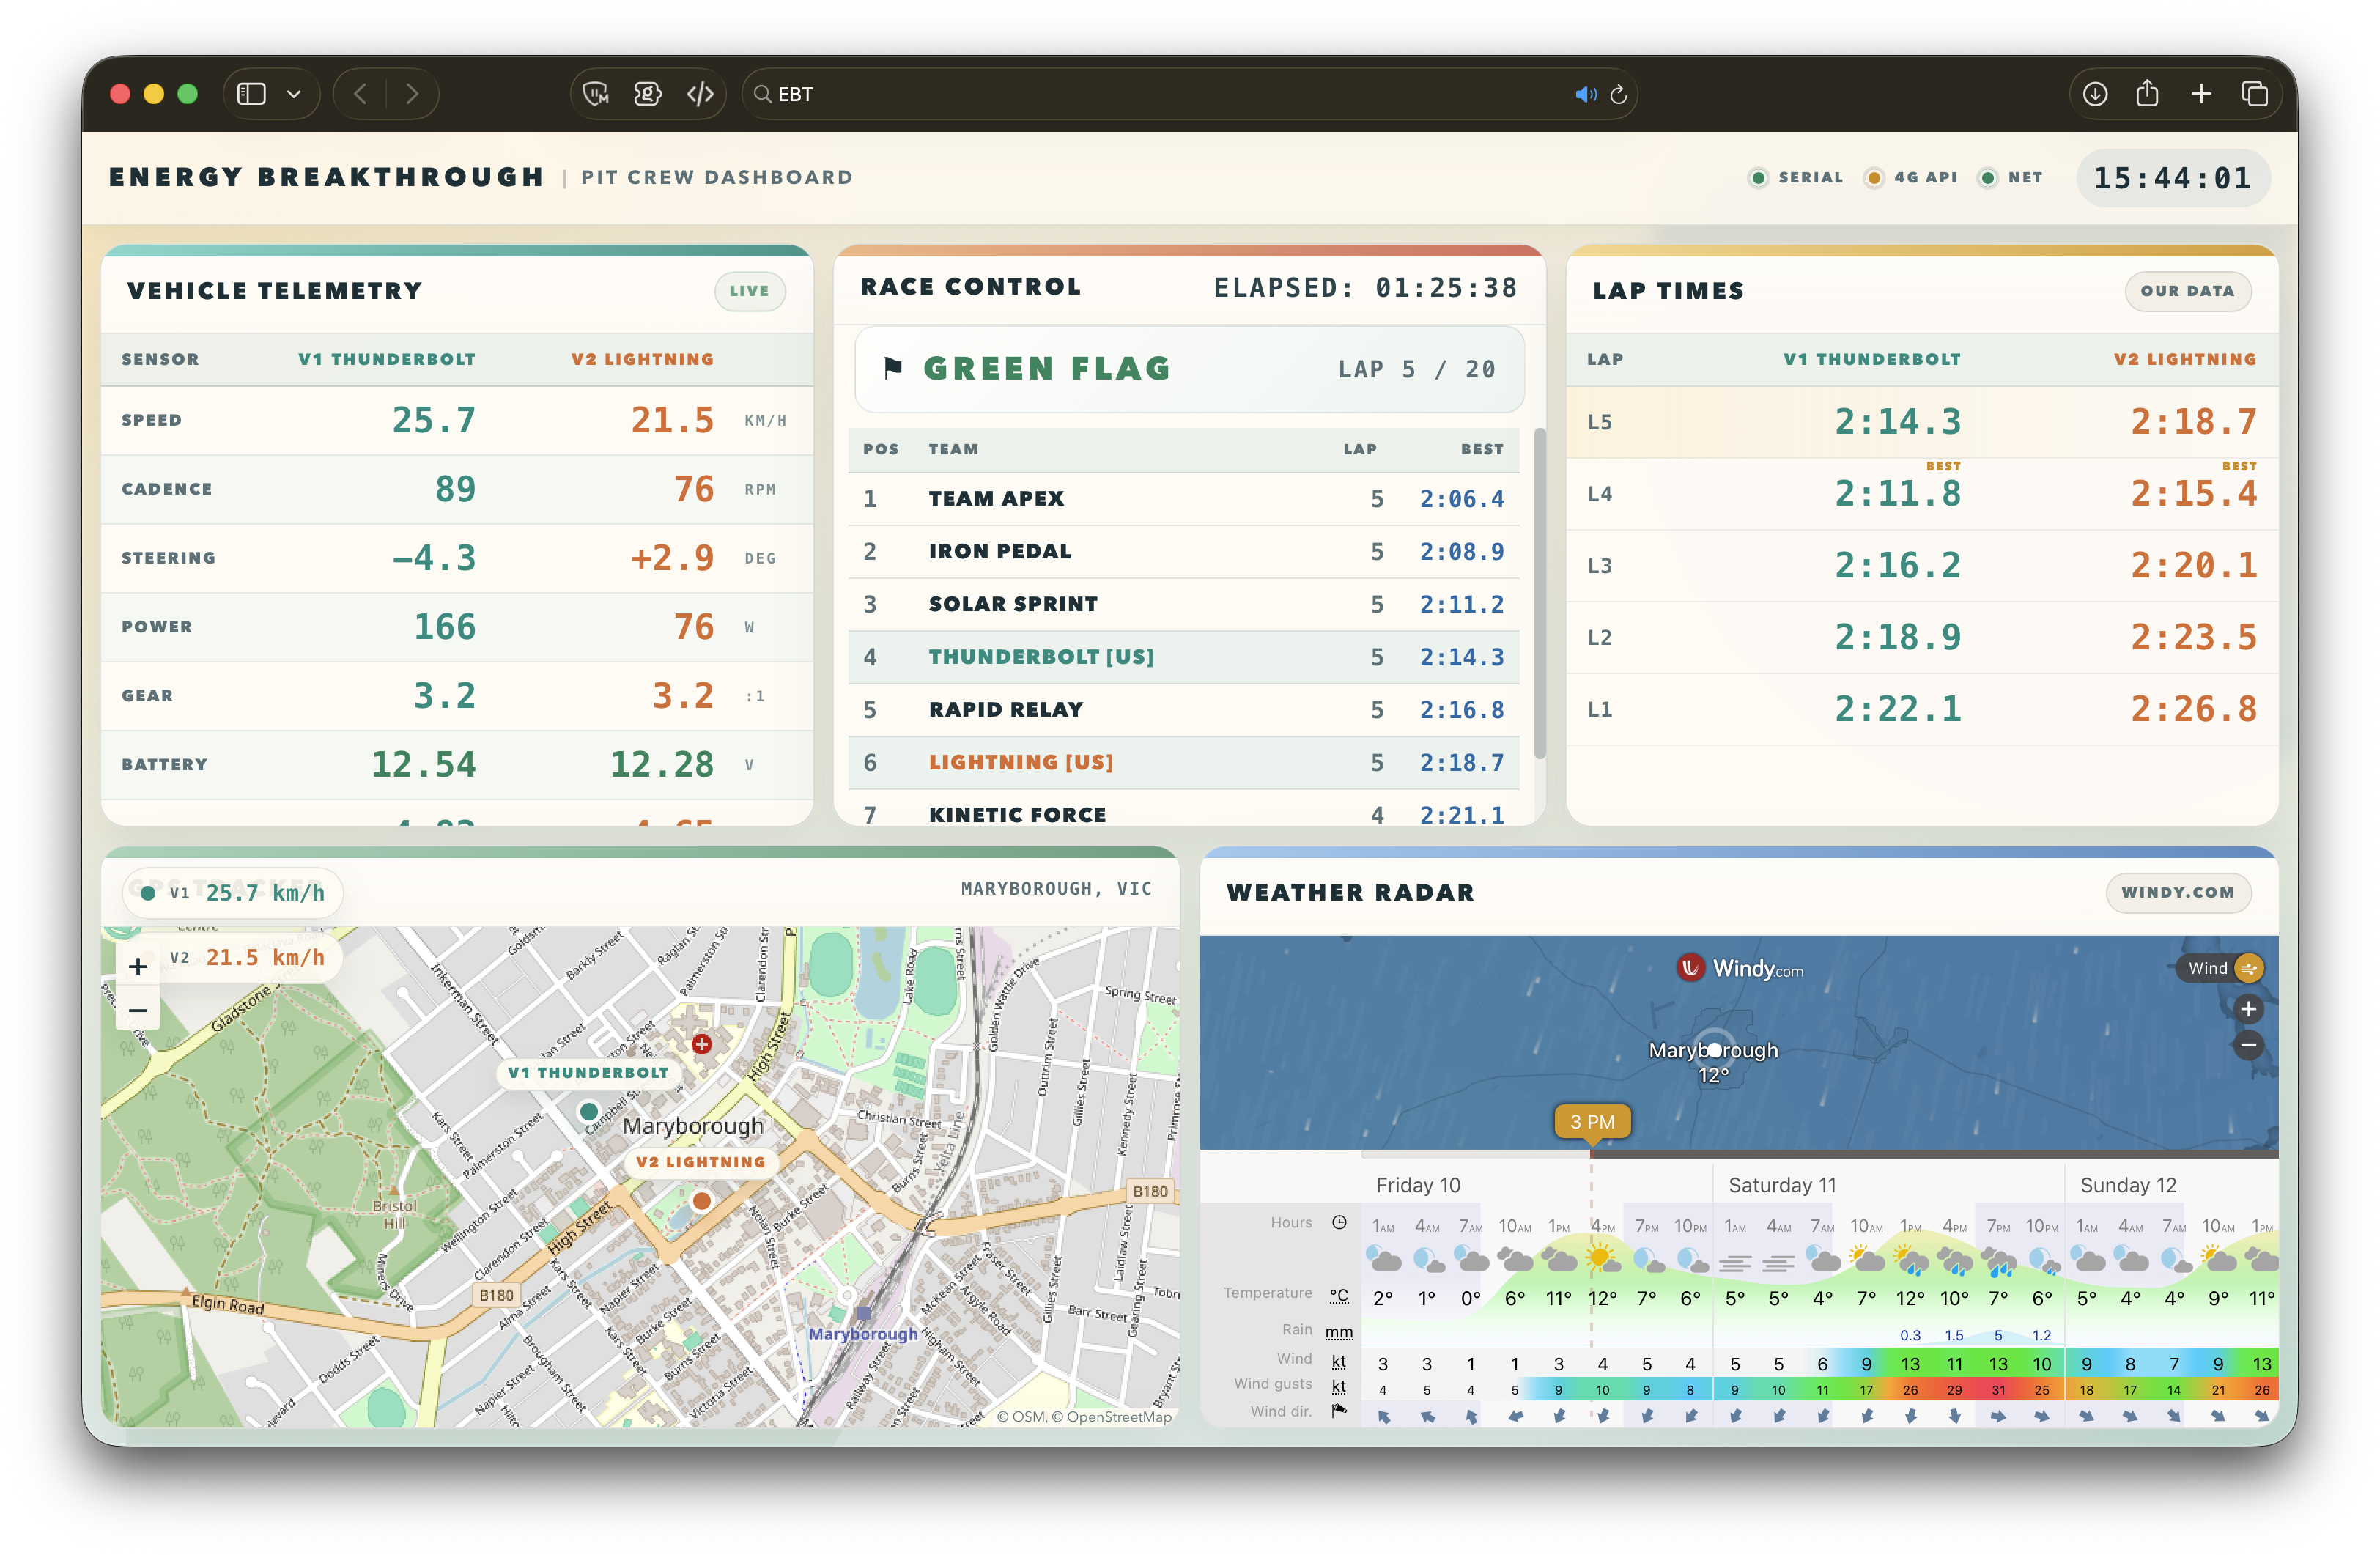
We wrote custom software that gives the Pits a professional-style dashboard on a large TV screen showing a variety of important real-time information such as the GPS locations of both vehicles overlayed on a map of the track, GPS-based automated lap timing alongside the official race timing for redundancy/comparison, real-time weather monitoring, and more.
This lets the kids in the pits feel more involved with what's going on out on the track, as well as adding important safety features previously missing from the race series like being able to tell if a vehicle has broken down or crashed in an area of the track not visible from the pits.
We are also working on crash-detection to be ready for the race, so if a vehicle does crash the pits get instantly notified and shown on the map exactly where it crashed.
Current Status
Below are photos of how the vehicle sits right now (September 2026) having completed a succesful test day at a nearby go-kart track where it was put through the paces to make sure all the new systems worked. The test day gave us some minor things to tweak but overall went incredibly well considering how much of the vehicle has now been modified.
Reminder that this page is a living document and gets updated. It was last updated on 7 September 2026.